1. Herringbone Marble-Look Tile with Under-Cabinet Edge Glow
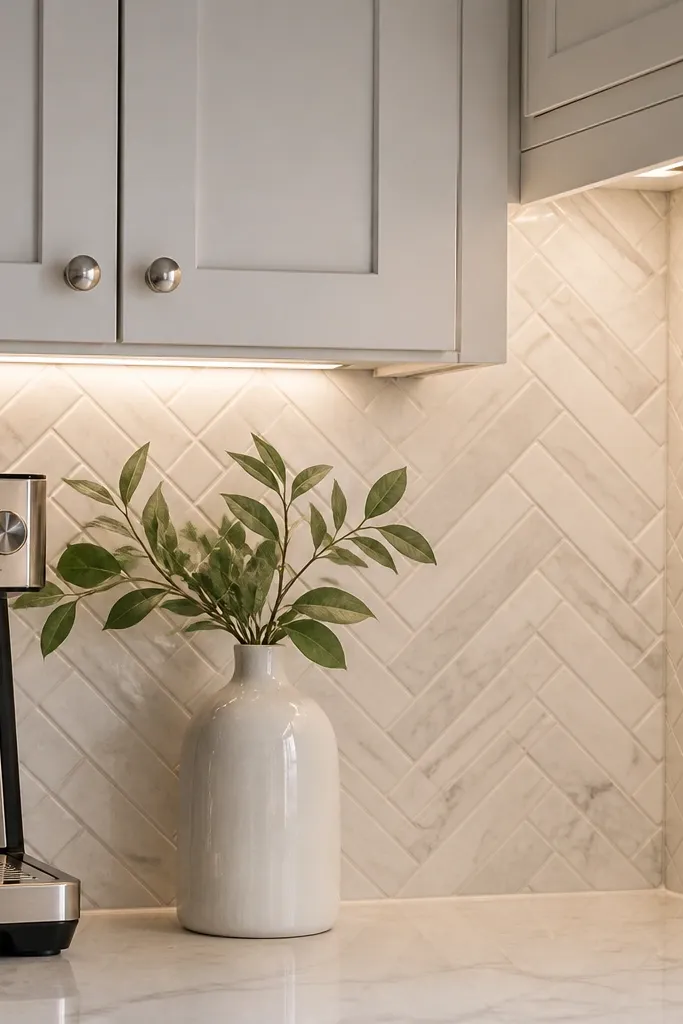
This look works because herringbone creates movement, and the under-cabinet light turns that movement into texture instead of shadow. I’ve used this with white cabinets and light gray grout so the wall stays airy in a small kitchen. The marble-look finish reads clean even when the kitchen is busy with appliances, because the veining is soft and stays mostly in one direction. It’s especially flattering if you have warm skin tones in your kitchen lighting — the 2700K glow makes the whites look creamy instead of blue. Keep the pattern tight and consistent; a messy herringbone layout makes the whole backsplash feel chaotic fast.
Start by dry-laying a test section on the floor to confirm your tile size and the grout width. Use 1/8-inch spacers and keep the pattern centered so the top grout line lands evenly under the cabinet bottoms. Install a 2700K LED strip in a shallow aluminum channel under the cabinet, then aim the channel so the light grazes the tile face, not the cabinet underside. Finally, seal the grout if your tile is porous, and wipe a small sample area with water to confirm the finish stays bright after it cures.
Pick marble-look tile with subtle veining that repeats — random veining looks great in big kitchens but can look noisy behind small counters.
Avoid mixing herringbone with a second busy pattern like patterned wallpaper or heavy cabinet hardware.
2. Classic White Subway Tile with Backlit Outlet Surrounds
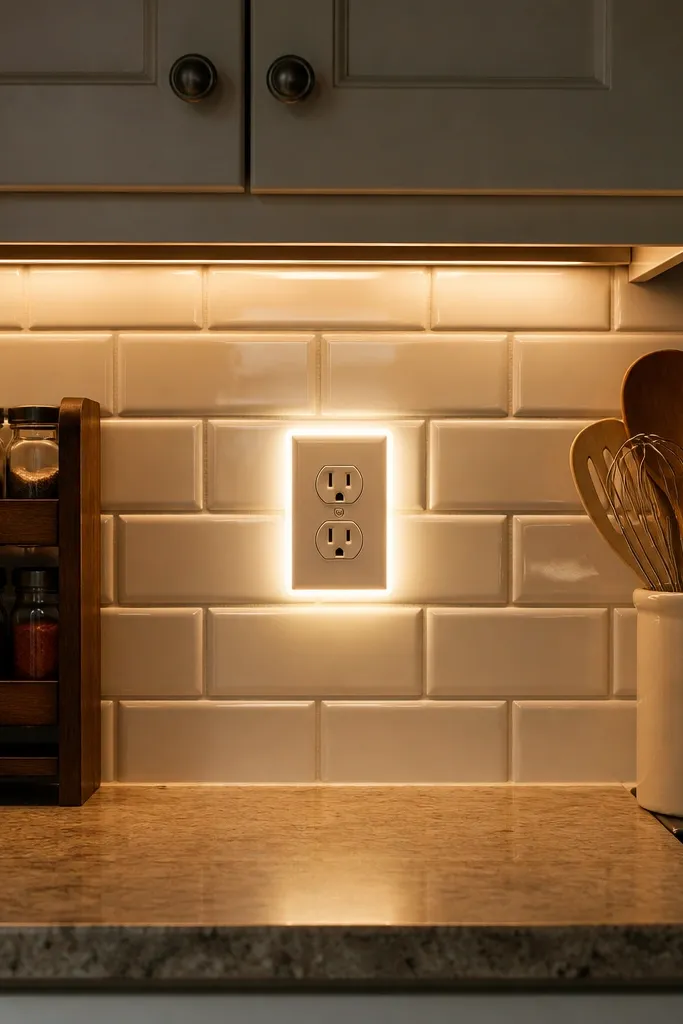
Start by choosing subway tile with a slight bevel so light catches the edges. Lay the tile in a running bond with a consistent 1/3 offset, then keep grout joints around 1/16 to 1/8 inch for a crisp look. Before tiling around outlets, plan your outlet plate size and confirm spacing so the LED source won’t overheat or show. After grout cures, install the outlet plate lighting and test it with the under-cabinet lights on to match brightness.
Subway tile is forgiving, and glossy white makes the light bounce back into your kitchen instead of disappearing into shadows. The backlit outlet idea is the trick I actually use in tight kitchens — outlets sit in the middle of the visual field, so lighting them makes the whole wall feel more finished. I like clear or frosted outlet plates with a warm LED so the glow looks like part of the design, not like a gadget. This works best with light cabinets or medium wood cabinets because the white tile keeps the color temperature balanced. It also flatters smaller kitchens by adding brightness exactly where your eyes land when you reach for the counter.
Common mistakeAvoid placing a strong cool-white (4000K) light on the outlets — it makes the white tile look chalky.
Try thisUse frosted or lightly textured outlet plates; they spread the light and hide any LED hot spots.
3. Matte Sage Tile with Warm Light and Slim Brass Trim
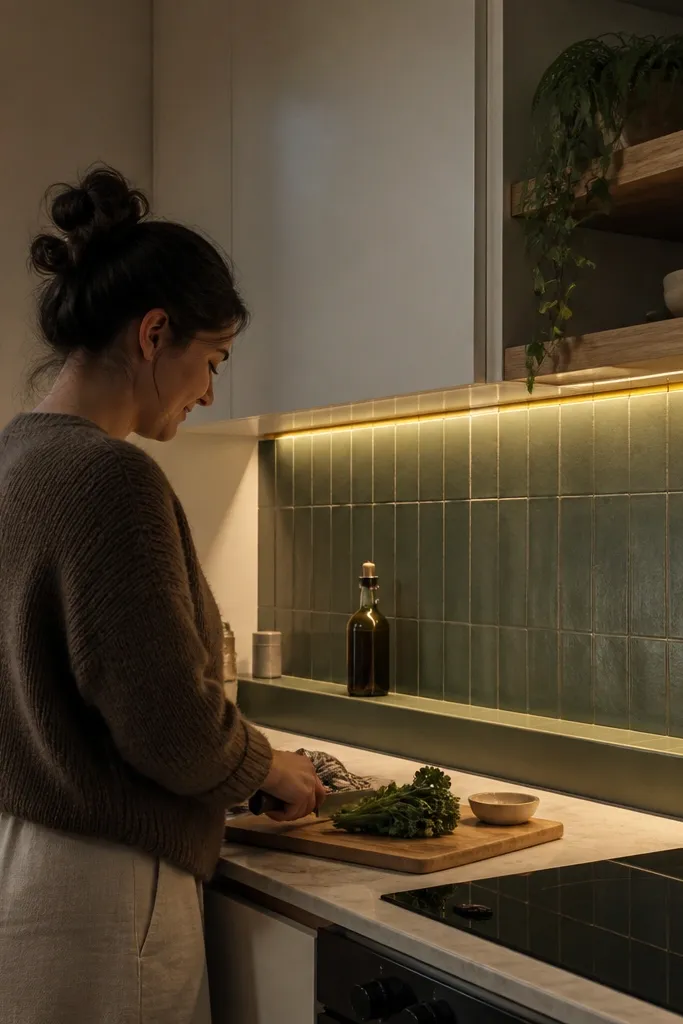
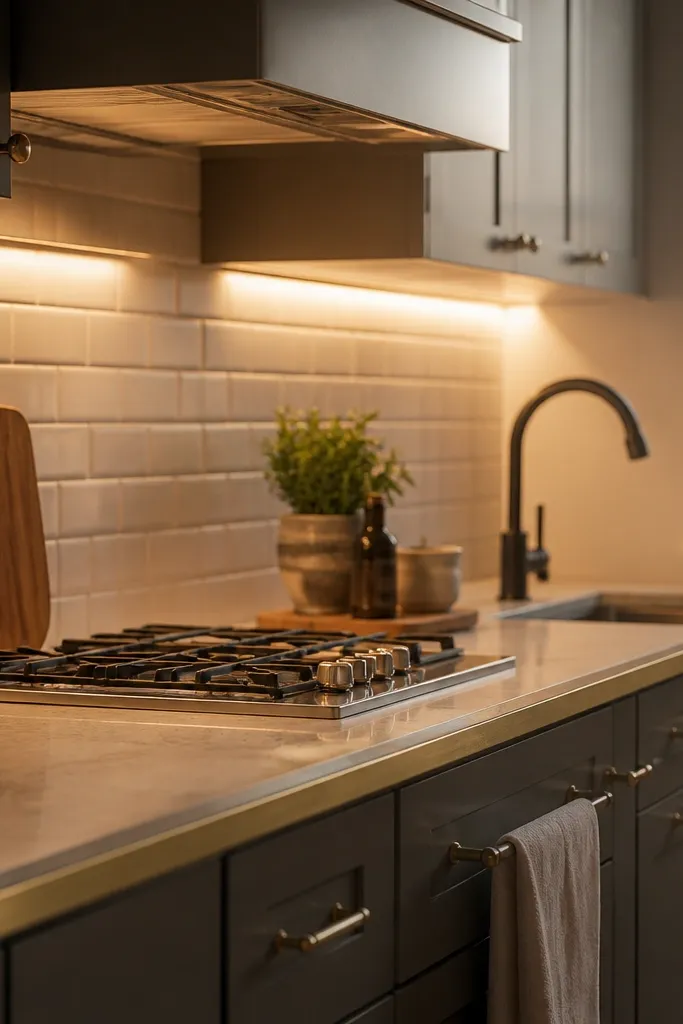
Start by choosing tiles with a true matte finish, not a semi-gloss — you want the surface to absorb and soften light. Lay tiles in a simple grid, and use a light cream grout to keep the green from looking muddy. Install under-cabinet LEDs in an aluminum channel and set the strip so it washes the backsplash from about 2-3 inches back from the cabinet face. Use a 1/2-inch or 3/4-inch brass trim at the top edge, then caulk the transition line with a paintable matching caulk.
Matte sage is a calm color, but it can look flat without the right lighting. Warm LEDs (2700K) bring out the gray-green depth and keep the tile from turning neon. The slim brass trim is what makes it feel finished — it catches light at the edge so your backsplash doesn’t look like it stops abruptly. This is a great pick if you have light wood floors or beige undertones in your cabinets, because sage and warm metal match naturally. It also flatters kitchens where you want color without high contrast — the wall stays soothing, not loud.
Common mistakeAvoid pairing matte sage with bright blue-leaning cool light, or the green reads dirty.
Try thisIf your cabinets are white, test sage tile under 2700K lighting before you commit — the undertone matters more than the name on the box.
4. Cream Porcelain Tile with Micro-Textured Light Roll
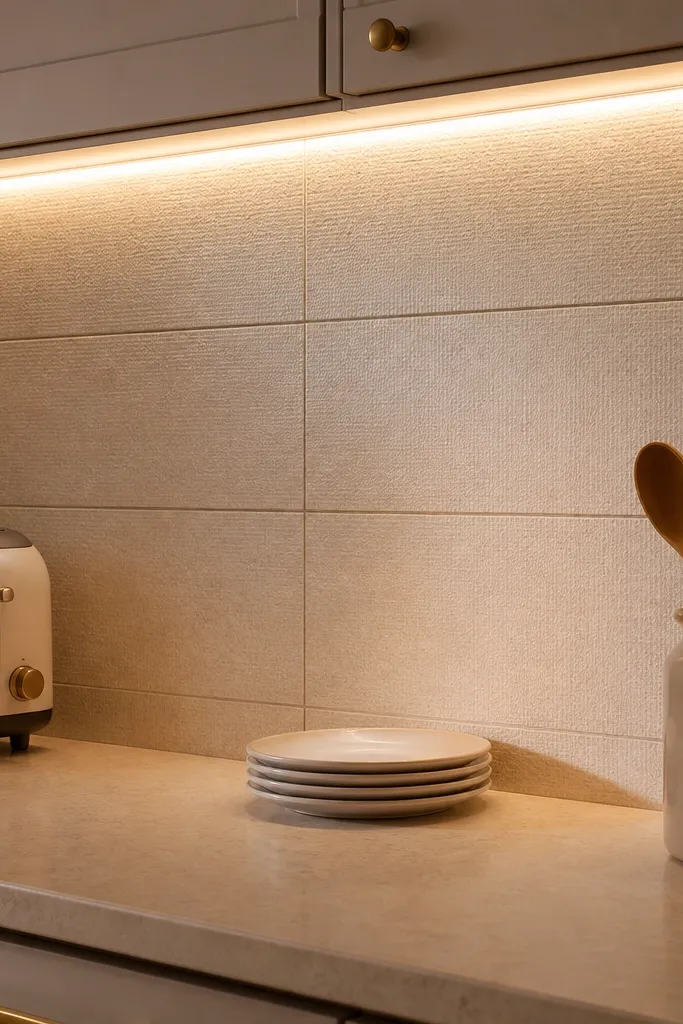
Micro-textured porcelain is the quiet hero for small kitchens. The texture catches light like fabric — you get depth without a pattern, which is exactly what keeps a small room from feeling crowded. I like cream because it reflects light well while still reading warm, especially if your countertops have beige or warm gray. The nearly invisible grout makes the wall feel continuous, which visually stretches the space. This works for anyone who wants an upscale look but hates busy lines and constant cleaning around grout.
Start by selecting a porcelain tile with low relief texture and matching grout color. Lay it with a tight, even joint and aim for a grout-to-tile contrast close to zero if you want the “single sheet” effect. Install the LEDs in a recessed or channel setup so the light skims the texture at a low angle. If you have a cabinet face that blocks light, add a small spacer so the LED sits closer to the backsplash surface.
Choose grout that dries slightly darker than the sample you see — cream grout often shifts after cure.
Avoid high-contrast grout with texture; it turns a soft look into a patchwork wall.
5. Small Square Glass Mosaic with Bottom-Lit Glow Line
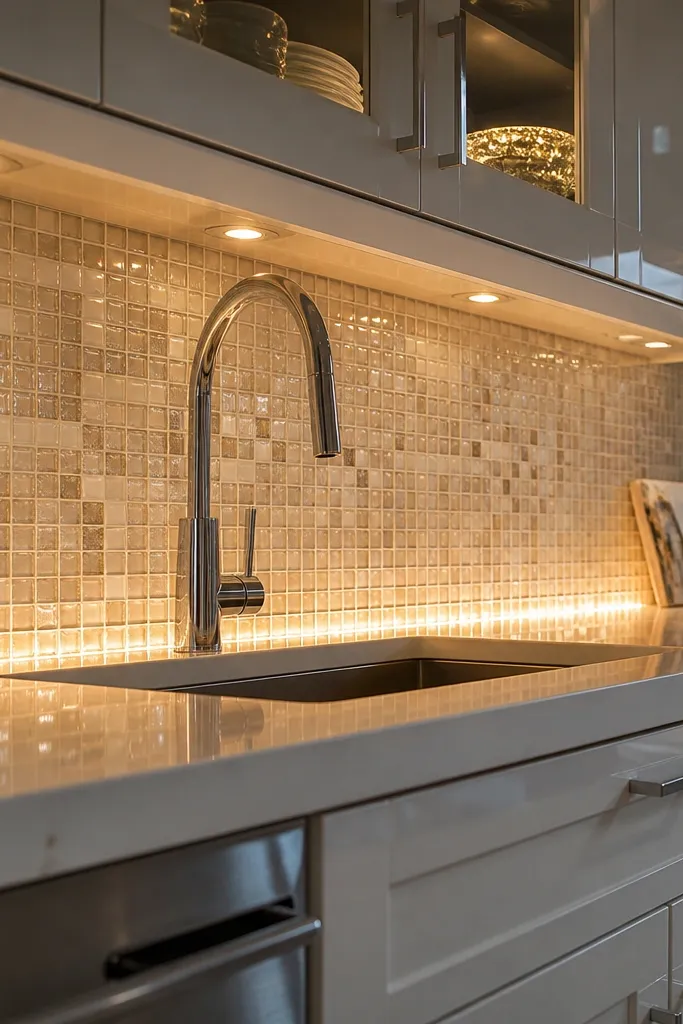
Glass mosaic looks expensive in small kitchens because it reflects light in tiny flashes. When you add a bottom-lit glow line, the mosaic doesn’t just look pretty — it makes the whole backsplash feel deeper. I’ve used this with clear and milky glass pieces so the wall stays bright without looking icy. It’s flattering in kitchens with stainless appliances because the glass echoes the metal shine. The key is choosing glass with consistent thickness; uneven pieces create uneven sparkle.
Start with a mosaic sheet where each glass tile has similar thickness and the backing is even. Set the sheets with unsanded grout in a white or near-white tone, and keep the sheet alignment so grout lines don’t “wave.” Install under-cabinet LEDs at 2700K and keep the strip close to the backsplash to intensify the glow. After grout, wipe with a glass-safe cleaner and buff lightly so the tile face stays clear and reflective.
If you’re sensitive to glare, pick slightly frosted glass instead of crystal-clear glass.
Avoid dark grout with glass mosaic in small kitchens — it turns sparkle into a muddy grid.
6. Dark Charcoal Shiplap Tile with Warm Light Wash
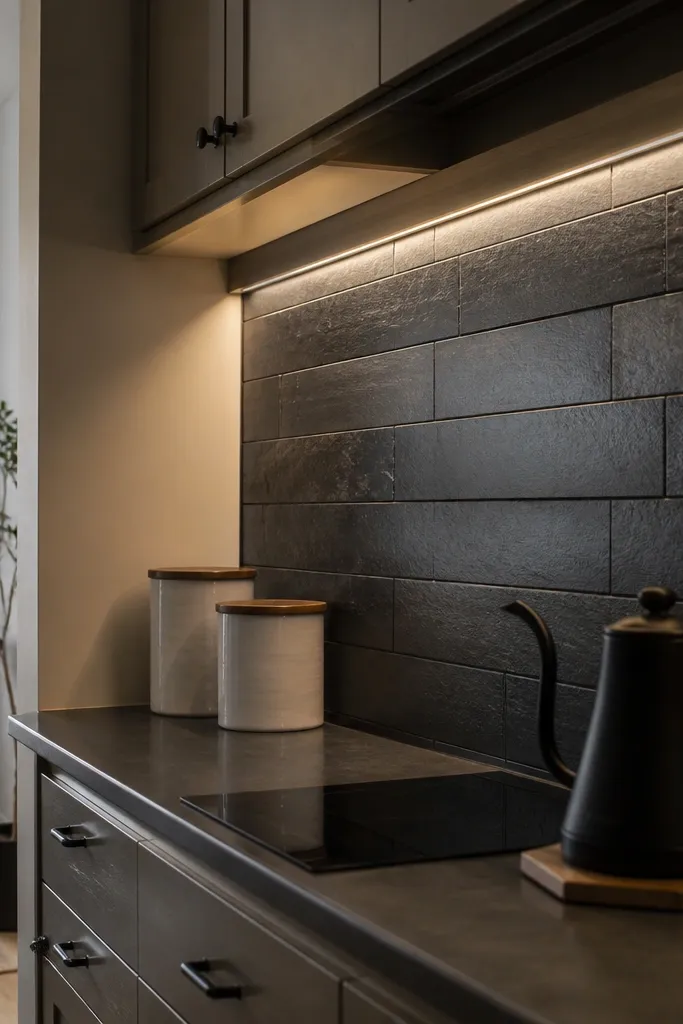
Charcoal shiplap tile gives you a strong look without needing a big pattern, and the light wash keeps it from feeling heavy. This is the one I pick when a client wants drama but has a small footprint and limited wall space. Warm lighting brings out the subtle variation in the tile finish so the charcoal doesn’t look flat. It also makes white countertops look sharper, which is a win in compact kitchens. If you have warm wood tones, charcoal plus warm light reads intentional, not goth.
Start by choosing plank tiles that mimic shiplap with a micro-bevel so light has something to grab. Lay the planks level, then keep the seams consistent and centered behind the sink and range. Install under-cabinet LEDs in a channel and set the strip so the light hits the plank face, not the grout seam. Paint the wall above the backsplash the same temperature family as the tile — I usually use warm gray paint so the transition doesn’t look cooler.
Use a matte finish LED diffuser if your strip is visible; it removes harsh hotspots.
Avoid cool-white LEDs with charcoal tile — the backsplash looks like a basement wall.
7. White Tile with Gold Edge Inlay and Tiny Spotlight Trim
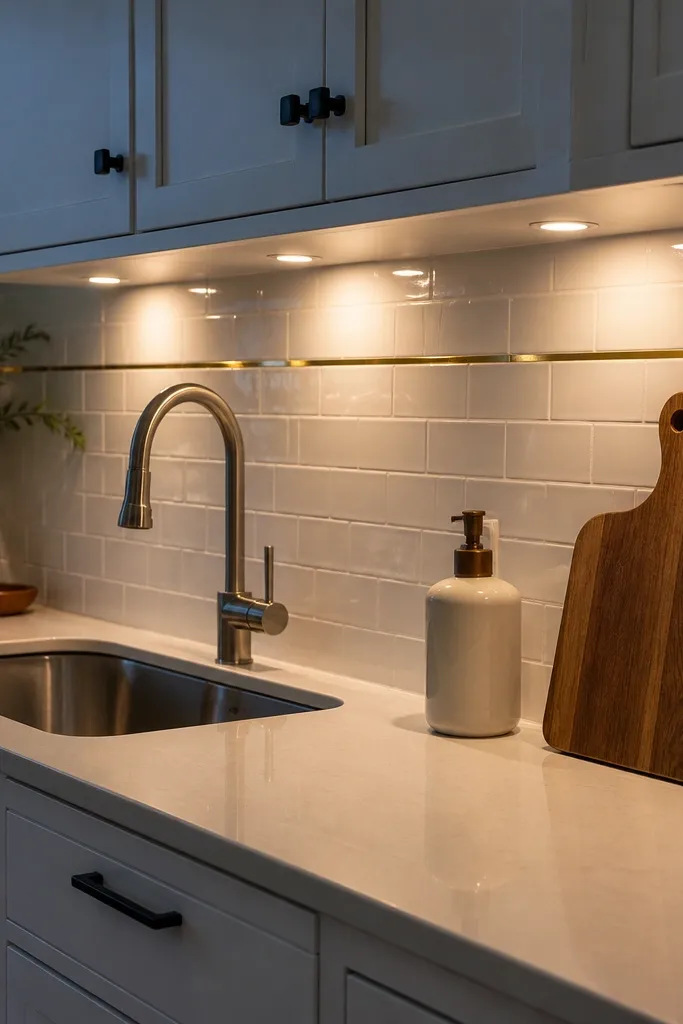
This is a “designer detail” look that works in small kitchens because you’re not relying on a big pattern. The gold inlay line gives you a clear visual cue that the backsplash has layers, and the tiny puck lights make those layers pop at night. I like this approach when you have a simple cabinet layout and want something refined without clutter. Gold also flatters warm-toned wood floors and creamy countertops. The effect is especially good if you like warm lighting and want your kitchen to feel cozy, not sterile.
Start with a white tile body that has a smooth face and a consistent shine level — I prefer satin over high gloss for this look. Install a thin gold edge inlay or a pre-made tile trim strip at the top third of the backsplash, keeping it level with your counter line. Mount a low-profile puck light strip or individual puck fixtures in a shallow metal track near the top edge, then aim them slightly down so the light grazes the tile. Finish by caulking all vertical transitions with matching color caulk so the gold line stays crisp.
Keep the gold line one consistent height so the camera and your eyes read it as intentional, not random.
Avoid using gold with high-contrast black grout; the wall turns busy fast.
8. Beige Travertine-Look Tile with Micro-LED in a Recessed Groove
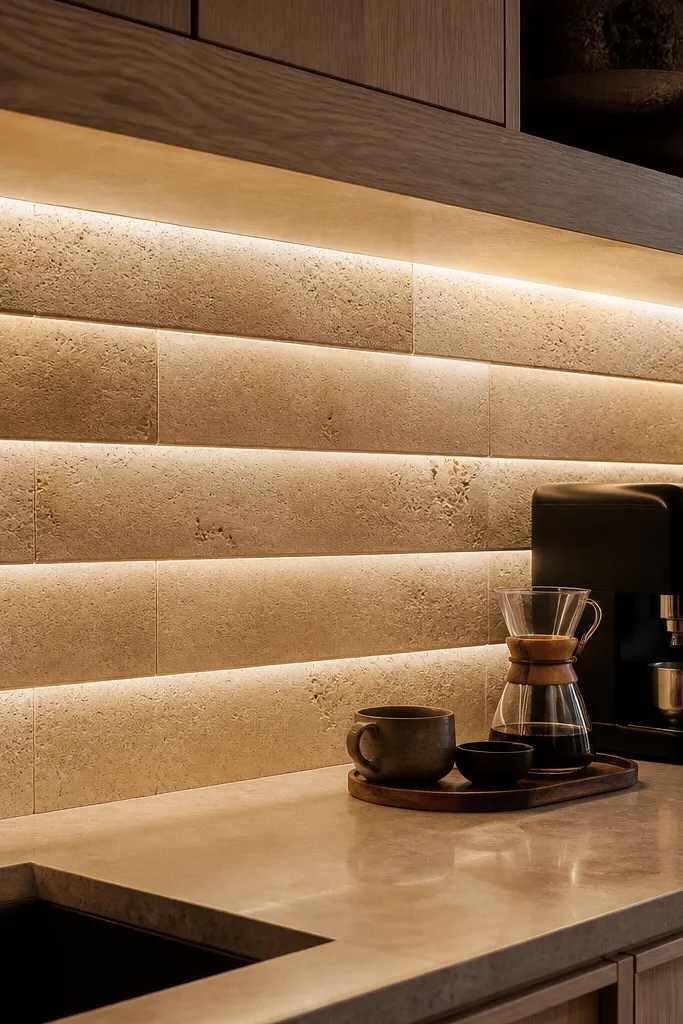
Travertine-look tile has natural character, but it can look flat unless you light the texture from the right angle. A micro-LED inside a recessed groove is a trick I like because it makes the glow feel built into the backsplash, not pasted on. Beige tones keep the room bright and forgiving, especially if your kitchen gets limited daylight. This look flatters warm undertones in countertops and wood floors, and it also adds depth without adding busy pattern. If you hate the look of heavy shadows, this is the approach because the light comes from the wall itself.
Start by selecting travertine-look tiles with consistent color families and similar striation direction. Set the tiles with sand-colored grout so the grout doesn’t fight the tile’s natural texture. Create a shallow recessed groove above the tile line using a trim channel or a manufactured LED recess kit, then run the LED strip inside. Install the tiles first if possible, then fit the groove trim so it sits exactly parallel with the counter edge.
Use a diffuser cover for the micro-LED so you get a soft line instead of visible LED dots.
Avoid recess grooves that are too deep — they create a dark cavity that swallows the glow.
9. Terracotta Hex Tile with Warm Tuck-Under Lighting
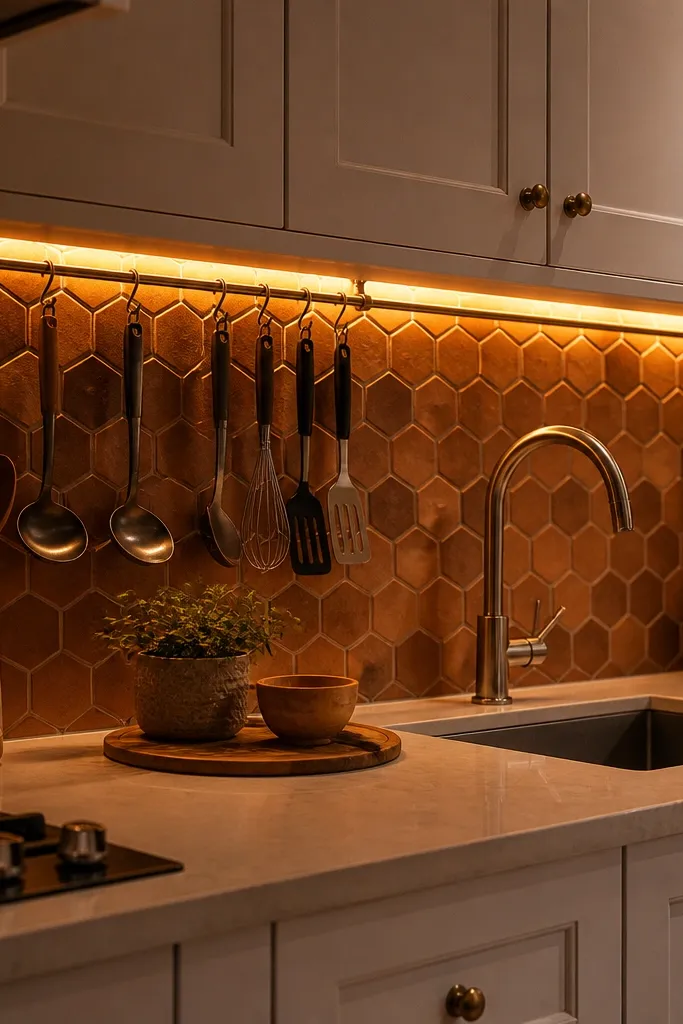
Start by choosing hex tiles with a slightly rounded edge or subtle bevel so the light catches the geometry. Plan your layout so the hex pattern is centered behind the sink, and keep the top row aligned so it doesn’t drift near the microwave. Install under-cabinet LEDs tucked close to the cabinet face in a diffuser channel. After grouting, wipe the tile face immediately and buff once dry so terracotta doesn’t look streaky.
Hex terracotta reads charming, but in small kitchens it can either look delightful or like a theme. Warm tuck-under lighting makes the hexes look dimensional without needing extra decor. The warm terracotta tone pairs well with 2700K light and makes the backsplash feel like it has depth. I’ve seen this work beautifully in kitchens with light countertops and simple cabinet fronts because it gives you one strong texture story. It’s also flattering if you want your kitchen to feel lived-in — the color warms up the whole room.
Common mistakeAvoid very dark grout with terracotta hex — it makes the honeycomb look heavy.
Try thisUse a grout color that matches the terracotta lightest tone; it keeps the pattern soft in small spaces.
10. Black Slate-Look Tile with Under-Cabinet Light Diffuser
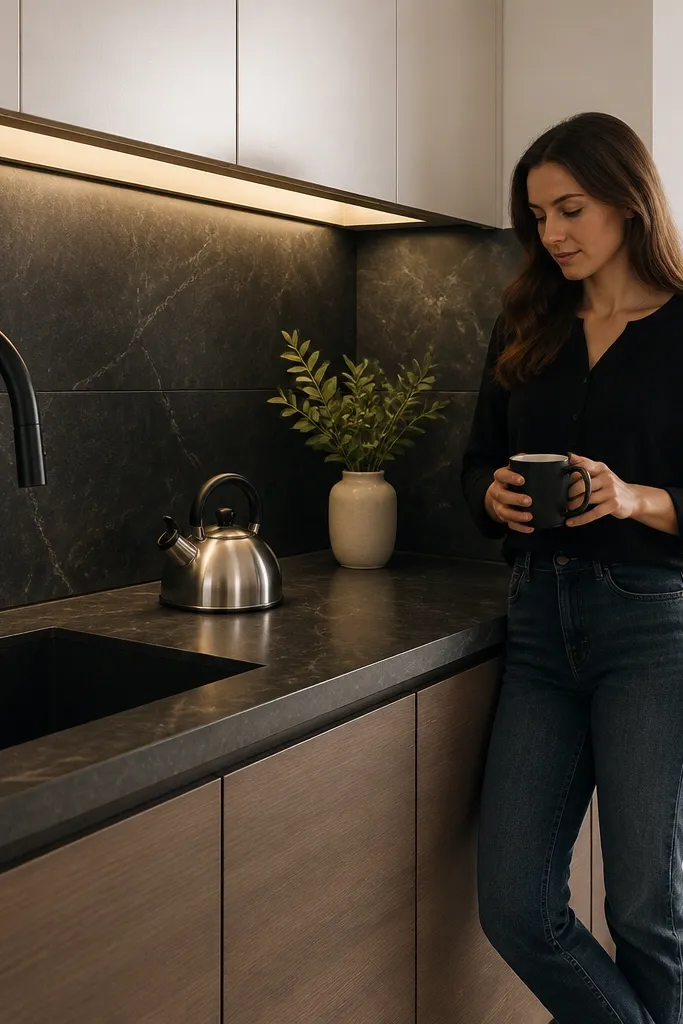
Slate-look tile has movement, and the diffuser is what keeps that movement from turning into harsh glare. In small kitchens, black can look cramped, but under even warm light it looks intentional and clean. I love this with white walls and light wood floors because the contrast makes the kitchen feel crisp. This look flatters people who want a modern edge without going fully monochrome, because the slate texture keeps it from looking flat. Use it when you have simple cabinet lines so the backsplash texture is the star.
Start by picking slate-look tile with a matte finish and avoid tiles that are too glossy. Lay in a straight pattern with staggered seams if the tile is designed that way, and keep grout lines thin for a tighter look. Install LEDs in a frosted diffuser channel under the cabinet, then set brightness so you see texture but not a reflection streak. Seal the tile if the manufacturer recommends it, then wipe with a pH-neutral cleaner after installation.
Test one tile under your exact LED before you tile — some slate-look finishes turn gray under warm light.
Avoid visible bare LED strips against black tile; it creates bright dots and looks cheap.
11. White Marble Mosaic Border with Solid Tile Field
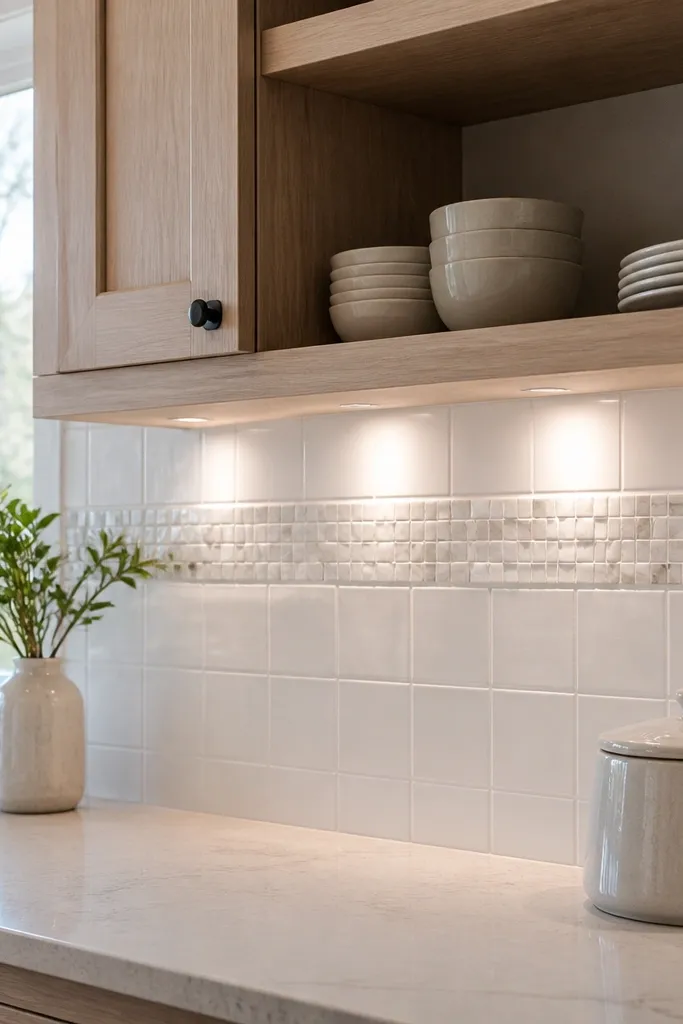
Start by installing the solid white field tile first, using light gray grout around 1/8 inch for a clean grid. Then plan the mosaic border height — I place it about 6-8 inches below the cabinet bottoms so it looks intentional. Mount the mosaic border strip so it’s perfectly level, and keep the chip thickness consistent. Finally, install under-cabinet LEDs and check the glow at night; adjust the strip angle so it hits the mosaic chips, not just the flat tile.
This is one of my favorite small-kitchen tricks: you get sparkle where your eye already wants it, without turning the whole wall into a busy pattern. The marble mosaic border reads like a jewelry piece, while the solid tile field keeps the room calm. Under-cabinet lighting makes the border catch light and gives the backsplash a finished, tailored edge. This look is flattering in kitchens with narrow counters or compact layouts because it adds interest at one height, not across the entire wall. It also works when you have a window nearby — the border can line up with the window trim visually.
Common mistakeAvoid placing the mosaic border right above the counter — it visually shrinks the backsplash height.
Try thisUse a mosaic border that is only one strip wide; two rows can overwhelm small walls quickly.
12. Patterned Moroccan-Style Zellige with Small LED Strip at Counter Line
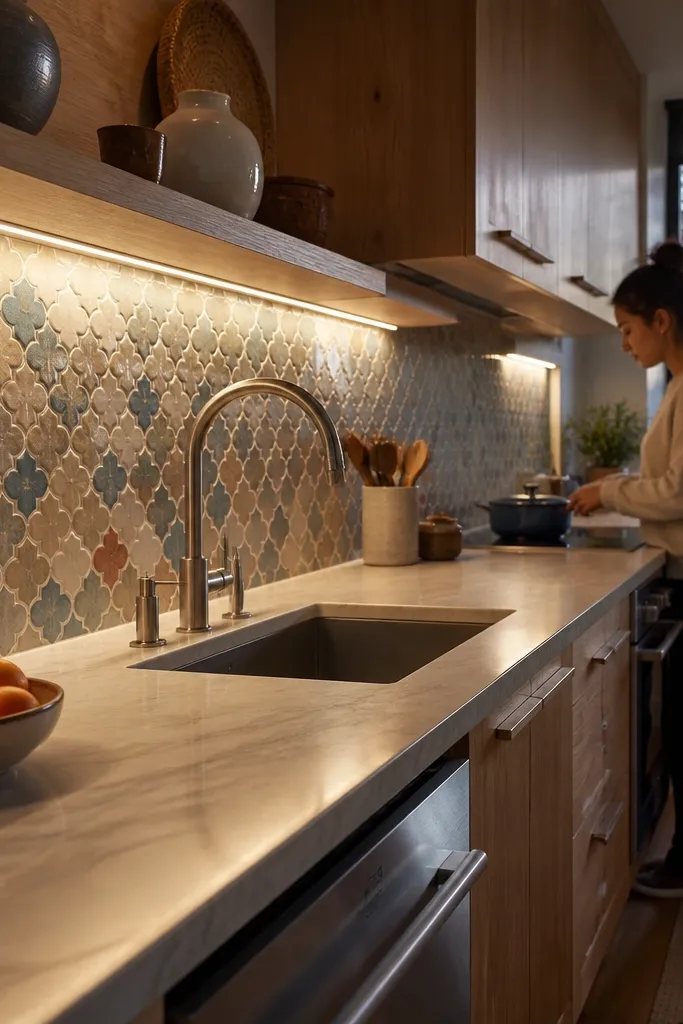
Zellige-style tile can look stunning in a small kitchen, but only if the lighting is low and close to the surface. I like a small LED strip positioned near the counter line so it rakes across the uneven glaze, which is where the handmade character shows up. The mixed tones — cream, soft blue, and muted terracotta — look balanced under warm light and feel less “busy” than they would under cool LEDs. This look flatters people who want personality but still need a kitchen that feels calm during the day. If your cabinets are simple, the zellige can handle the visual work without making the room feel crowded.
Start by choosing a zellige pattern with no more than three main colors, and keep the grout light to medium so the glaze variation stays the focus. Install the tile with a consistent pattern alignment so the motif doesn’t drift at corners. Place the small LED strip close to the backsplash face, using a channel with a diffuser so you don’t see individual LED points. After grout cures, wipe with a glaze-safe cleaner and buff dry to bring out the sheen.
Pick warm LEDs at 2700K so the blues look soft instead of greenish.
Avoid cool-white LEDs with patterned tiles; it makes glazes look chalky.
13. Warm White Peel-and-Stick Tile with Plug-In LED Sconce Rail
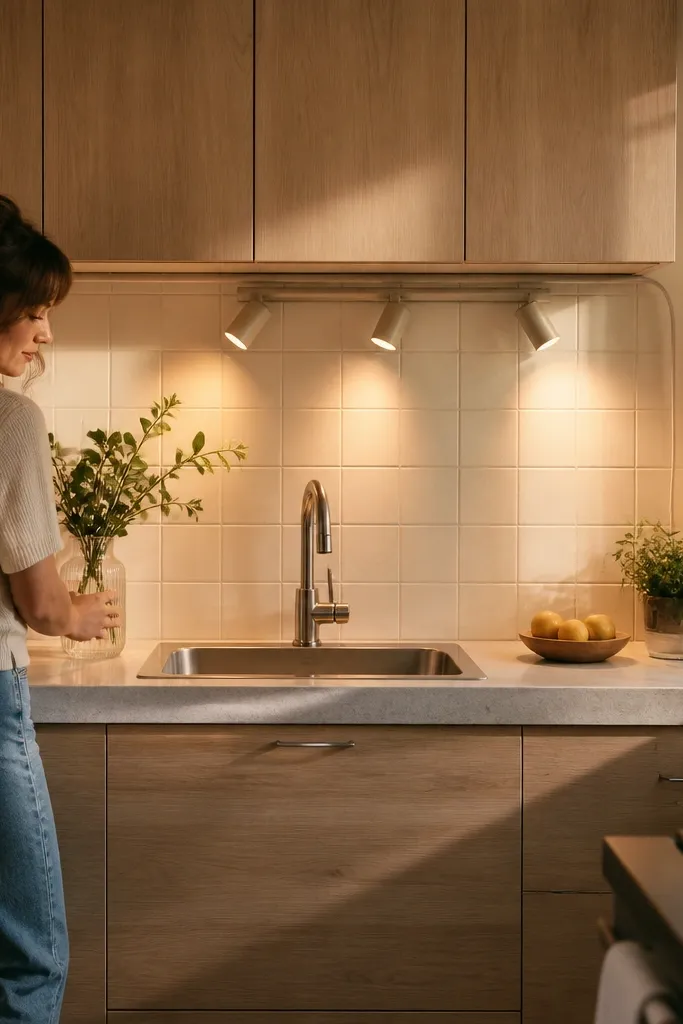
Start by cleaning the wall with a degreaser and letting it dry completely, then remove outlet covers. Measure the backsplash area and dry-fit a row to confirm alignment around outlets and corners. Apply the peel-and-stick tiles in small sections, pressing with firm pressure and using a straightedge to keep rows level. Then mount a plug-in LED sconce rail with a diffuser, aiming the light so it lands across the tile face about 2-3 inches from the wall.
If you’re renting or you don’t want to grout, peel-and-stick tiles can still look legit when you treat lighting as part of the plan. Warm white square tile under a focused sconce rail makes the surface look thicker and more expensive. I’ve installed this in kitchens where the wall had minor imperfections; the light helps hide slight irregularities because the glow is directional. This look flatters small kitchens with gray or light cabinets because it adds warmth without adding color chaos. The biggest win is speed — you get a cleaner backsplash look in a weekend.
Common mistakeAvoid installing peel-and-stick over glossy paint or greasy residue; the tiles lift and look cheap fast.
Try thisUse a thin spacer strip behind the rail bracket so the light doesn’t shine into the underside of your cabinets.
14. Stainless Steel Look Tile with Under-Cabinet Linear LEDs
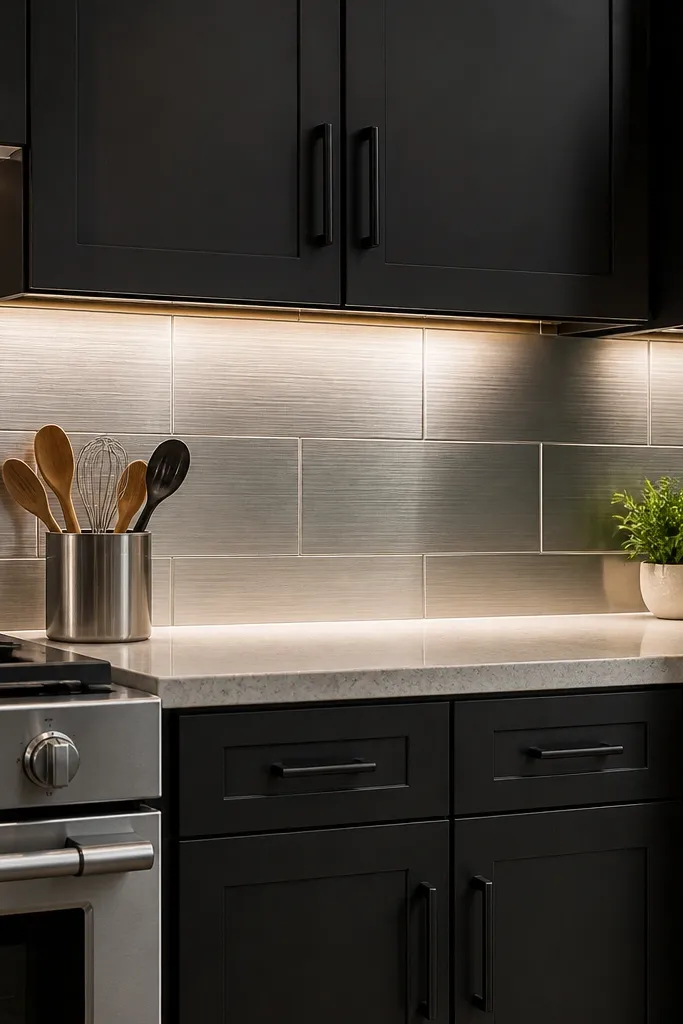
Start by picking metal-look tile with a brushed finish and consistent grain direction. Lay it in a simple grid and keep grout joints tight, around 1/8 inch, so it reads like one surface. Install under-cabinet LEDs in a channel with a diffuser to reduce glare, and set brightness so the tile reflects but doesn’t blind. Seal the grout if the manufacturer recommends it, then wipe the tile with a microfiber cloth after installation to remove haze.
Brushed metal look tile gives you that clean, industrial shine without the maintenance of real stainless sheet. Under-cabinet linear LEDs make the brushed pattern glow in a smooth band instead of sharp reflections. This looks especially good when you already have stainless appliances or black fixtures, because it ties the metal elements together. I like it in small kitchens because the reflective surface increases brightness without needing a lot of color. The key is choosing a brushed finish, not mirror — mirror tile shows every fingerprint and makes small spaces feel cluttered.
Common mistakeAvoid mirror-finish metal tile in a small kitchen unless you enjoy constant wiping.
Try thisUse a matte cleaner and dry buff — metal-look tile can show streaks if you leave residue.
15. Beige Brick-Pattern Tile with Light Ladder Effect
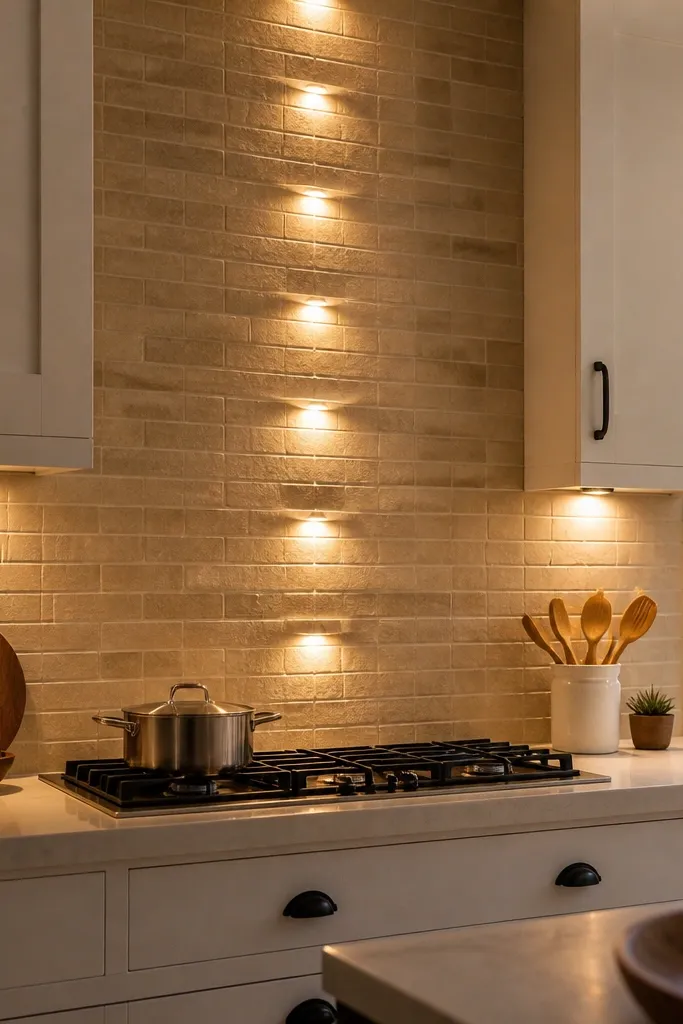
Brick-pattern tile adds structure, and small recessed LED points create a ladder effect that makes the backsplash feel longer and taller. In a small kitchen, vertical cues help the room feel less cramped, and this lighting does that without changing your layout. I’ve used beige brick tile with white cabinets because it stays warm and doesn’t look like a basement. The grout lines should be thin and light so the brick reads refined. It’s a good option for people who want texture but still like a clean, organized kitchen.
Start by choosing a brick-pattern tile with thin grout-friendly joints and a matte or satin finish. Lay tiles with a consistent offset and align the seams under cabinets and near the range. Install a small recessed LED strip or individual puck lights along the underside of a shelf, spaced evenly so the highlights repeat. Test the spacing by turning lights on and off — if you see dark gaps, adjust the LED spacing before you grout.
Use warm LEDs and keep the brightness moderate; the goal is a highlight rhythm, not a spotlight show.
Avoid large, high-contrast grout lines with brick patterns; it makes the wall look uneven.
16. Two-Tone Tile Vertical Panel with Corner Light Spill
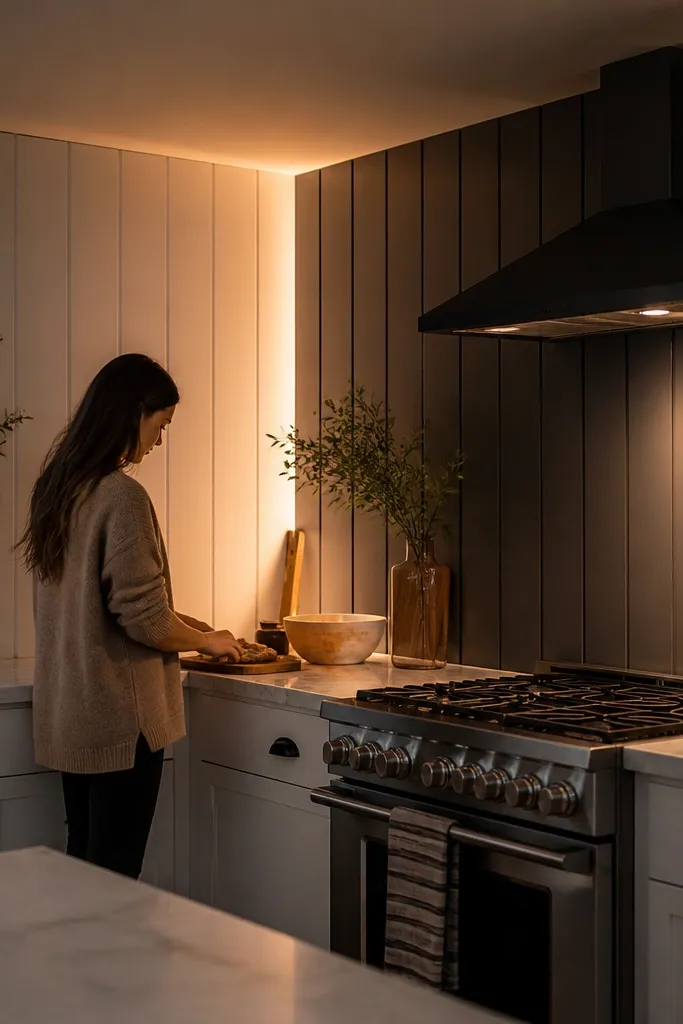
Vertical panels are a cheat code for small kitchens because they create a longer eye line without adding clutter. The corner light spill helps define the panel edges, so the two-tone look doesn’t feel like a patch. I like this for kitchens with a single main focal point — usually the range or the sink — so the vertical panel aligns with that spot. Warm light makes the gray tile look soft instead of stark. This look also flatters kitchens with mix-and-match materials because it gives you a structured backsplash that coordinates easily.
Start by picking two tile tones that share the same undertone temperature — warm white plus warm gray works best under 2700K. Install the vertical panel column centered behind the range or sink, using a level line to keep it straight. Add a recessed LED in the cabinet corner or a small channel light that points at the panel edge, not straight down the counter. Finish by caulking the panel edge with matching caulk so the light spill looks intentional and clean.
Keep the panel width narrow, around 8-12 inches, so the rest of the wall stays airy.
Avoid big color jumps like stark white and cool blue gray; the panel edge will look harsh under warm LEDs.
17. White 3x6 Tile with Coffered Top Edge and Hidden LED
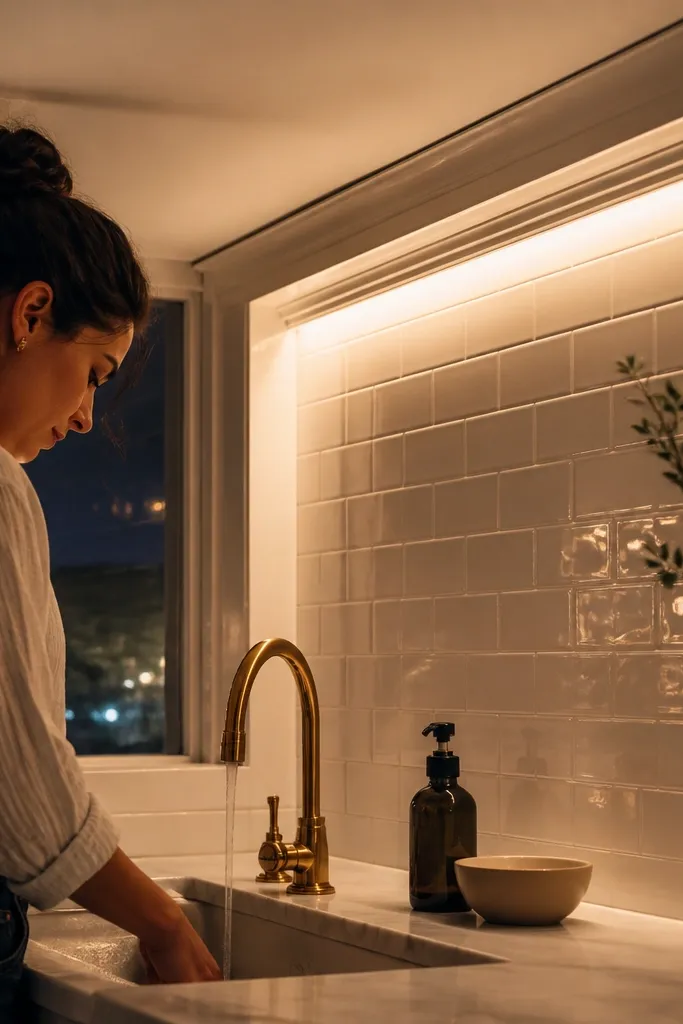
A coffered top edge makes the backsplash feel built-in, and hidden LED lighting makes it look like the wall has a soft ceiling. In small kitchens, this is one of the prettiest ways to get a premium look without using expensive tile everywhere. The 3x6 format keeps grout lines neat, and the gentle glow hides any minor unevenness in the wall. This works well if your cabinets go to the ceiling or if you have a small gap above the backsplash. It also flatters kitchens where you want the backsplash to feel taller without actually raising it.
Start by tiling the backsplash with 3x6 pieces in a straight or subtle offset pattern, keeping grout consistent at 1/8 inch. Add a top trim that creates a shallow ledge, then install hidden LED strip lighting behind it with a diffuser. Aim the light so it grazes the tile surface at a downward angle; this makes the tile shine without washing out the grout lines. After everything cures, use a paintable caulk at the top seam so the light fixture edge stays clean and invisible.
Use a dimmer — the glow looks different at 60% than at 100%, and dimmed light makes small kitchens feel cozy.
Avoid placing the LED so it shines directly into your eyes when you stand at the counter.
18. Cream Moroccan Tile with Cable-Managed Rope Light in Channel
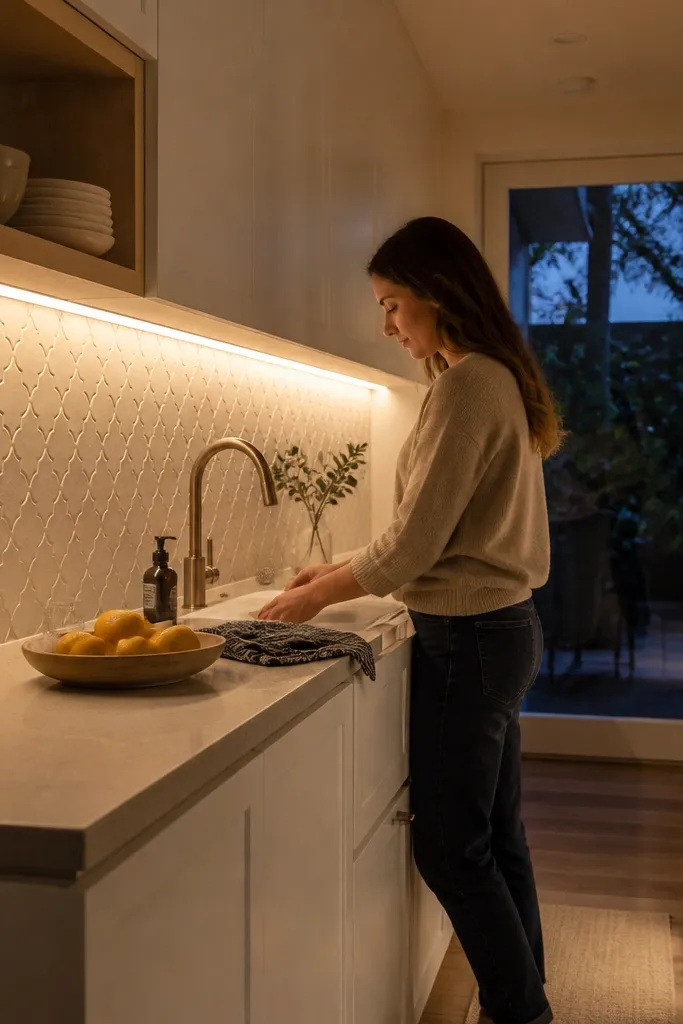
Start by choosing Moroccan tile with a cream base so the rope light doesn’t overpower it. Install the backsplash normally, then test the channel placement with painter’s tape so the glow hits the tile face. Mount the metal channel under the cabinet, run the rope light inside, and keep the cable path tucked along the cabinet frame. Plug in and adjust brightness, then grout and seal the tile so the glow stays consistent after cure.
Rope lights look old-school when they’re slapped on the wall, but in a small kitchen with the right channel, they create a warm, even wash that makes patterned tile look intentional. I used this in a narrow galley kitchen where under-cabinet strips were too tight and threw uneven hotspots. The rope light in a channel gives you a continuous glow line, which helps Moroccan tile look cohesive instead of patchy. This is a strong choice when your cabinets are shallow and you need a lighting method that fits in tight spaces. Warm light keeps the colors soft and wearable.
Common mistakeAvoid leaving cables visible; even a great backsplash looks DIY if the wiring is obvious.
Try thisUse a rope light with an internal diffuser so you don’t see bright beads along the line.
19. Monochrome Peel-and-Stick Marble with Floating Shelf Light
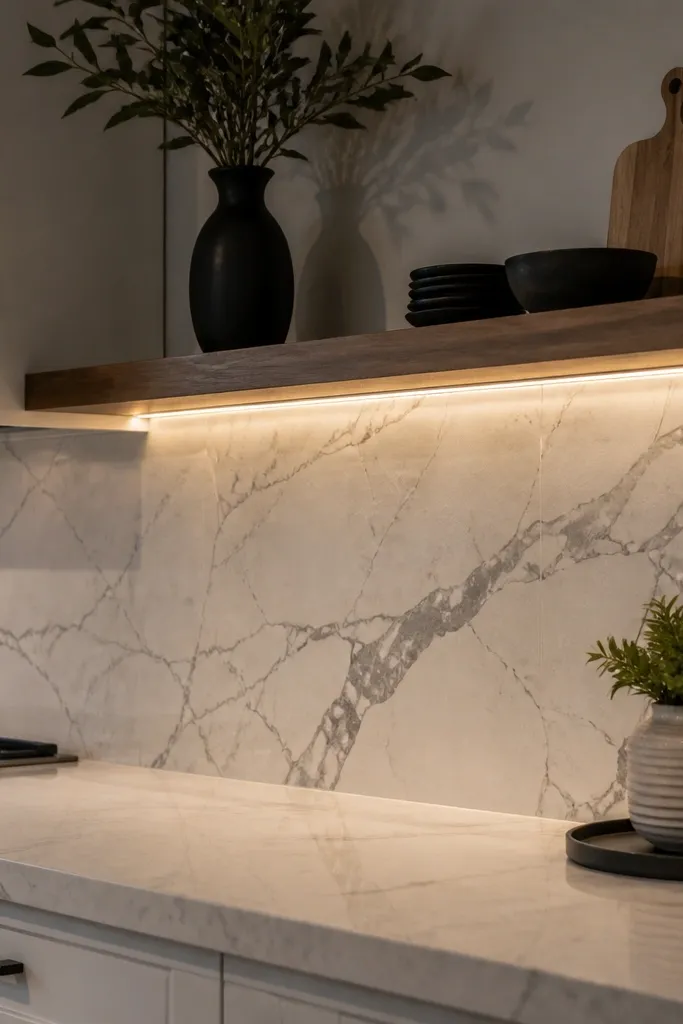
Start by cleaning the wall and removing all outlet covers so your tile can wrap cleanly around edges. Apply peel-and-stick marble panels starting from a level reference line, pressing firmly and smoothing seams with a plastic squeegee. Install the floating shelf first, then attach a narrow LED strip under the shelf lip with a diffuser cover. Turn the lights on and adjust the shelf LED so it hits the backsplash surface, not the back of the shelf. Finish by adding matching caulk at the panel edges and around outlets.
Peel-and-stick marble-look works when you treat it like a wall panel, not like a temporary fix. A floating shelf with a narrow LED strip makes the marble movement look layered, which is the whole point of marble-look tile. The monochrome palette keeps the kitchen from feeling busy, and the shelf light gives you a clean, modern highlight line. This setup flatters small kitchens with open shelving because you already have horizontal surfaces, and the light connects them visually. I also like this for people who want a designer look without tiling — the glow hides minor seams.
Common mistakeAvoid thick pattern peel-and-stick in a tiny kitchen; it fights with cabinet hardware and makes the wall feel loud.
Try thisIf your peel-and-stick seams show, place a thin strip of matching caulk over the seam line before it fully cures.
20. White Tile with Vertical Light Strip Behind a Glass Insert
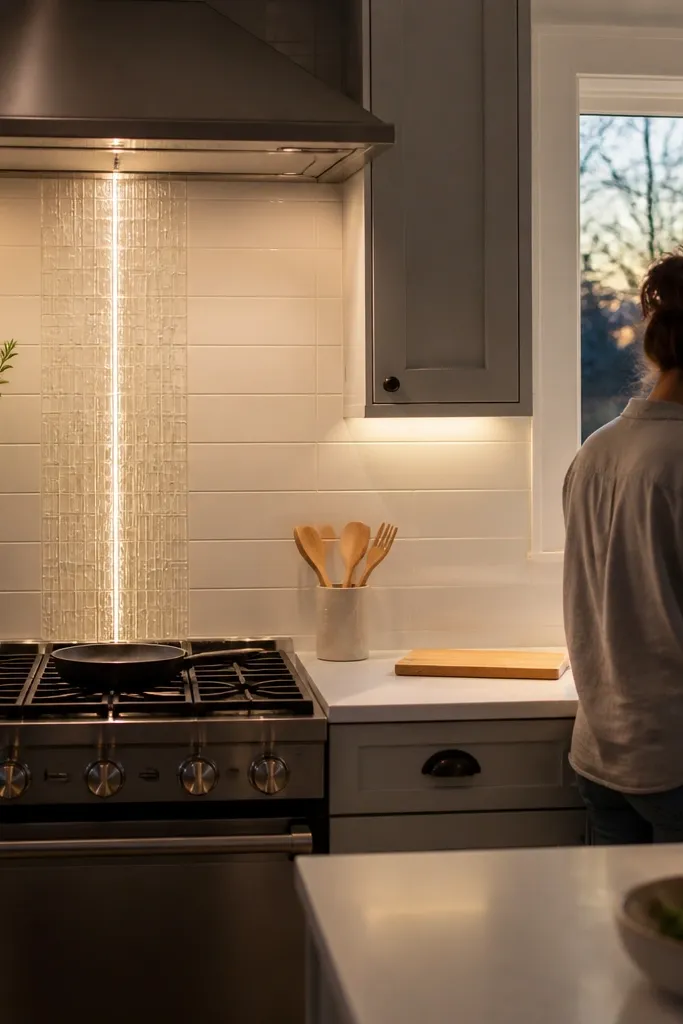
A vertical light strip behind a glass insert gives you a clean focal point without turning the entire backsplash into a pattern. In small kitchens, that focus helps the eye settle, so the room feels more organized. I’ve done this with white tile fields because the glass reads bright and the glowing column adds depth. Warm light makes the glass look creamy instead of harsh, and it pairs well with both modern and traditional cabinet styles. It’s also flattering if your kitchen has a narrow wall — the vertical glow makes that wall feel taller.
Start by tiling the white field and leaving an exact opening for the glass insert panel. Frame the opening with a trim kit so the glass sits flush, then mount a vertical LED strip behind the glass using adhesive clips made for LED channels. Use a frosted or lightly textured glass insert so the light spreads evenly and you don’t see LED dots. Finally, install the under-cabinet LEDs at a lower brightness so the vertical column remains the hero.
Choose glass that diffuses — clear glass shows the LED strip line too sharply and can look harsh.
Avoid placing the vertical glow right next to a window glare — it can create a distracting bright hotspot.
21. Light Gray Herringbone with Outlet-Level Sconce Glow
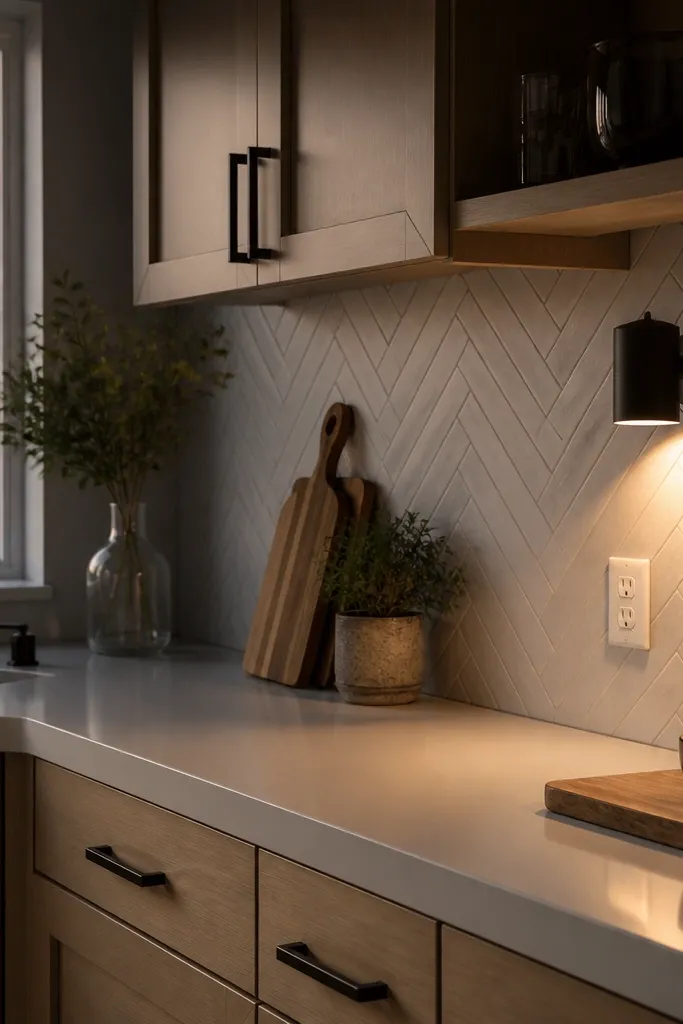
Start by installing the herringbone tile with consistent grout joints and keep the pattern centered so it doesn’t skew toward corners. Place sconce lights or low-profile LED points at outlet height, spaced so the glow covers the herringbone seams. Use warm LEDs at 2700K and keep brightness moderate so you don’t create strong reflections on satin tile. After grout and caulk, turn the sconce lights on at night and check for dark corners near the range — if you see them, adjust sconce angle slightly.
Herringbone plus sconce glow is a strong combination because it turns the wall’s direction changes into something you can see at eye level. In many small kitchens, outlets and counters sit at the same visual height, so adding light around that zone makes the backsplash look more intentional. I like light gray because it hides minor scuffs and keeps the kitchen looking clean. Warm sconce light makes the grout lines look softer, which keeps the pattern from feeling too sharp. This works well in kitchens with wood cabinets because the gray reads modern while the warm lighting keeps it cozy.
Common mistakeAvoid placing sconce lights too high; they light the cabinet underside instead of the backsplash.
Try thisAim the sconce so the light grazes the tile face at a shallow angle; it makes the grout texture look richer.