1. Built-in bench with a crisp waterfall cushion
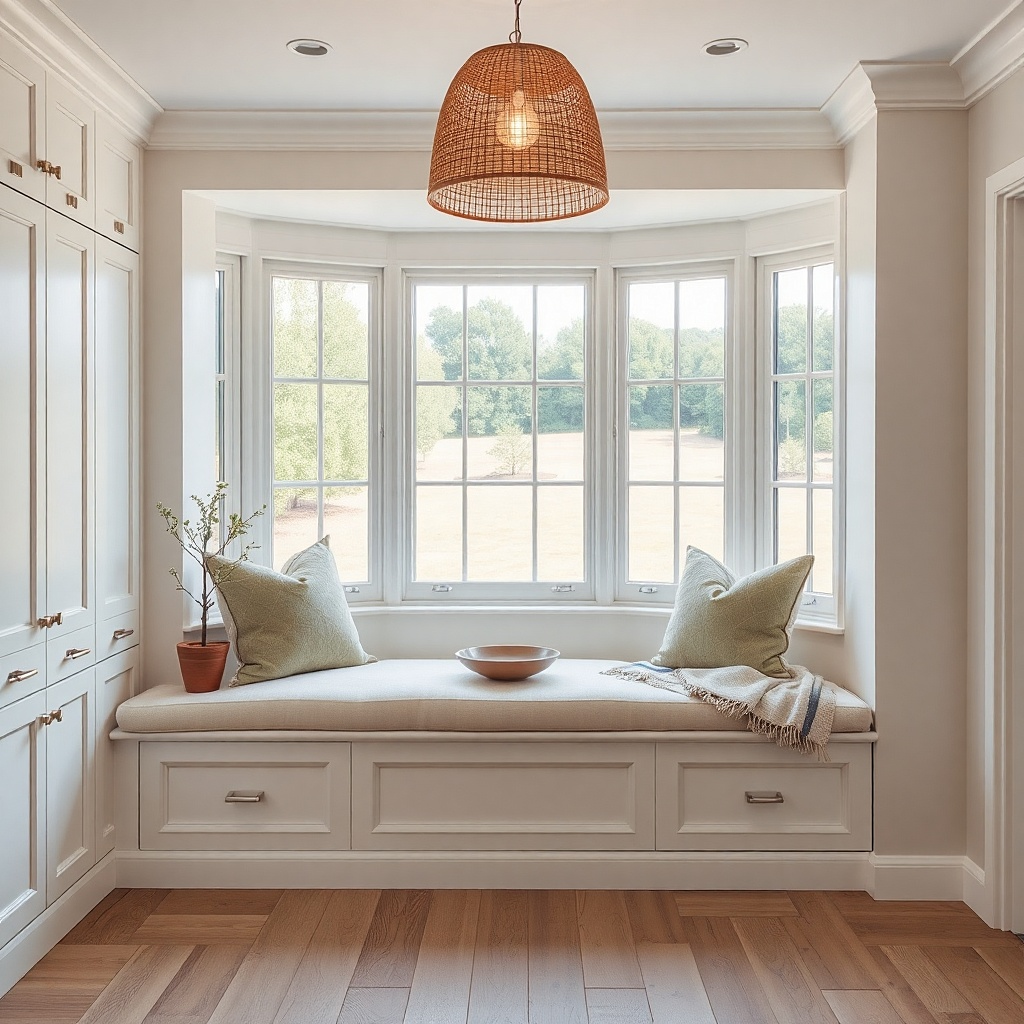
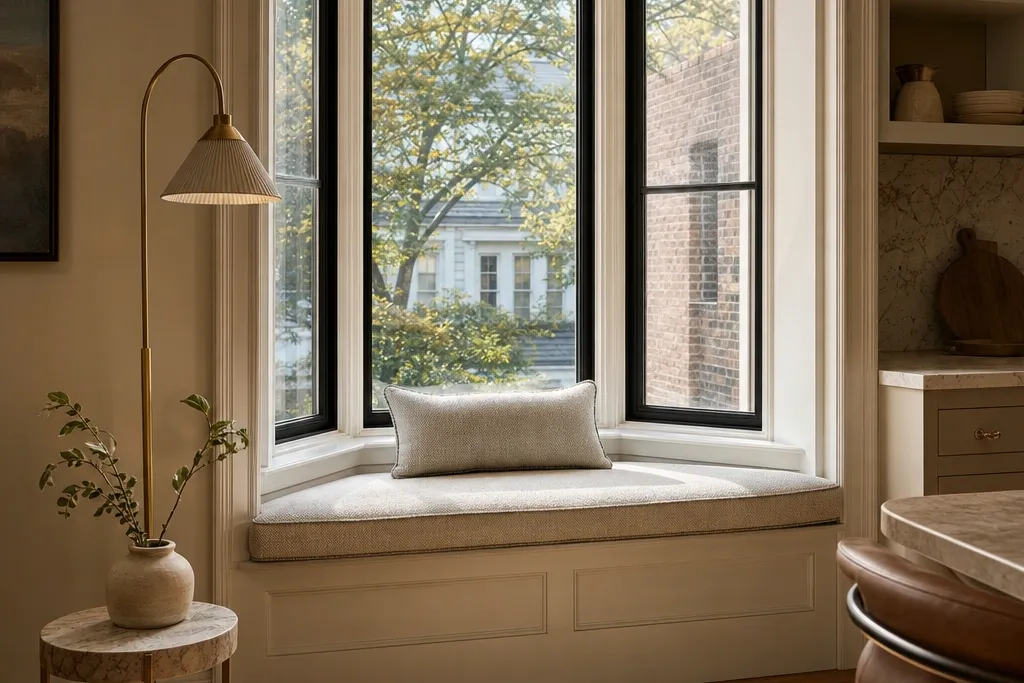
This idea turns the bay into real seating by making the cushion read like part of the architecture. Use a bench base in light oak or white-washed wood so the bay stays bright against typical kitchen cabinetry. Add a thick seat cushion with a “waterfall” front panel — the cushion cover extends down past the base edge in a straight line, which looks clean and modern. Choose a performance fabric in warm greige or stone so crumbs don’t visually disrupt the look. It solves the common problem where window ledges look pretty but never turn into a place to sit for more than a minute.
Measure the bay width and cut the bench base panels so the front edge lands flush with the window trim. Build or install a bench base with a top height that lands the cushion around 18-20 inches from the floor; then target 16-18 inches for the cushion depth. Use 2 layers of foam (about 2 inches total) plus a thin wrap layer for a firm, modern feel. Finally, cover with a zip-off cushion cover in a performance fabric and add a slim, dark metal trim strip along the top edge to sharpen the lines.
Add a single welt seam in a matching or slightly darker thread color it makes the cushion look tailored instead of “thrown on.”
Avoid soft, tufted cushions that look loungey; they fight the sharp geometry of most bay windows.
2. Low storage bench with hidden lift-top cushions
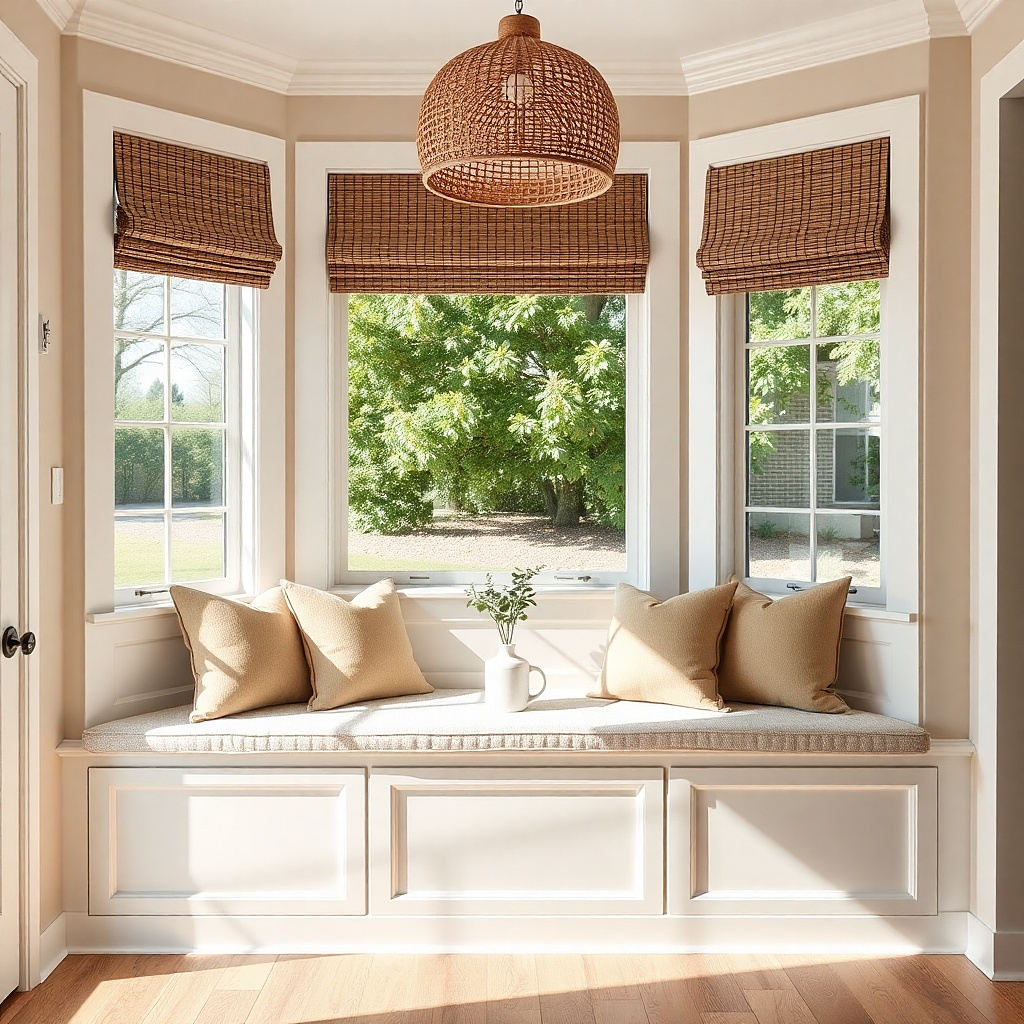
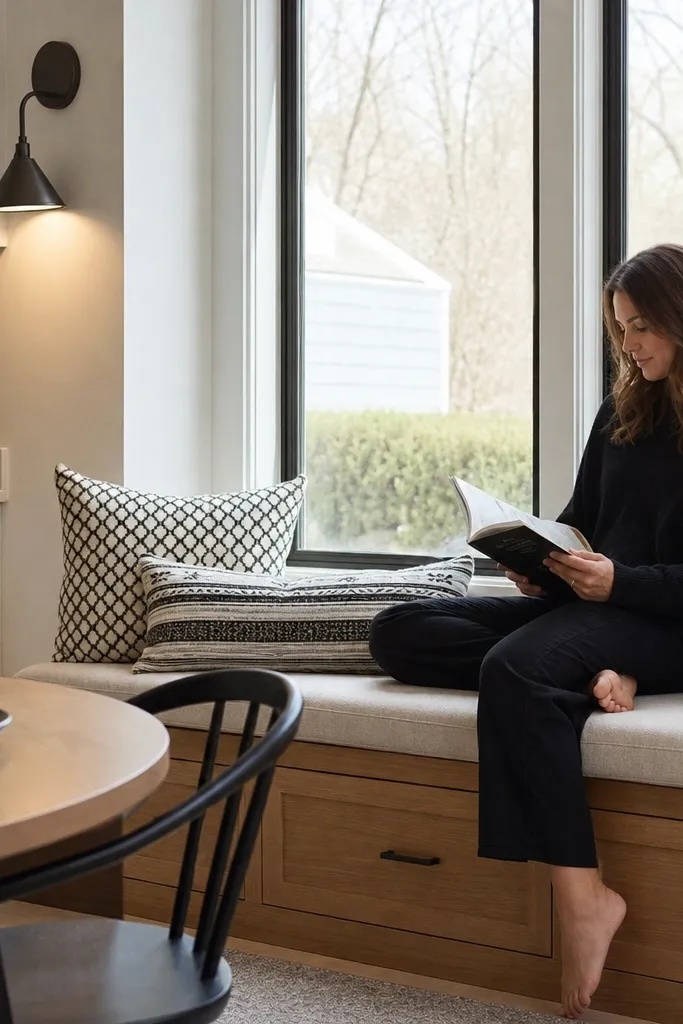
If your kitchen dining area is tight, this makes the bay useful without sacrificing the modern look. A low storage bench keeps clutter out of sight, and lift-top cushions let you grab serving platters, extra napkins, or seasonal table linens without pulling things into the room. Use matte painted cabinetry color-matched to your base cabinets (think soft white, dove gray, or greige) so it blends into the kitchen instead of looking like an add-on. Keep the cushion cover a simple solid no big patterns — because the storage lines already add visual structure. The result reads like built-in millwork and gives you an actual reason to sit in the bay.
Start with a bench depth around 16-18 inches, then design the storage cavity so the lift mechanism has clearance under the cushion. Place hinges and gas struts (or quality lift supports) so the lid opens smoothly without slamming into the window trim. Use a plywood base and paint-grade MDF for crisp edges; seal all cut surfaces before painting. Install the cushion on top with a removable cover, and line the inside with a wipeable finish or thin vinyl sheet so spills don’t become stains.
Use magnetic catches hidden under the lip so the closed lid sits flush and doesn’t shift when people lean back.
Don’t make the storage lid too deep — if the opening feels hard, you’ll stop using the seat.
3. Window-first dining nook with a slim tabletop over the ledge
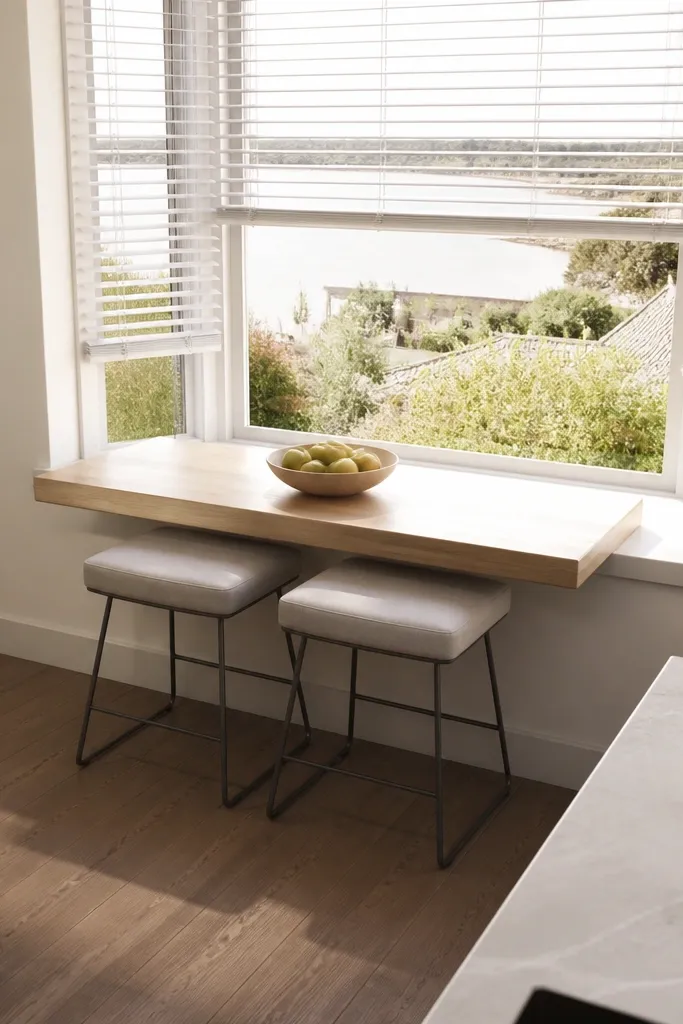
This is for bays where you want the window to stay visually dominant. Instead of building a thick bench, use a low ledge base and add a slim tabletop surface that sits just above the sill height. The look is modern because the tabletop line is straight and minimal, and the seating stays light swap heavy dining chairs for two upholstered bar stools or armless dining chairs with slim legs. Choose a tabletop finish like smoked oak or matte black to echo modern hardware. It creates a cozy seat by giving you a defined place for coffee, plates, or a laptop, while the window still frames the whole scene.
Measure from the floor to the sill and decide how much clearance you need for comfortable knees; then set the tabletop height so it lands around 28-30 inches from the floor. Install a support frame under the tabletop that anchors into the bay walls or adjacent cabinetry. Use a slim top thickness of about 1-1.5 inches so it doesn’t look bulky. Add two seats that fit the bay projection — aim for 18-20 inches of clear space between seat backs and the window wall so people can slide in without scraping.
Try thisHang a single pendant or mini track light centered over the tabletop it makes the bay feel like a real dining spot, not a leftover corner.
Common mistakeAvoid oversize chairs with wide arms; they block the bay’s clean lines and make the nook feel cramped.
4. Corner wrap banquette with matching back cushions
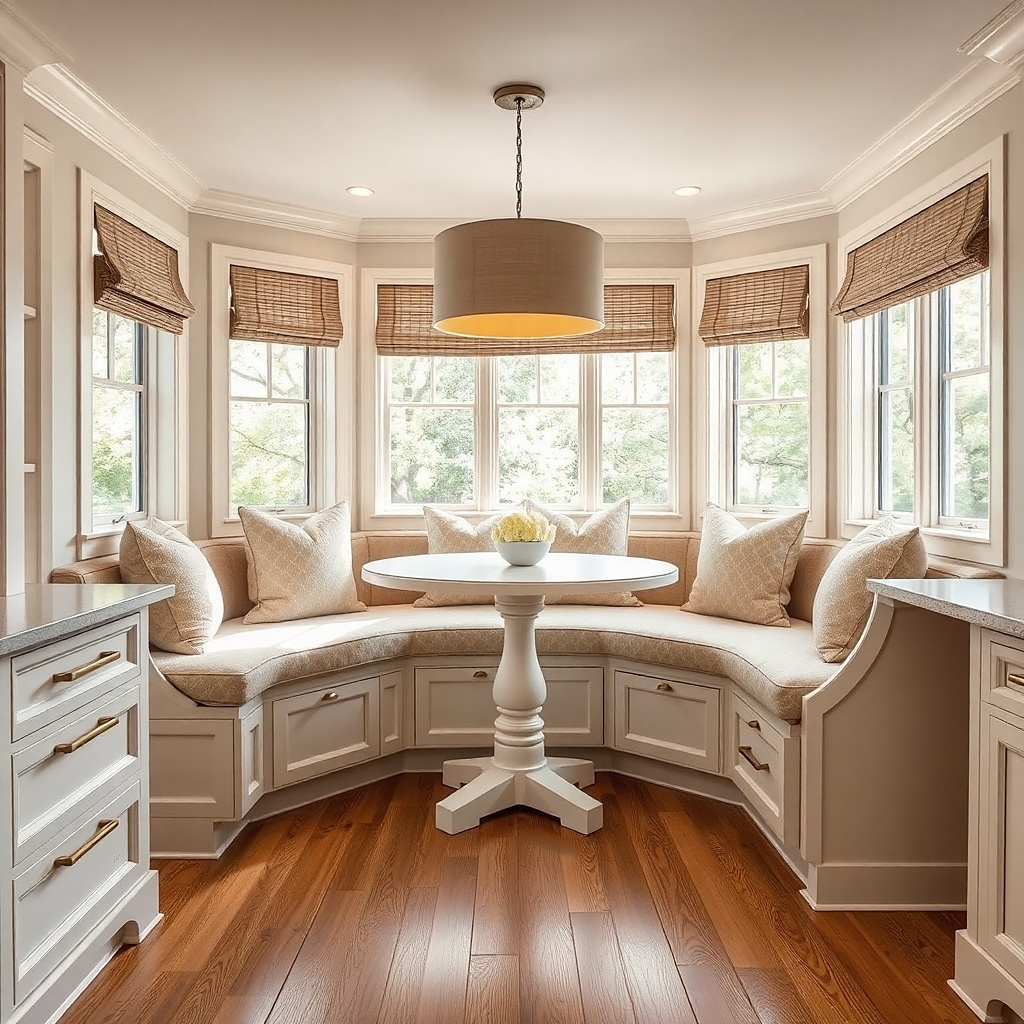
Bay windows have angled sides. A wrap banquette uses that geometry instead of fighting it, giving you a seat that feels like a small lounge tucked into the kitchen. Build a bench seat plus two side/back cushions that follow the bay angles, so your body naturally rests against something. Keep the upholstery in a crisp white, warm ivory, or light oatmeal for a bright kitchen look, then add subtle brass or champagne trim at the seams if your kitchen hardware is warm metal. This creates the “best seat” effect because it’s comfortable for lingering, not just eating.
Start by mapping the bay angles: measure each side panel angle and build cushions that match, rather than trying to force one flat cushion. Make the seat depth 16-18 inches and set the cushion height around 18-20 inches from the floor. Use foam density that holds shape (firm high-resilience) and cover with washable performance fabric. Install a back cushion support rail or wall cleat so the cushions stay aligned and don’t slide when someone leans back.
Try thisUse double welting along the seams it makes curved cushions look deliberate and modern.
Common mistakeDon’t skip back support; a seat-only bay looks pretty but feels awkward for longer meals.
5. Sculpted upholstered window seat with fluted edges
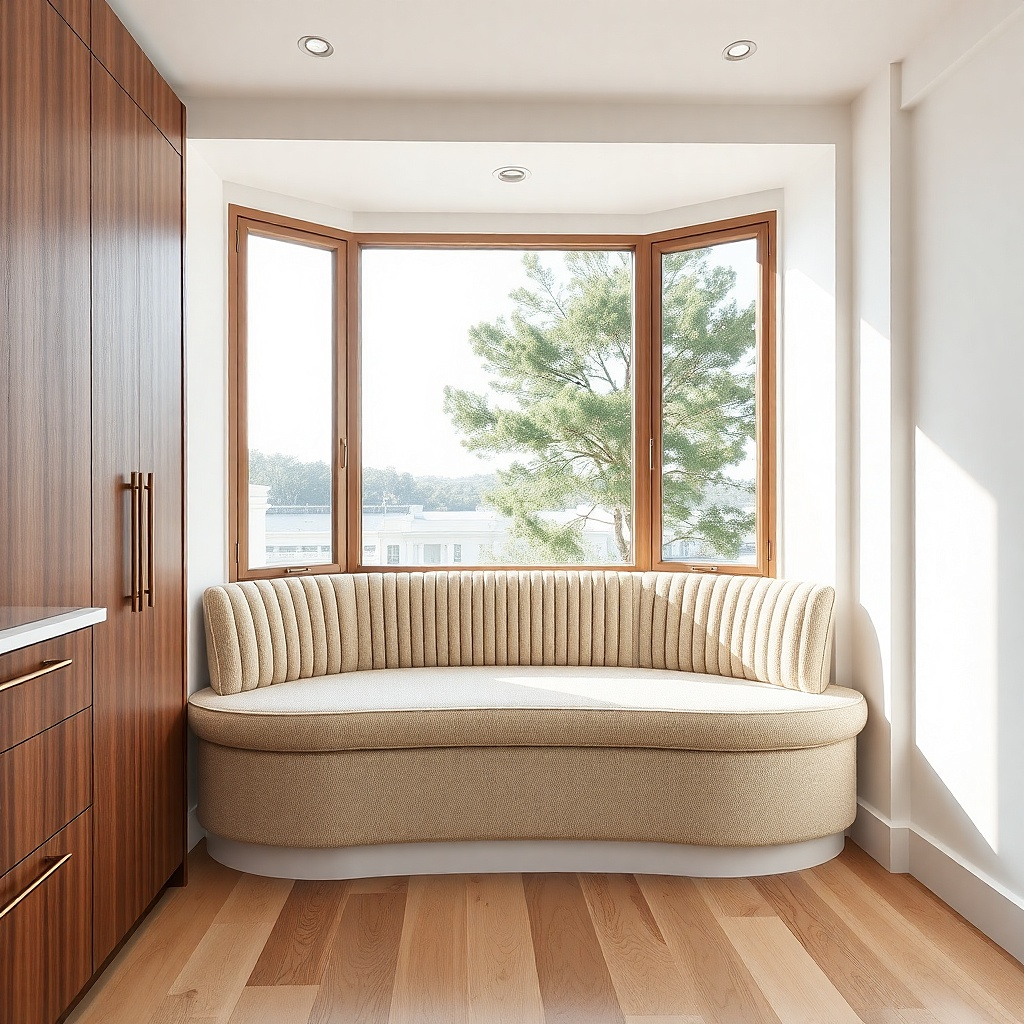
If you want modern without looking flat, fluted or ribbed front edges add a sculptural touch that photographs beautifully. Build a bench base in a neutral color like taupe, then wrap it in upholstery with subtle vertical ribbing on the front panel. Keep the seat cushion clean and solid so the ribbing is the only texture competing for attention. This works especially well with kitchens that have simple cabinetry and want one architectural moment. It solves the “bay looks like a plain window ledge” problem by giving the seat a distinct silhouette.
Choose a ribbed performance fabric or create the ribbing with foam strips and upholstery batting; aim for consistent rib spacing about 1-1.25 inches apart. Build the bench base with straight top edges so the upholstery lines stay crisp. Set seat depth to 16-18 inches, and keep the cushion thickness around 4-5 inches for a structured look. Finish with a narrow band of trim along the back edge so the seat looks framed, not messy.
Match the rib color to your cushion piping thread it makes the texture read intentional, not random.
Avoid glossy fabrics; in a window bay, sheen creates glare that flattens the rib pattern.
6. Matte concrete-look base with warm leather cushion
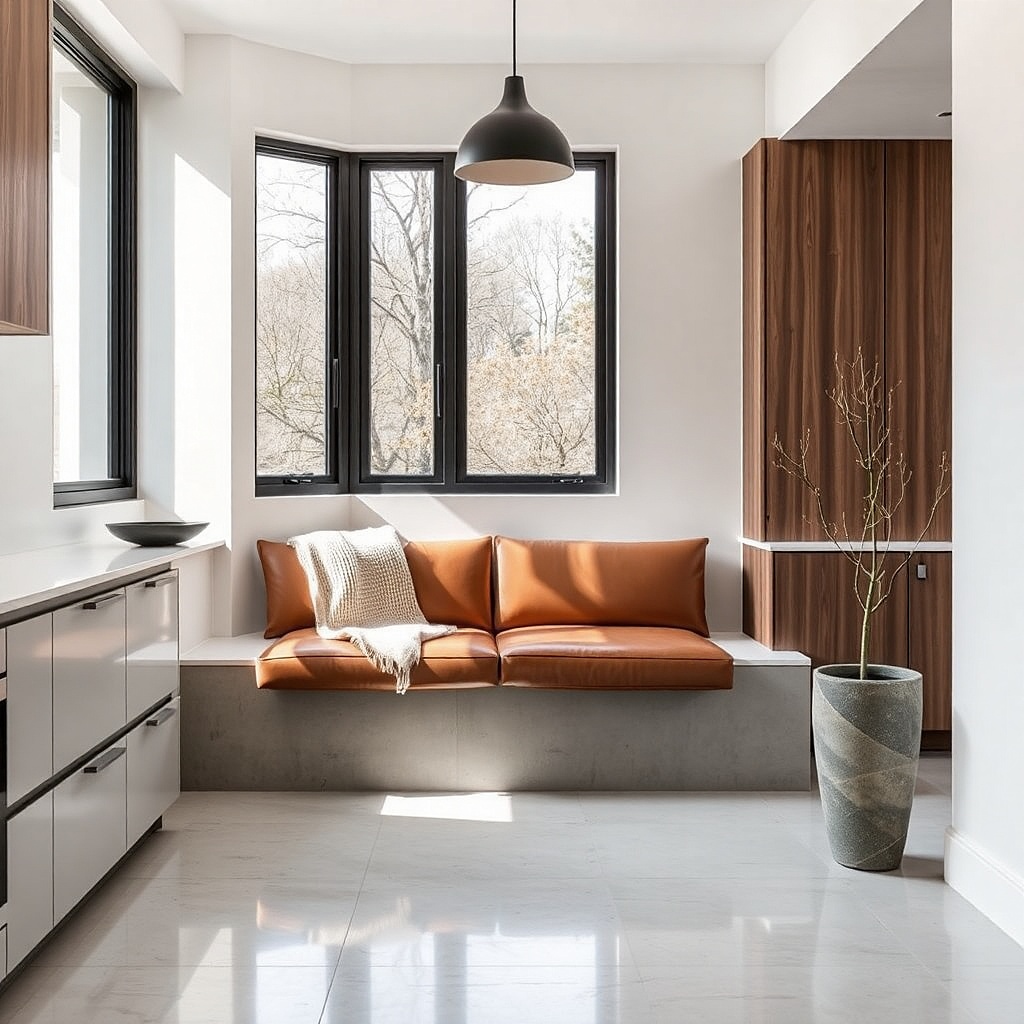
This is a modern contrast play: cool stone-like base with a warm, inviting cushion. Use a concrete-look finish on the bench base (painted and sealed for wipeability) in a soft greige or light cement gray. Pair it with a warm tan leather or high-quality faux leather cushion for a cozy seat that still reads sleek. This combination looks especially good in kitchens with dark countertops, black hardware, or stainless appliances. It solves the problem of modern kitchens feeling too cold — the leather warmth makes the bay feel like a place to sit, not just a design feature.
Build or install a bench base with a straight, square-front profile and seal the surface with a matte clear coat designed for painted furniture. Cut foam to a 16-18 inch depth and 18-20 inch seat height, then cover with leather or faux leather cushion panels. Add a removable cover option if you choose faux leather; if you choose real leather, plan on spot-cleaning with a leather-safe cleaner. Finish edges with a thin matching base trim so the concrete-look surface doesn’t look DIY.
Try thisAdd a small throw pillow in a woven texture (boucle or flat weave) in one warm color like cinnamon or camel.
Common mistakeDon’t go with a shiny concrete finish; it looks wet under window light.
7. Two-tone bench: painted base + stained wood top rail
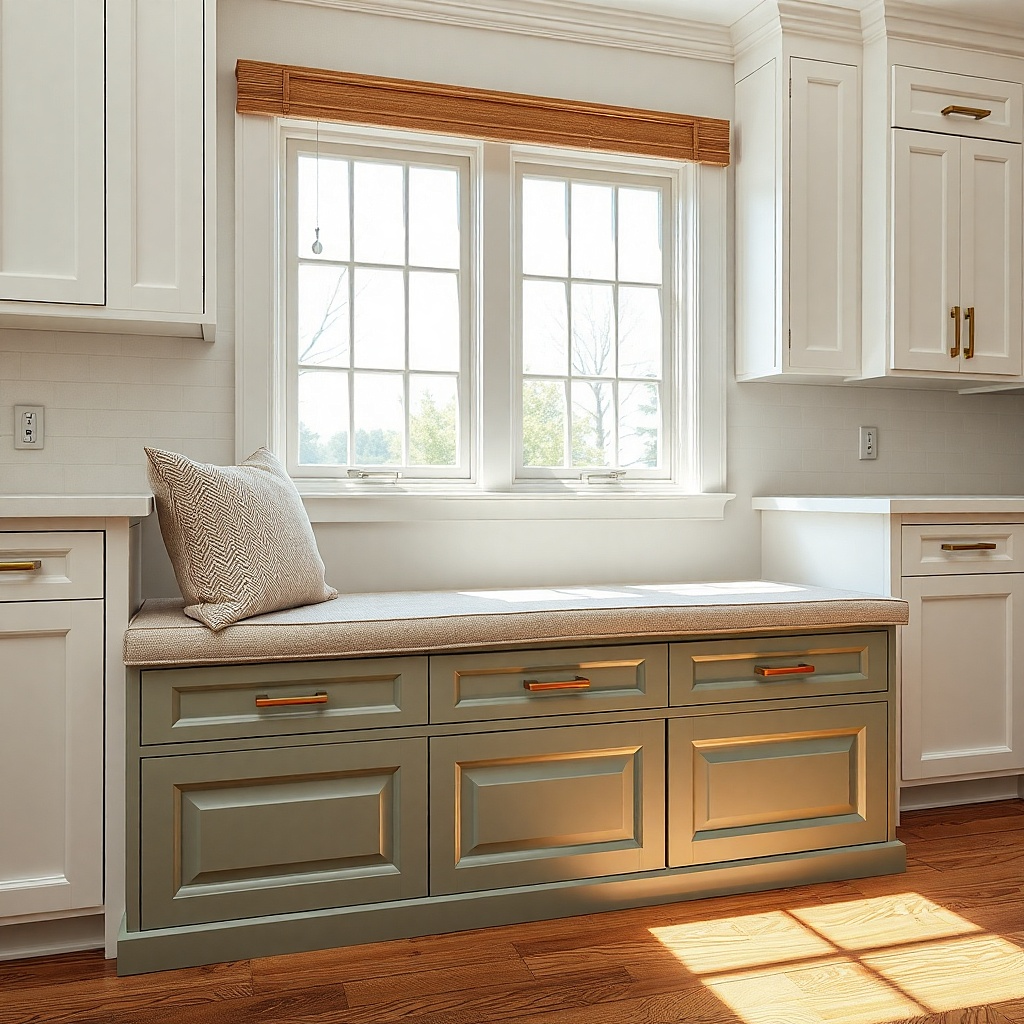
Two-tone millwork makes a bay window seat look custom without getting busy. Paint the base in the same color as your lower cabinets or island (soft white, light gray, or sage-leaning green), then add a stained wood top rail that runs along the seat front or back. The wood rail brings warmth and gives you a clean place to rest a small tray or plant pot. Pick wood tones that match your cabinet hardware undertones warm oak for brass, cooler ash for chrome. This idea creates a cozy seat because the eye reads layers: painted base for modern structure, wood for comfort.
Measure the bay width and decide whether the wood rail sits on top of the bench base or wraps the front edge; keep it slim at about 1.5-2 inches tall. Build the base first in MDF or plywood and paint it with a kitchen-grade cabinet paint. Stain the wood rail (clear or medium tone) and seal it with a wipeable topcoat. Install the rail with hidden screws or brad nails into a solid backing so it doesn’t wobble, then add a cushion that matches the painted base color for a seamless modern look.
Repeat the wood tone in one other kitchen element within 6 feet cutting board, open shelf edge, or utensil holder.
Avoid mixing three wood tones; two tones max keeps the bay from looking assembled.
8. Built-in window sill lighting and a reading seat vibe
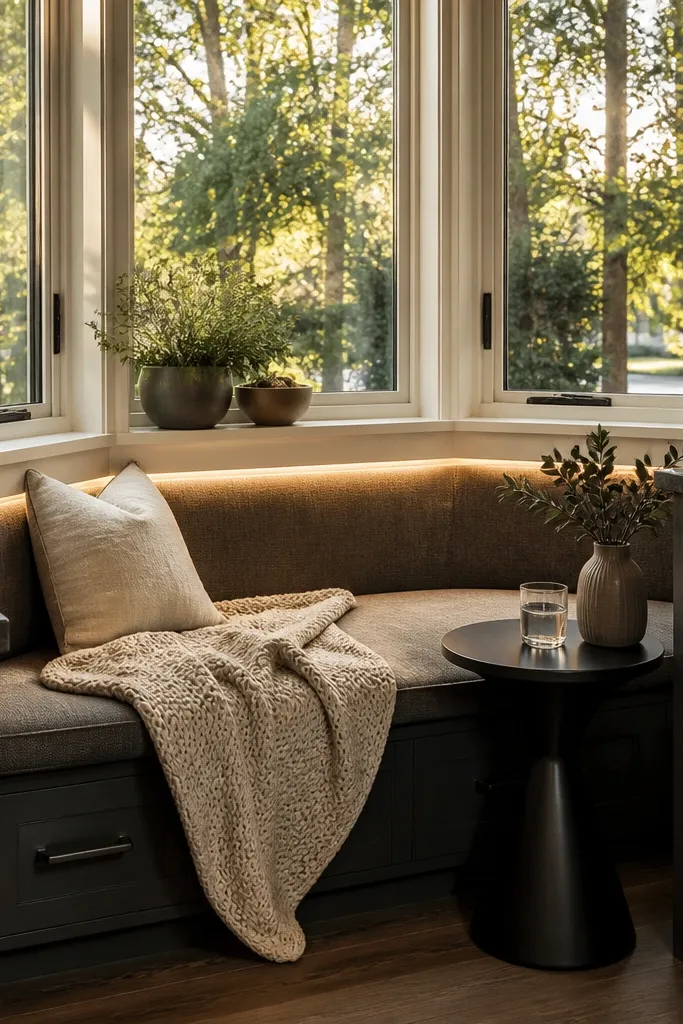
A bay seat feels cozier when the window area has light at seat level, not just overhead. Install a slim LED strip under the sill or inside a low valance so it washes the cushion and the backrest area with warm light. Pair it with a bench in a neutral upholstered fabric (gray, oat, or charcoal) and a simple cushion shape so the lighting becomes the star. This is modern because the light source is hidden and the effect is controlled. It solves the problem where bay seats look great in daylight but feel ignored after dinner.
Choose a warm LED color temperature around 2700K so it doesn’t look blue in kitchen lighting. Plan the wiring path before building the bench: run power to a junction box behind the bay trim and use a low-profile LED channel under the sill. Install a bench base with a recessed opening so the LED channel sits flush and doesn’t cast glare. Use a dimmer switch if you can — even a simple in-line dimmer makes the seat go from “task light” to “cozy light.”
Try thisPick a cushion fabric with a matte finish; it diffuses the LED glow and avoids harsh hotspots.
Common mistakeAvoid placing LEDs where they shine directly into eyes from the dining chairs.
9. Patterned cushion mix with solid backing panels
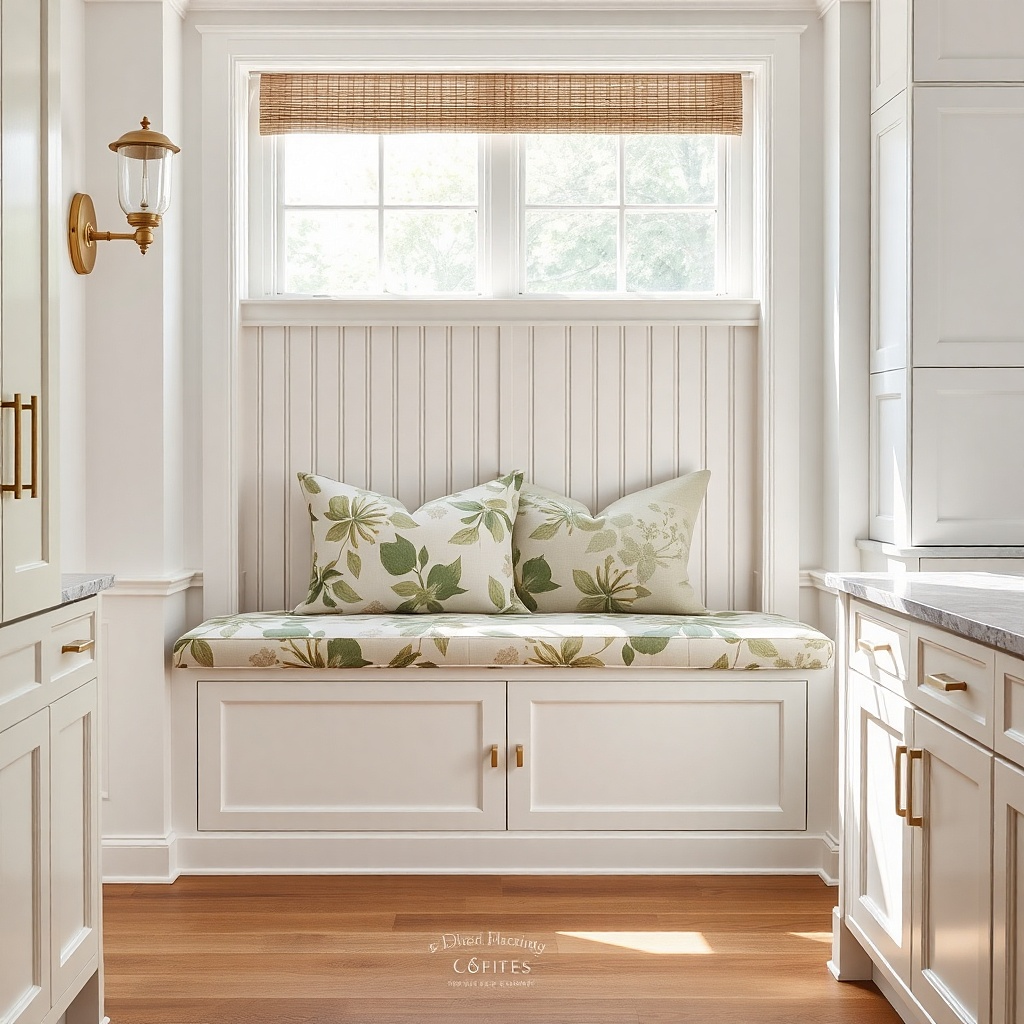
Modern doesn’t mean boring. The way to keep it good-looking is to limit the pattern to one or two pieces and make the rest solid. Use solid backing panels in a smooth white or soft gray, then add a seat cushion with a subtle modern pattern like micro-geo, ticking stripe, or a minimal abstract in two colors. Keep the back cushion solid so the pattern doesn’t fight the bay angles. This works in kitchens where you want personality but you don’t want the bay to look like it belongs in a living room. It delivers the “best seat” feel because the cushion looks inviting from across the kitchen.
Pick one pattern and one solid color from the same fabric line so they match undertones. Install solid panels first and keep them flush — this is what makes the pattern look intentional. For the cushion, build or buy a seat cushion that fits the 16-18 inch depth and 18-20 inch height targets, then add a patterned cover only on the seat. Use a removable cover so spills wipe off without ruining the look, and add one solid throw pillow in the same solid fabric as the backing panels.
Try thisTest pattern scale by laying the cushion fabric against the bay wall in daylight for 10 minutes; if it looks busy up close, swap to a smaller geo or stripe.
Common mistakeAvoid matching patterned curtains and patterned cushions; the bay will look visually noisy.
10. Dining bench with built-in tray storage and place-setting hooks
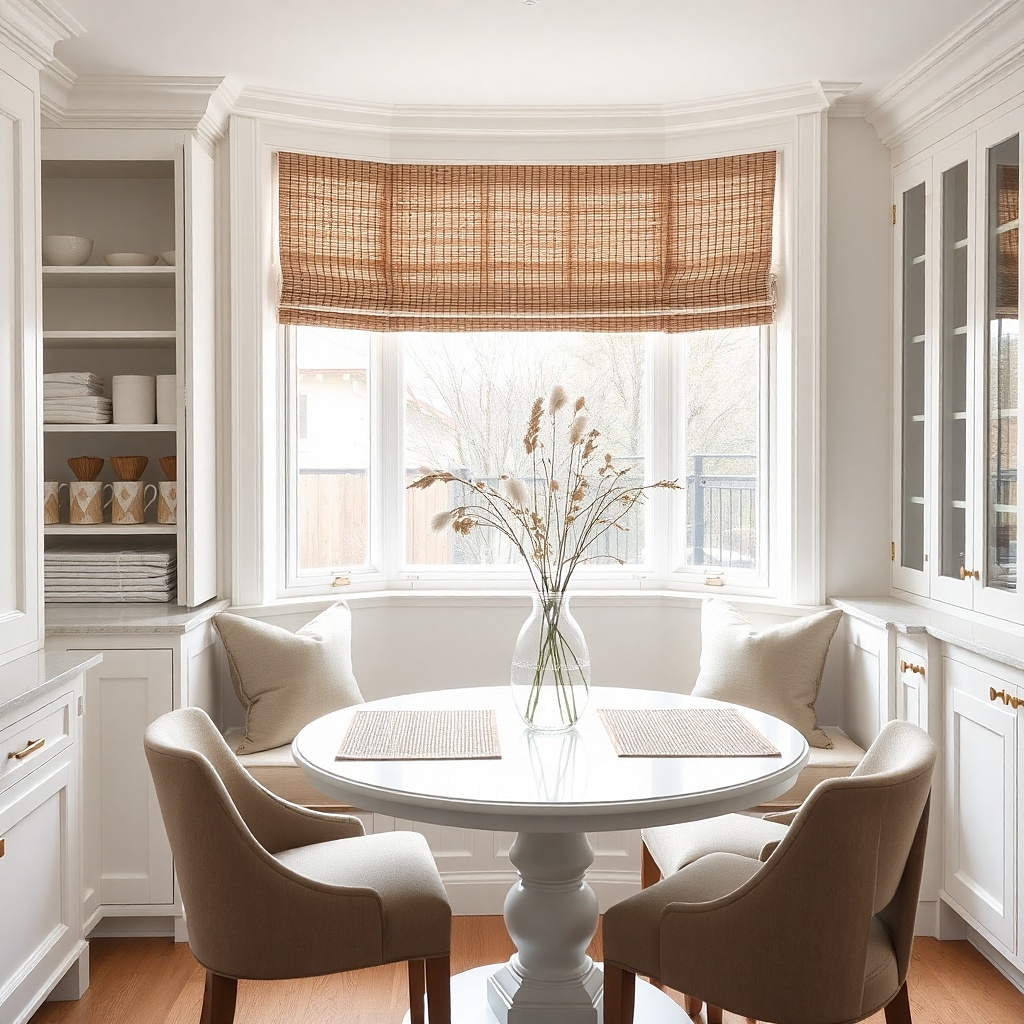
This is the “best seat” idea for people who actually host or do quick daily meals. Add shallow drawers or pull-out bins under the bench for trays, placemats, and extra cups, then install a neat row of hooks or a slim rail on the inside of the bay end panel for reusable napkin rings or place-setting organizers. Keep the exterior clean: flat-front doors in matte finish and a cushion in a solid neutral. The look stays modern because the hardware is minimal and the lines follow the bay. It solves the practical problem of where to put serving items so the seat can be used without turning the kitchen into clutter.
Plan the storage depth under the bench so you can fit standard placemats (around 18x13 inches) folded or stacked; aim for about 4-6 inches of usable height per bin. Install a pull-out drawer system or bins with soft-close slides if you want it to feel furniture-grade. Mount a slim rail with hooks on the vertical end panel so items hang neatly and don’t block the cushion. Finish with a cushion sized to 16-18 inches deep and 18-20 inches high, using wipeable fabric since this seat sees daily use.
Try thisUse one tray size as the “default” and design the storage around it; everything looks more organized when the system is consistent.
Common mistakeAvoid bulky knobs on the bench fronts; they break the clean, modern silhouette.