1. White stoneware trio with walnut lids
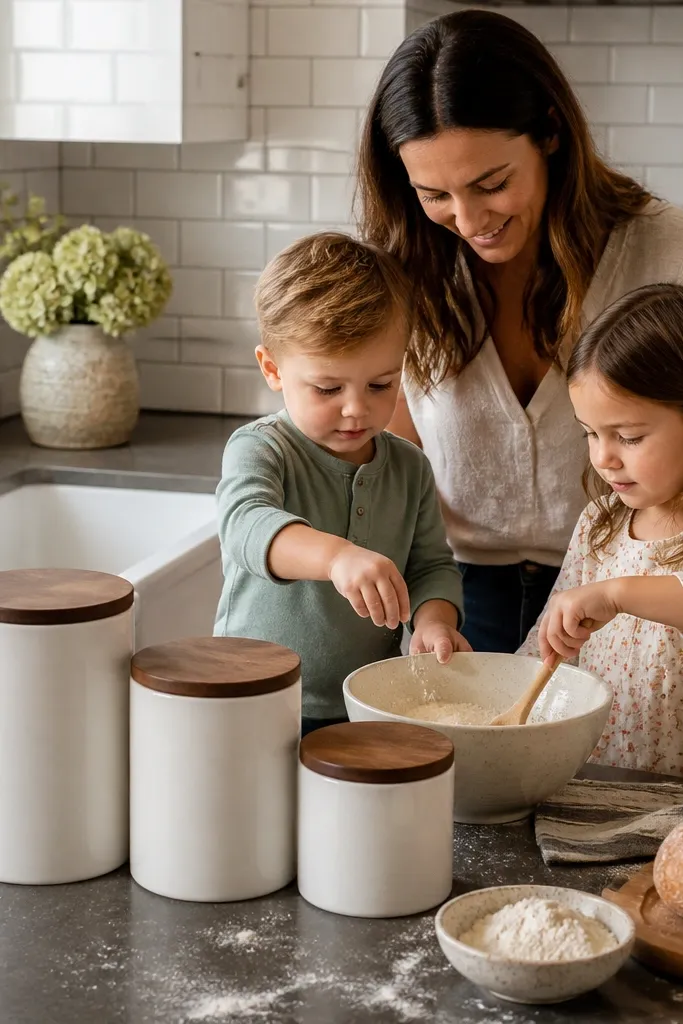
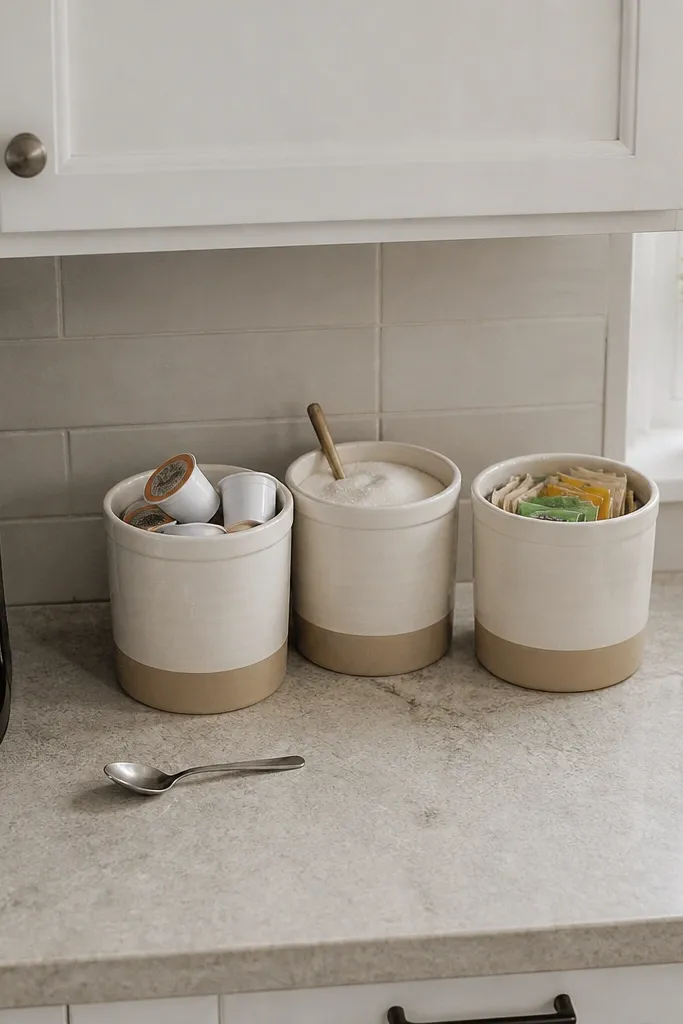
This is the safest good-looking choice for a busy counter because it calms almost any kitchen down. Use three matte white stoneware canisters in graduating heights — about 6, 8, and 10 inches — with flat walnut lids. The white body ties into sinks, trim, and backsplashes, while the medium-brown wood keeps the setup from looking sterile. It suits sugar, coffee, and tea bags on a breakfast counter, or flour, sugar, and oats near a baking corner. The shape reads clean in photos because the matte finish cuts glare and the wood lids add a warm horizontal line at the top of each piece.
Start by choosing one counter stretch at least 20 inches wide, ideally between the coffee maker and the wall or at the end of a run near the fridge. Then place the tallest canister at the back, the medium one slightly forward, and the smallest nearest the hand you reach with most; leave 1.5 to 2 inches between them so they do not blur into one block. Fill them with items you use daily and add simple labels in small black vinyl or embossed tape if more than one person cooks in the house. Expect to spend about $45 to $120 for a solid ceramic set with real wood lids, depending on thickness and seal quality.
Try thisChoose lids with a visible silicone ring. Loose lids ruin this idea fast because the canisters start looking decorative instead of useful.
Common mistakeSkip glossy bright-white canisters if your counter already reflects a lot of light from polished quartz or shiny tile.
2. Amber glass pantry jars on a black tray
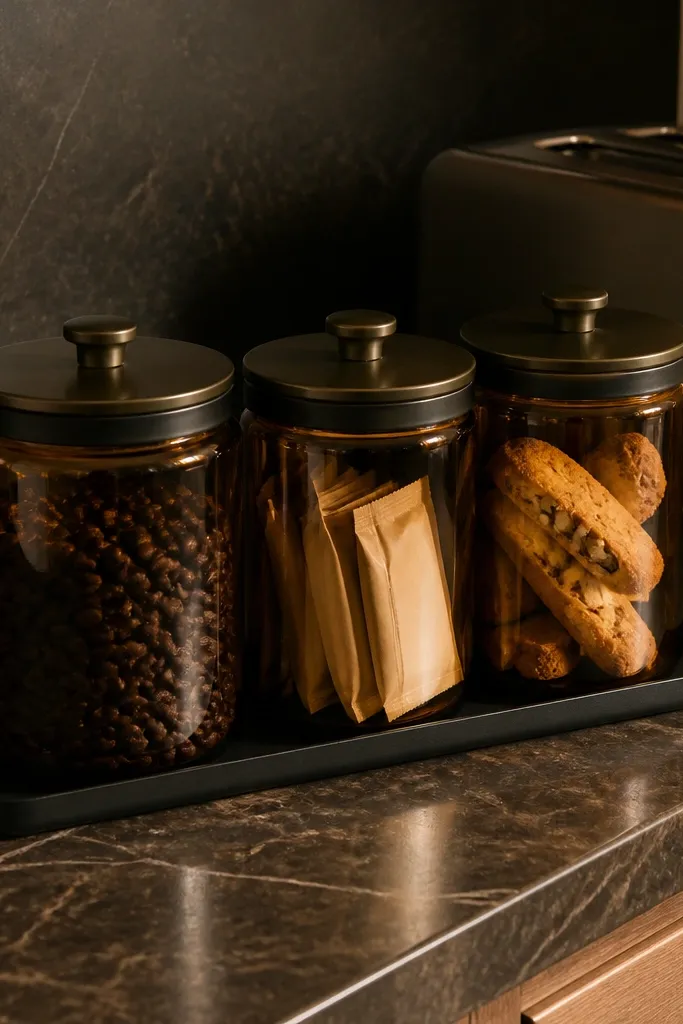
Amber glass has more presence than clear glass and hides half-used contents better. Put two or three straight-sided amber jars with black or dark bronze lids on a slim black tray, and the whole counter corner looks tighter at once. This setup is excellent for coffee beans, sweetener packets, biscotti, or tea sachets because the darker glass keeps visual noise down. Against white counters, the amber reads warm and graphic. Against soapstone or dark quartz, it catches light without disappearing.
Start with a tray around 14 by 6 inches so the setup has a boundary and the jars do not drift across the counter. Then choose jars between 5 and 8 inches tall with wide mouths, and line them up with the tallest at the back if they are not all the same height. Add only one extra object on the tray — a small spoon crock or sugar bowl — and stop there. A polished version of this look lands around $35 to $90 if you buy the jars separately and pair them with a metal tray.
Try thisUse matte black labels or a white paint pen low on the glass, not centered. Lower labels keep the lids and upper shape visible.
Common mistakeDo not mix amber, clear, and frosted glass in the same grouping unless the whole kitchen already has that layered look elsewhere.
3. Ribbed glass canisters for a light-catching coffee station
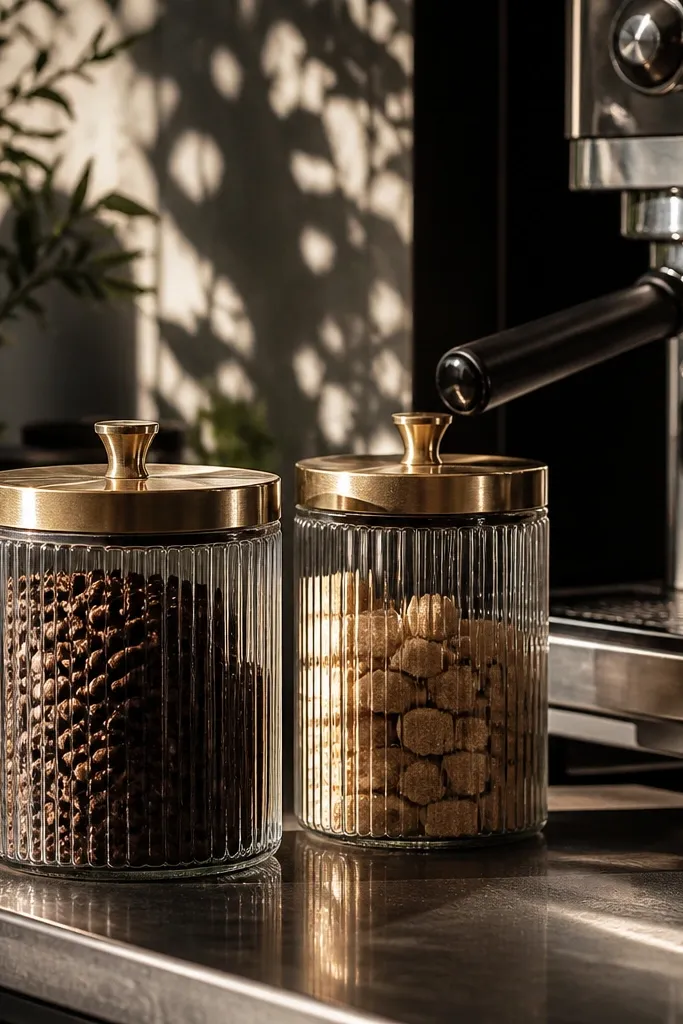
Ribbed glass has a sharper look than plain jars because it breaks light and gives the counter texture without adding color. Use two matching ribbed canisters with brushed brass or pale oak lids beside a coffee machine, one for beans and one for sugar cubes or ground coffee. The vertical fluting keeps the setup from looking flat, especially against a plain painted wall or slab backsplash. This idea works best in kitchens that already have warm metals, globe pendants, or cabinet hardware in brass. It feels dressier than mason jars but still practical enough for daily use.
Start by measuring the space between the coffee machine and the nearest outlet or wall return; you want at least 10 inches of open width. Then set the canisters on the side opposite the machine handle so you are not knocking into them every morning, and keep them 3 inches back from the counter edge. If you want to finish the corner, add a 6-inch marble spoon rest or a small stack of espresso cups behind them. Good ribbed canisters with fitted lids run about $30 to $75 for a pair.
Try thisFill ribbed glass almost full. Half-empty ribbed jars look messy because the grooves exaggerate the uneven line of the contents.
Common mistakeSkip this look if your backsplash already has strong pattern or heavy veining that fights with the ribbed texture.
4. Oatmeal ceramic canisters on butcher block
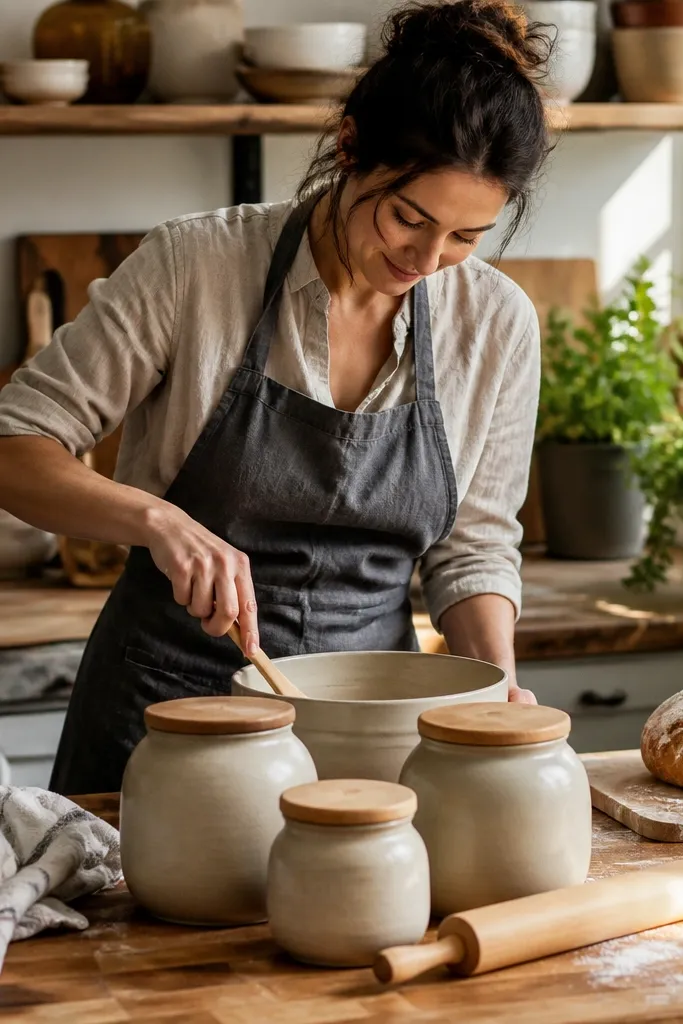
On butcher block, stark white can feel too sharp. Oatmeal, sand, or light greige ceramic sits better because it echoes the wood without matching it too closely. Use squat canisters with rounded shoulders and unlacquered wood lids for flour, sugar, and sea salt. The softer body color gives the counter a bakery feel that suits cottage, shaker, and quiet modern kitchens. It is especially good near a stand mixer or prep area where you want ingredients in reach but do not want the counter to read cluttered.
Start with two medium canisters around 7 inches tall and one smaller one around 5 inches, since lower profiles suit wood counters and keep sightlines open. Then place a wood cutting board upright behind the grouping to give the canisters a backdrop and stop them from visually sinking into the counter. Keep the set 4 to 6 inches away from the sink splash zone so the wood lids stay dry. A nice version of this setup costs about $50 to $140 depending on ceramic thickness and lid quality.
Try thisPick a ceramic with tiny speckles or a hand-thrown look if the kitchen has natural wood grain. Flat uniform beige can look cheap fast.
Common mistakeDo not pair warm oatmeal ceramic with cool gray-washed wood lids. The undertones fight each other.
5. Tall black canisters for a white quartz counter
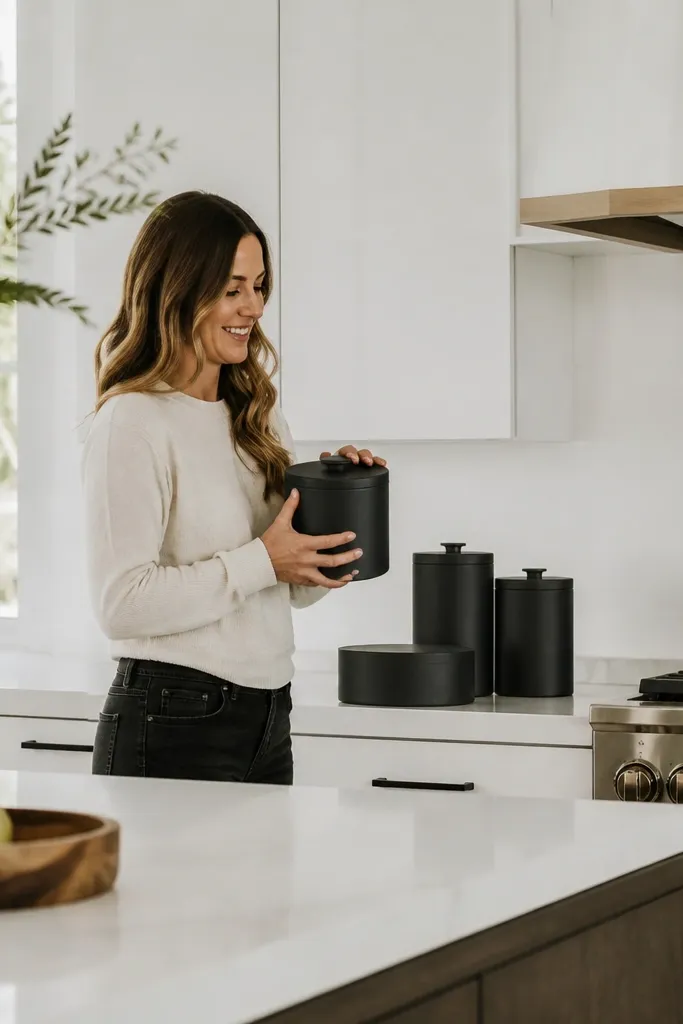
If the kitchen already feels pale and washed out, matte black canisters fix it in one move. Use two tall cylinders and one shorter wide canister in matte black metal or ceramic on a white quartz counter. The dark silhouettes ground the space and make the counter look styled instead of blank. This look suits kitchens with black windows, black pendants, or dark faucet hardware because it repeats that line at counter level. It is best for coffee pods, tea, and sugar rather than flour, since taller black canisters are harder to scoop from if the opening is narrow.
Start by placing the tallest piece closest to the backsplash so it reads like an anchor, then stagger the other two forward by 1 to 2 inches. Keep this grouping on a stretch with at least 16 inches of breathing room around it, since black objects look heavier and need space. Add one softening element nearby — a small oak utensil crock or a pale wood board — so the corner does not turn harsh. Expect to spend $40 to $110 for a matte black set that does not chip at the rim.
Choose black with a dead-matte or satin finish. Glossy black shows every fingerprint and starts looking greasy beside a stove.
Skip oversized black canisters under upper cabinets mounted low. They make the whole wall feel shorter.
6. Marble and brass canisters for a polished baking corner
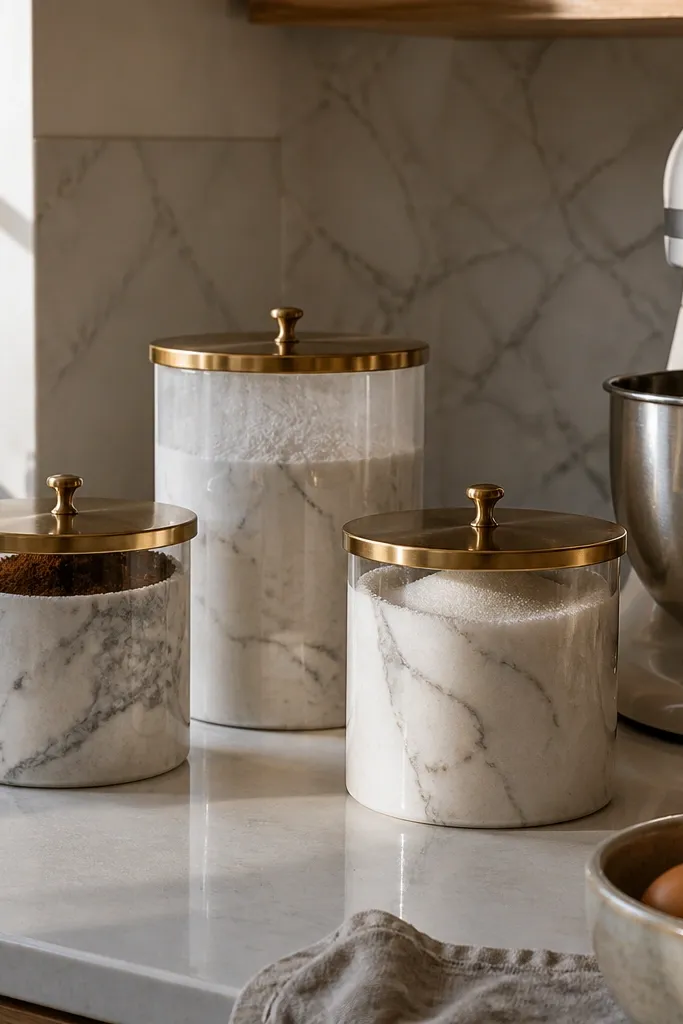
This idea has a dressier look, but it still earns its space if you bake several times a week. Use white marble or marble-look resin canisters with brushed brass lids for sugar, flour, and cocoa near the mixer. The stone body picks up light from quartz or marble counters, while the brass lid gives a clean warm edge at the top. It looks best in kitchens with slab backsplashes, cream cabinets, or classic brass hardware. The effect is neat and bright, with enough weight that the setup never looks flimsy.
Start with one large canister for flour around 9 inches tall and two smaller pieces around 6 to 7 inches for sugar and cocoa or sprinkles. Then group them to the side of the mixer, not behind it, so the lids open fully and the canisters stay usable. If you choose real marble, add clear felt pads underneath to stop scratching and to make sliding easier during wipe-downs. A full set ranges from about $60 for marble-look resin to $180 or more for solid stone.
Use brass that leans brushed, not mirror-shiny. Brushed brass looks cleaner next to flour dust and fingerprints.
Do not cram marble canisters into a tiny corner with patterned tile. Heavy material needs visual space.
7. Clear apothecary jars for colorful dry goods
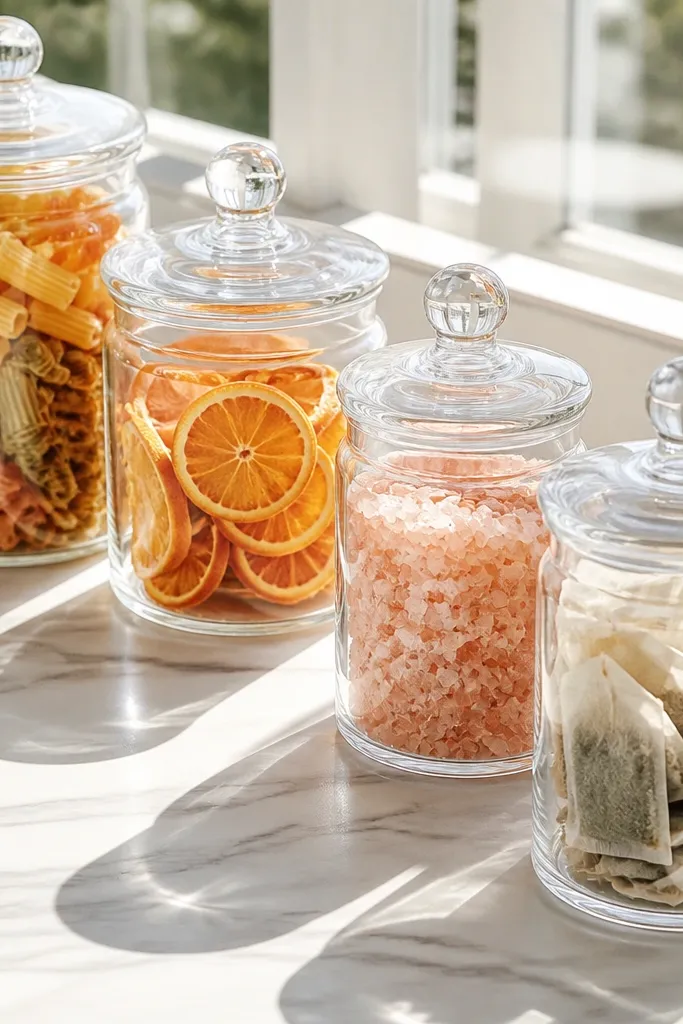
Clear glass works best when the contents themselves are attractive. Fill apothecary jars with striped pasta, dried citrus slices, pink salt, or wrapped tea sachets and they become part storage, part color accent. This is a strong choice on open, airy counters where light can pass through the glass and keep the area from feeling heavy. The rounded lid shape gives a softer old-kitchen line than straight modern canisters. Use this for items that stay neat inside the jar, not powdery staples that coat the glass.
Start by choosing two jars with the same diameter but different heights, such as 6 and 9 inches, so the pair looks related instead of random. Then fill them almost to the shoulder and turn the best-looking side of the contents forward; striped pasta and tea sachets benefit from that extra minute of arranging. Place them beside a bowl of lemons or a wood board, not next to another transparent object like a glass soap dispenser. A good pair of clear apothecary jars costs about $25 to $70.
Try thisUse a funnel for small dry goods. Clean glass with a microfiber cloth after filling or every smudge will show in daylight.
Common mistakeSkip flour, powdered sugar, and anything dusty unless you enjoy wiping the inside walls constantly.
8. Low ceramic salt cellar and olive jar by the stove
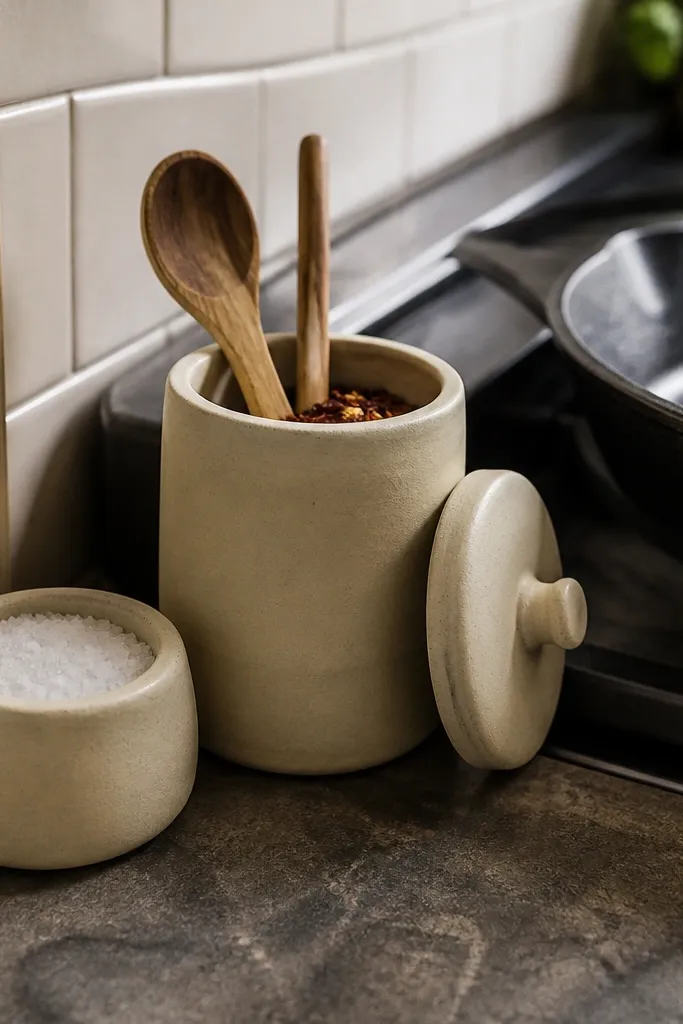
Not every canister setup needs height. Next to the stove, low pieces work better because they stay out of the way and feel built for cooking. Pair a wide-mouth ceramic salt cellar with a matching lidded jar for wooden stir spoons, chili flakes, or garlic bulbs. The look is grounded and practical, especially on a narrow strip between the range and backsplash where tall containers would crowd the space. In photos, the lower line also lets a statement range hood or tile pattern stay visible.
Start by giving this setup a footprint no wider than 10 to 12 inches so you keep room for a spoon rest and oil bottle. Then place the salt cellar closest to your dominant hand and the second jar just behind or beside it, with enough space to grab pinches without bumping the lid. Choose glazed ceramic that wipes clean with one pass because this zone catches grease. This is one of the cheaper ideas here — about $20 to $55 for both pieces.
Pick a salt cellar with a notch or half-open shape if you cook daily. A fully sealed lid slows you down at the stove.
Do not put fabric-lined baskets or raw wood canisters right beside a burner where grease settles fast.
9. Smoked glass tea canisters beside the kettle
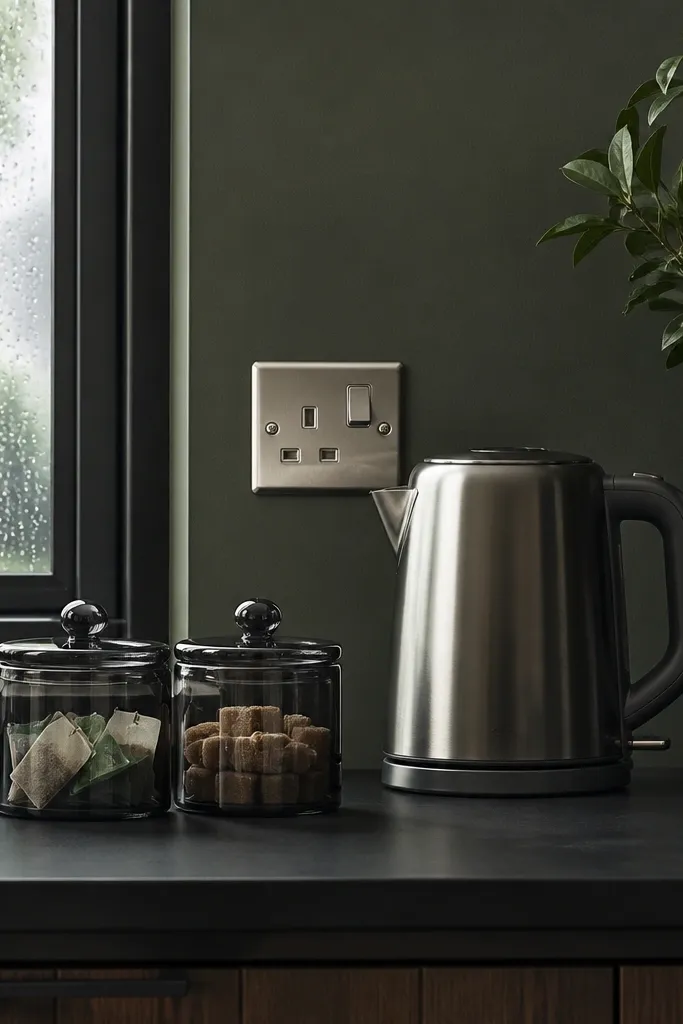
Smoked glass has a moodier, cleaner look than clear glass, especially in kitchens with dark counters or moody paint. Use two small smoked glass canisters with tight lids for tea bags, sugar cubes, honey sticks, or drink stirrers beside an electric kettle. The tint hides mixed packaging better than clear glass, so even ordinary tea bags look tidier. This is a smart move for a tea corner in a small apartment kitchen where every object stays in sight. The result feels intentional without needing much space.
Start with canisters around 4 to 6 inches tall so they fit under upper cabinets and beside the kettle without crowding the steam path. Then place them on a small stone or metal coaster tray to protect the counter from drips and to keep the grouping from spreading. Keep one canister for sweetener and one for tea so the shapes stay simple and the contents stay easy to find. Expect to spend $25 to $65 for the pair and a small tray.
Try thisChoose smoked glass with a brown or gray tint that matches your hardware. Blue-black smoke can look cold against warm brass or oak.
Common mistakeSkip cork lids here. Steam from the kettle dries them out and they start shedding crumbs.
10. Slim square canisters for a narrow counter run
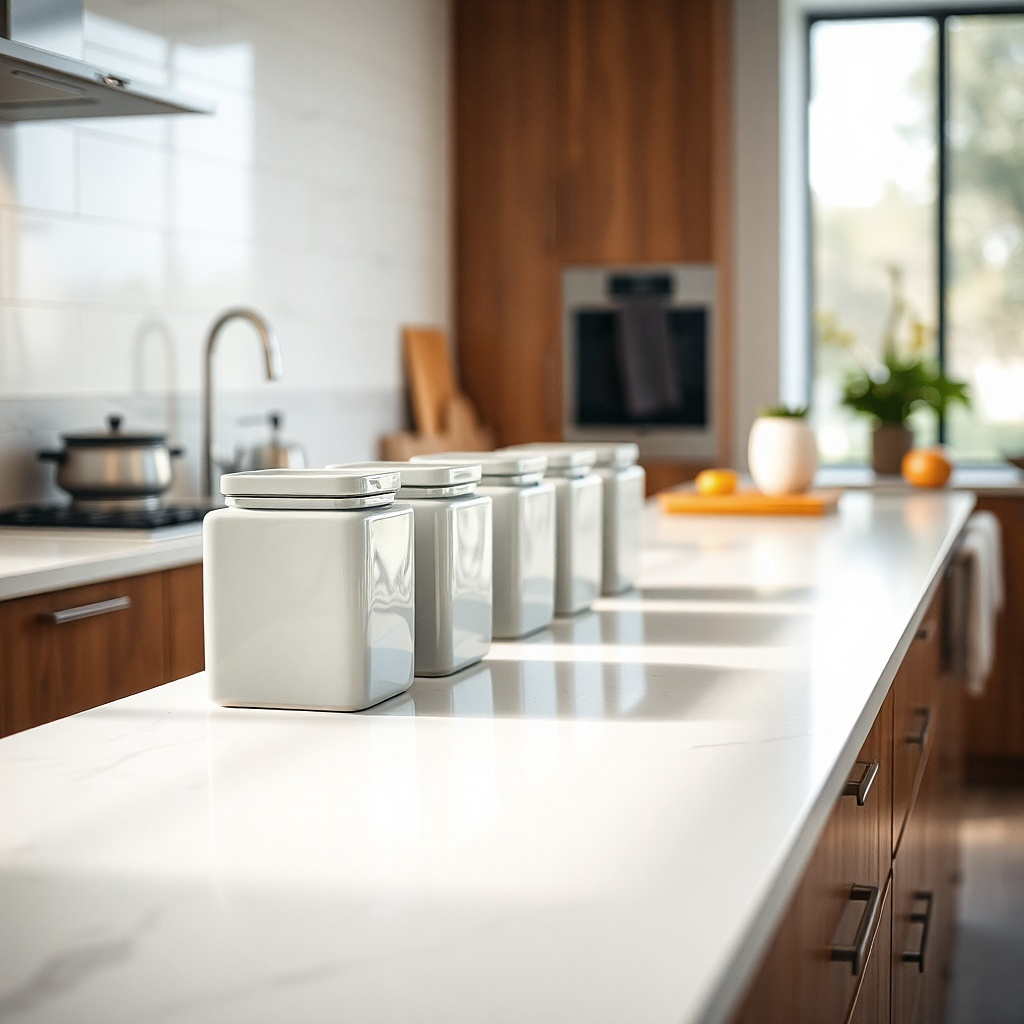
Round canisters waste room on tight counters. On a narrow run between the sink and fridge or beside a wall oven, slim square canisters use the footprint better and look neater from the side. Choose three pieces in enamel, powder-coated steel, or straight-edged ceramic, each about 4 to 5 inches wide. The flat fronts create a tidy line that suits galley kitchens and newer apartments where every inch matters. This setup is ideal for coffee pods, sweetener packets, tea bags, or snack bars that would otherwise scatter across the counter.
Start by measuring the exact width you have and subtracting 2 inches so the canisters never touch the wall on one side and the next appliance on the other. Then line the canisters up flush at the front or flush at the back; do not split the difference, because that is what makes small counters look messy. If the lids are all the same height, add a narrow cutting board behind them to break the straight line. A practical square set costs about $30 to $85.
Front-facing labels work best on square canisters because the flat face reads clearly from across the kitchen.
Do not buy square canisters with tiny lid knobs if you have upper cabinets close above. They are awkward to open in a cramped spot.
11. Handmade speckled jars with a linen label look
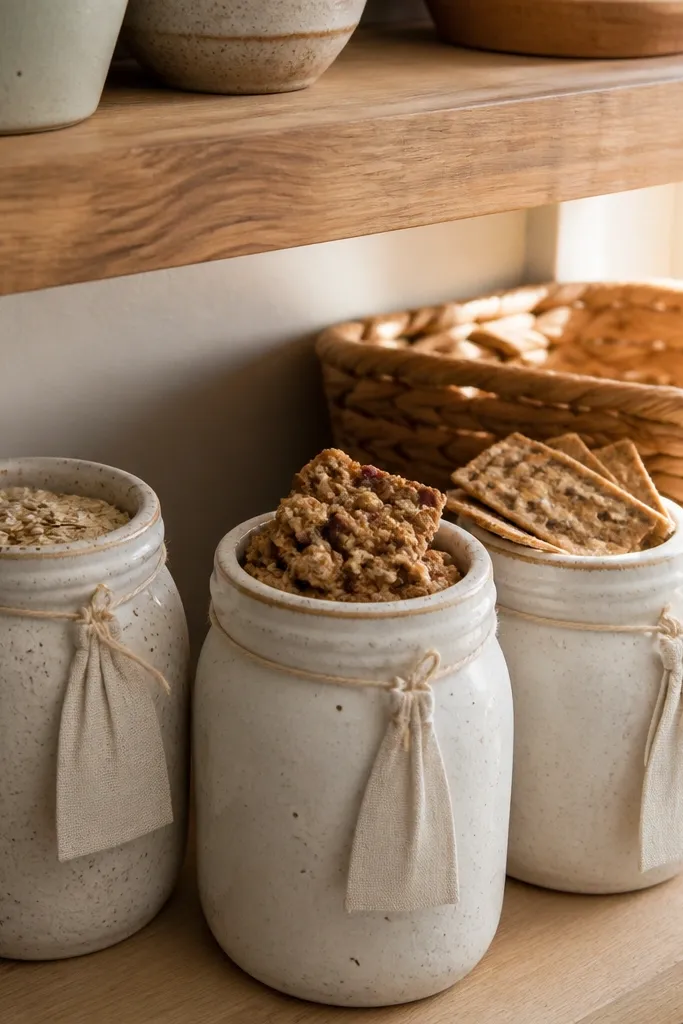
For kitchens that lean soft and textured, handmade-looking speckled jars beat factory-slick canisters every time. Choose two or three off-white stoneware jars with visible speckles, slightly uneven rims, and simple linen or cotton tags tied at the neck. They suit oats, granola, coffee, and snack crackers on counters with plaster walls, zellige tile, or natural oak cabinets. The slight irregularity keeps the setup from feeling too matched. It reads warm, quiet, and lived-in without turning rustic in the themed sense.
Start with jars in one clay family — cream with brown speckles, not a mix of cream, pink, and gray. Then keep the tags small, around 1 by 2 inches, and handwrite in a dark brown or black marker so the labels look useful rather than decorative. Group the jars near a toaster or breakfast nook with a folded tea towel underneath only if the counter material feels cold and shiny. Handmade-style pieces range from about $40 to $130 for a set depending on the ceramic source.
Try thisUse the same string or ribbon on every tag. Mixed twine, leather, and fabric ties make the grouping look accidental.
Common mistakeSkip oversized script labels. They drag this look into craft-fair territory.
12. Glass and oak canisters tucked into a corner tray
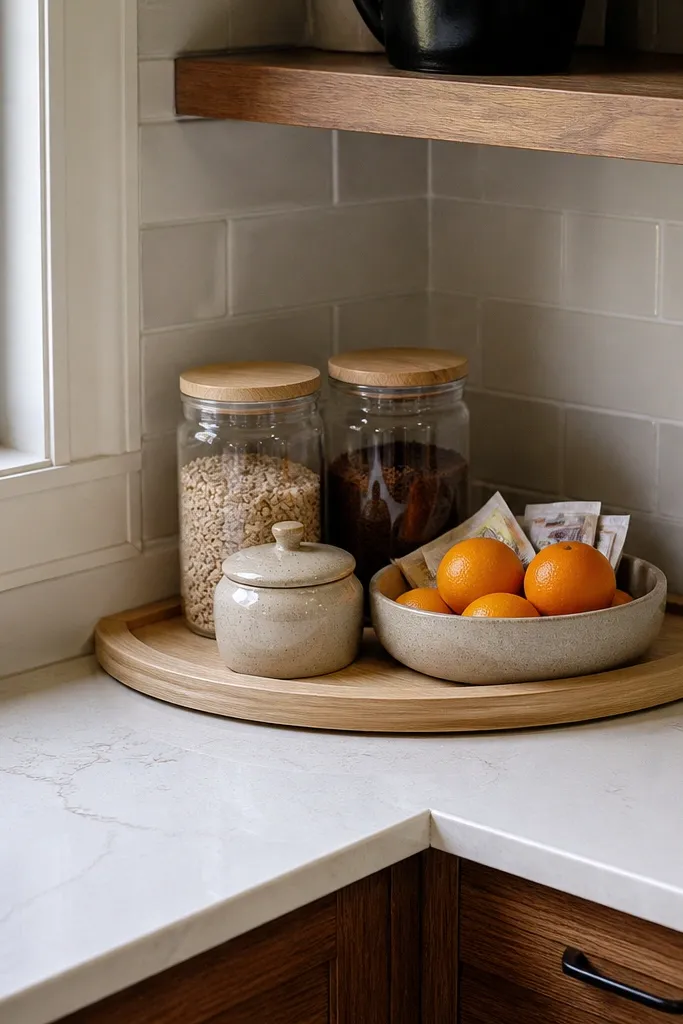
A corner tray setup solves the awkward dead space where two counter runs meet. Use a quarter-circle or rectangular tray with two clear glass canisters, one small crock, and one low bowl for packets or fruit. The tray makes the corner feel planned instead of leftover, and it keeps daily essentials in a compact zone. Glass and oak are the best material pair here because they stay light enough for a corner that already has visual weight from two walls or two backsplash lines. This is excellent for sweeteners, coffee, stirrers, and loose tea.
Start with a tray no deeper than 10 inches so you can still wipe behind it and reach outlets if needed. Then place the tallest item in the deepest part of the corner, the second canister to one side, and the crock or bowl at the open edge where your hand reaches first. Keep the total item count to four pieces max or the corner turns into a dumping ground. This look costs about $35 to $95 depending on the tray material and jar size.
A tray with a 0.5- to 1-inch lip looks better than a flat board here because it visually contains small items.
Do not fill every inch of the tray. Empty space is what makes a corner setup look styled instead of stuffed.