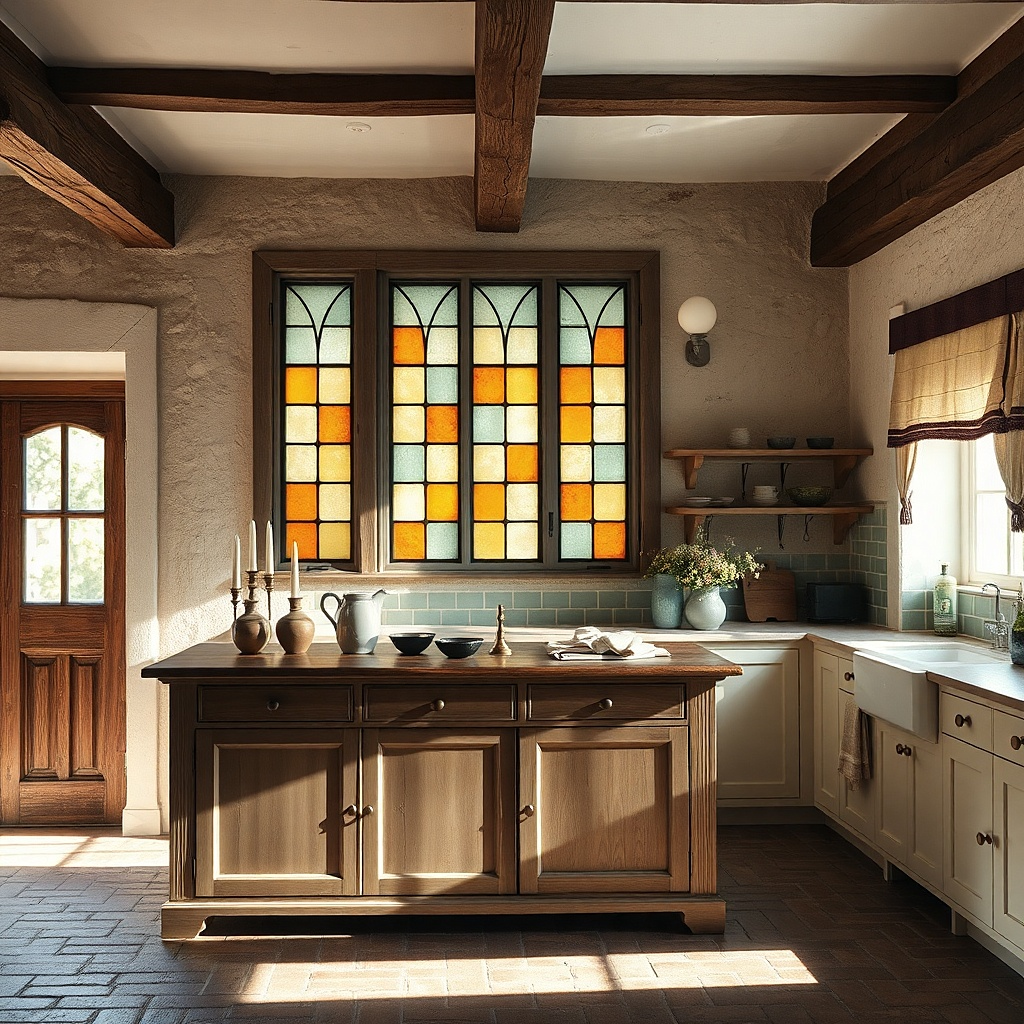
1. Blackened Tin Recipe Sign Over the Table
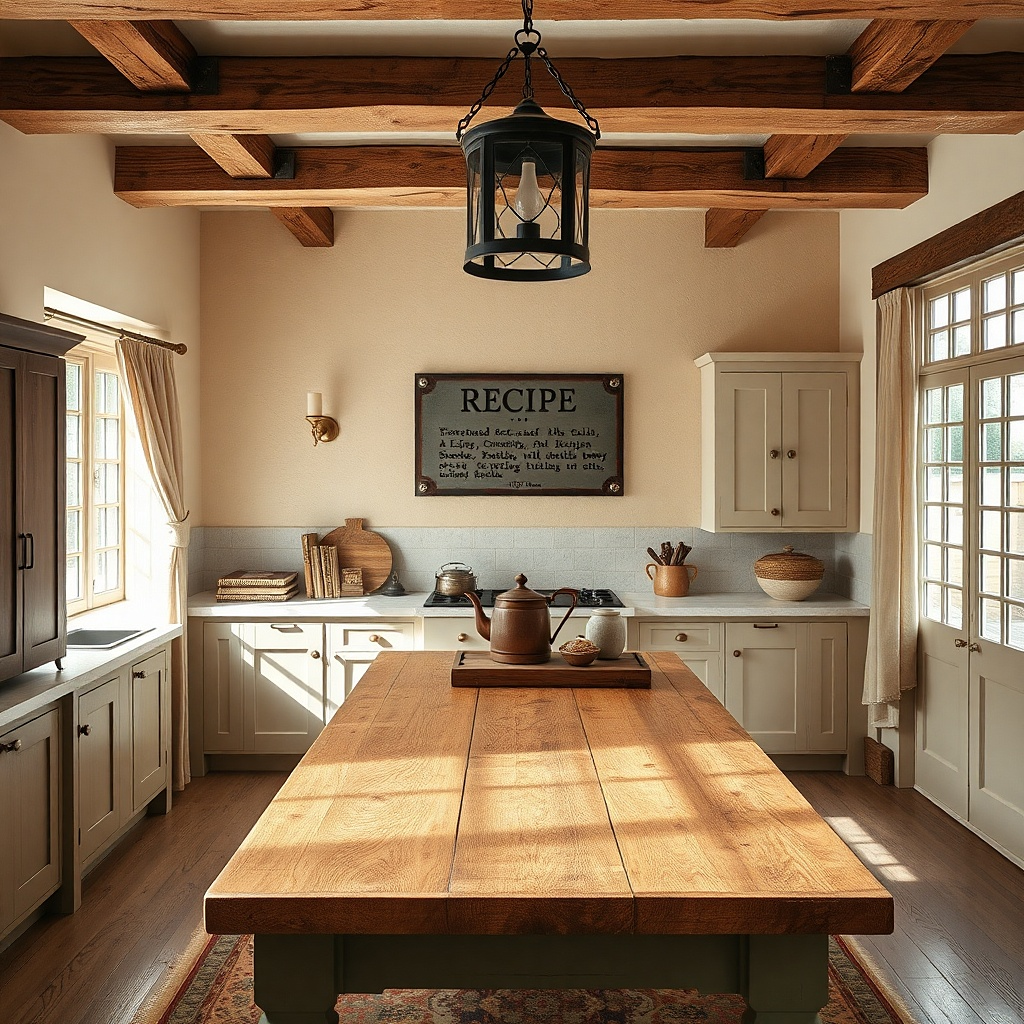
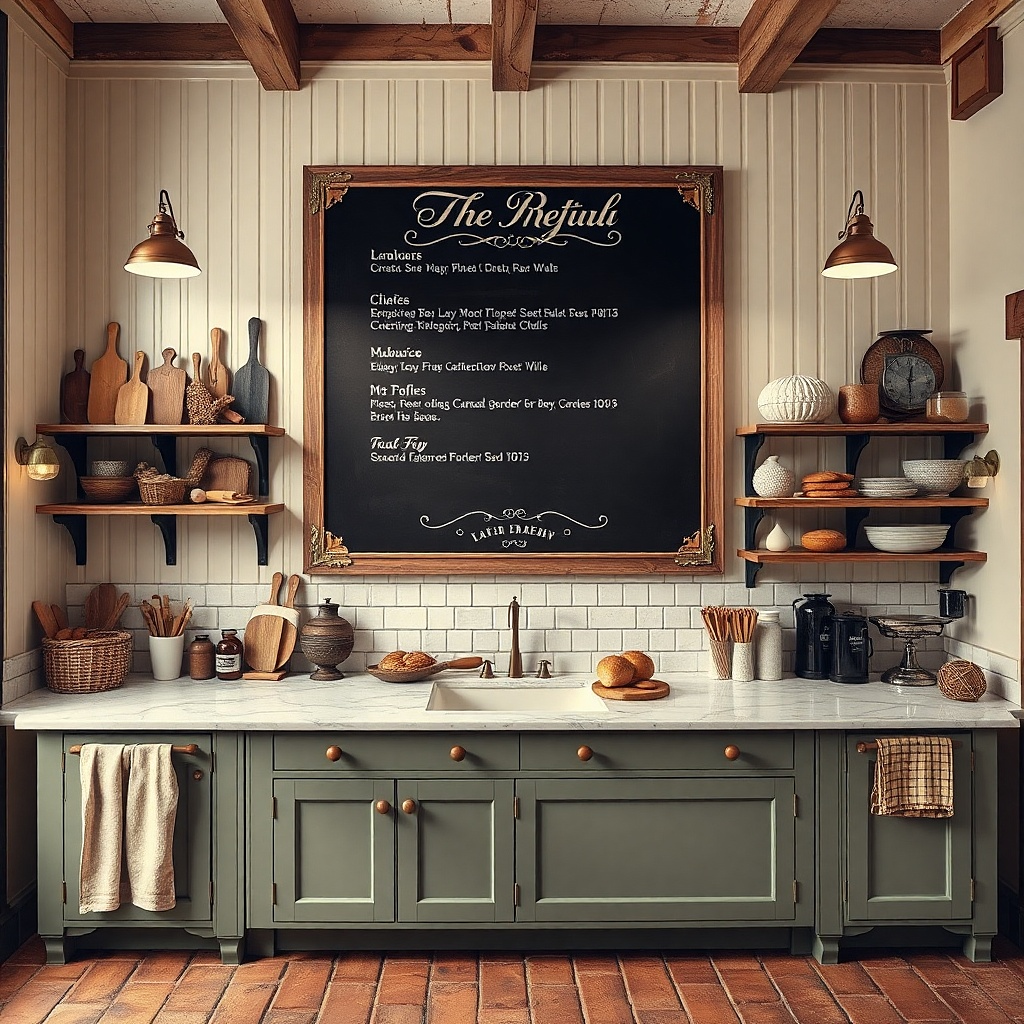
A blackened tin recipe sign gives you old-world warmth without looking messy. The aged metal finish reads vintage, and the darker color grounds lighter cabinets and backsplashes. Hang it centered over the table so it becomes the wall’s focal point, then let the sign’s cream lettering echo your plateware or table linens. This works especially well when your kitchen has lots of white space the tin adds shadow and texture you can see from the doorway.
Start by measuring the table width. Choose a sign that spans about 60-70% of the table width, then hang it so the bottom edge lands about 65-70 inches from the floor. Use a stud finder and mount through the sign’s hanging tabs or brackets. If the sign is heavy, add a second screw on the back edge for stability. Plan for $25-90 depending on size and whether it’s real tin or printed metal.
Try thisMatch the sign color to something real in the room even a single cream runner or light ceramic plate makes the lettering look intentional.
Common mistakeAvoid hanging a tiny tin sign too high; it will look like an afterthought instead of a centerpiece.
2. Gallery Frame Trio of Botanical Prints
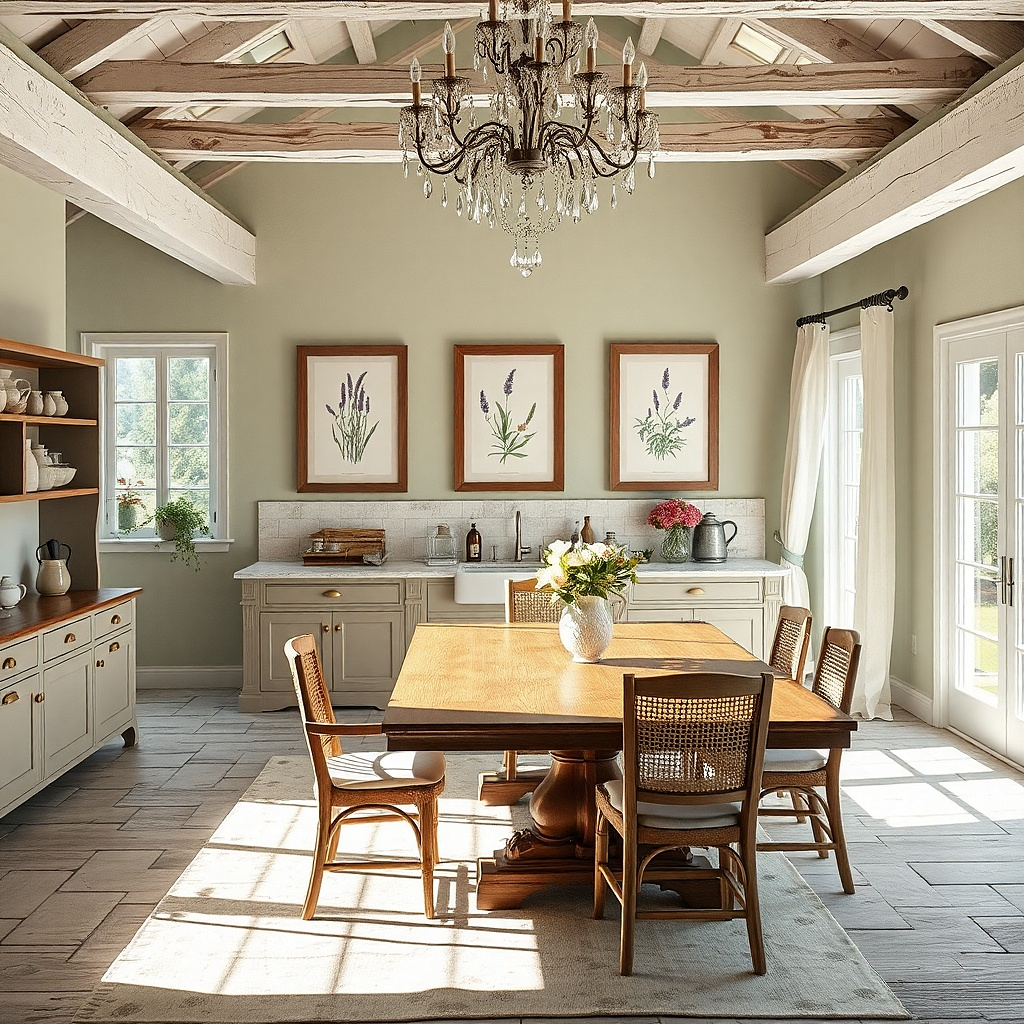
Botanical prints bring that farmhouse-vintage feel while staying clean and readable. The key is choosing prints with muted greens, warm browns, and off-white paper so they don’t fight with modern cabinetry. Use matching frames in a satin black or distressed wood finish to keep the look coherent. This set is ideal for kitchens with neutral walls because it adds color through art, not clutter.
Pick three prints that share the same paper tone and line style. Choose frames that are 11x14 or 12x16 inches each, and set them in a straight line or a gentle stagger. Hang the center frame first at about eye level, then place the left and right frames with 2-3 inches between frame edges. Use glass or plexi if you’re near cooking steam. Budget $60-200 for frames and prints depending on where you source them.
Use the backsplash color as your guide if your tile has a warm beige undertone, choose prints with warm yellow-green leaves.
Don’t mix wildly different print styles; botanical line art plus busy watercolor often reads mismatched.
3. Vintage Wooden Cutting Boards as Wall Decor
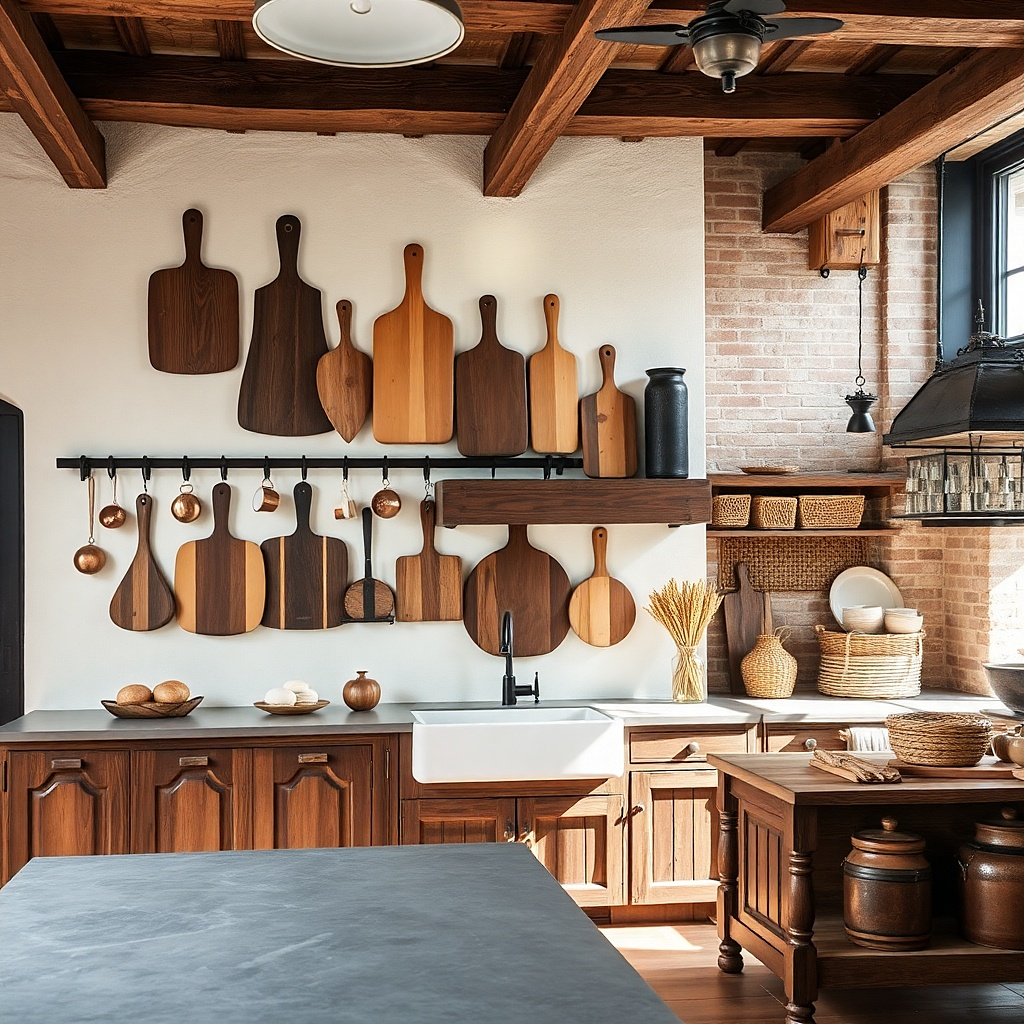
Mounted cutting boards look like real kitchen tools, just displayed with care. The grain, knife marks, and warm wood tones create texture that feels old-world without needing elaborate styling. This is a strong choice if your kitchen already has wood shelves or butcher-block counters. It also solves the “no art fits here” issue because cutting boards belong in a kitchen and don’t need a perfect matching palette to look right.
Choose three boards with different sizes, aiming for about 10-14 inches, 14-18 inches, and 18-22 inches wide. Mount them on a single wall using two methods: a french cleat for the largest board and wall hooks for the smaller boards. Keep the top edges aligned so the grouping looks intentional. If the boards are raw or unfinished, seal them with a food-safe clear coat so they resist grease splatter. Expect $40-120 depending on board size and whether you’re buying new or vintage.
Stagger the angles slightly one board flat, one tilted 10 degrees, one tilted the other direction so the grain catches light.
Avoid shiny polyurethane boards; they look modern and show every fingerprint.
4. Cream Ceramic Plate Rack with Mixed Antique Plates
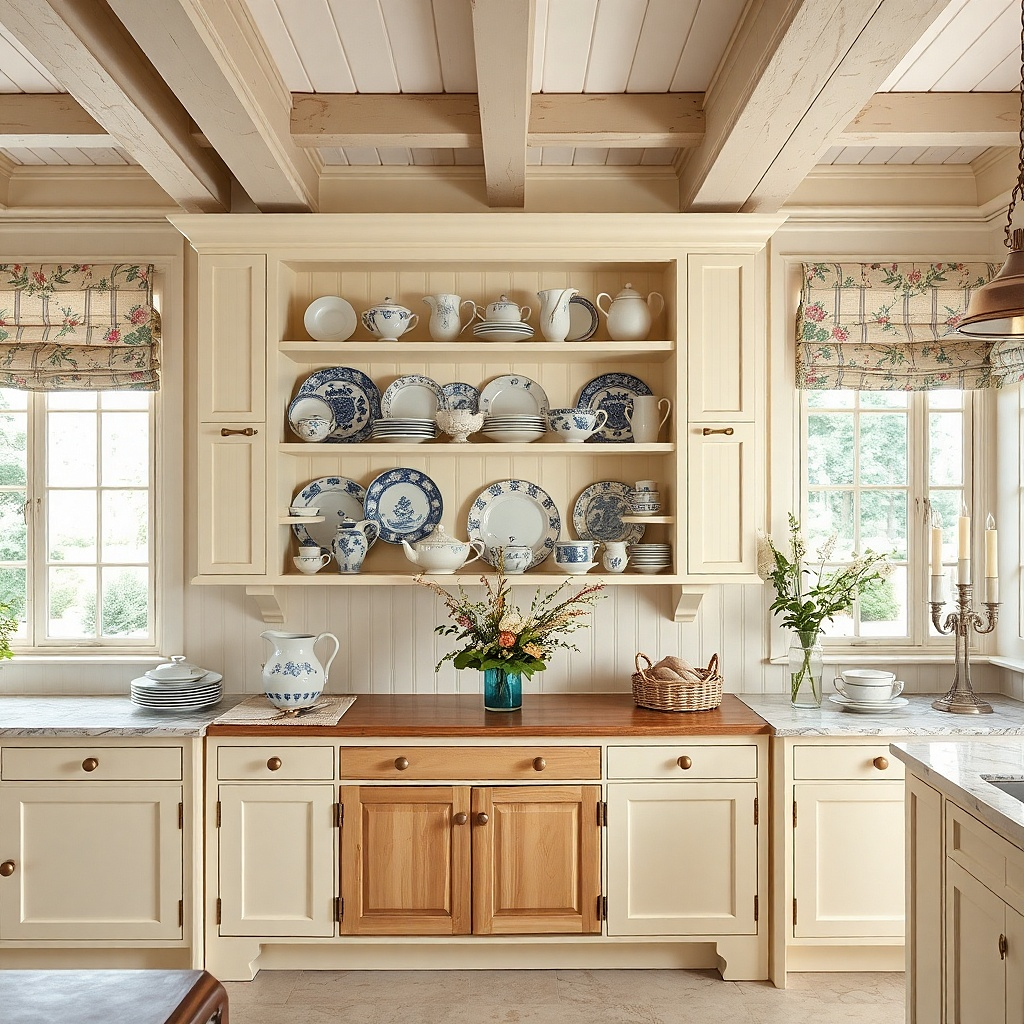
A plate rack turns dinnerware into wall art, and it reads vintage immediately when the plates have age cues. Choose a rack in cream, whitewashed wood, or aged brass so the plates look warmer. Mix plate patterns in the same color family think soft blue with cream, or muted red with beige so the wall stays cohesive. This is best for kitchens where the dining area is close to the wall, like a breakfast nook, because the display feels like part of the meal setup.
Buy a small rack with 3-5 hooks, then select 3 plates with similar diameters (roughly 8-11 inches). Attach the rack to studs using a level, keeping the top hook about 70-75 inches from the floor. Hang the largest plate in the center, then place the medium plates on the outer hooks. Add felt pads between plates and hooks to prevent scratches. Cost is usually $25-80 for a rack plus $10-40 per plate.
Try thisStick to one plate finish either all matte or all slightly glossy so the display doesn’t look patchy under kitchen lighting.
Common mistakeDon’t hang plates too close together; leave at least 1-2 inches of gap so each plate pattern reads.
5. Woven Basket Wall Cluster in Warm Natural Tones
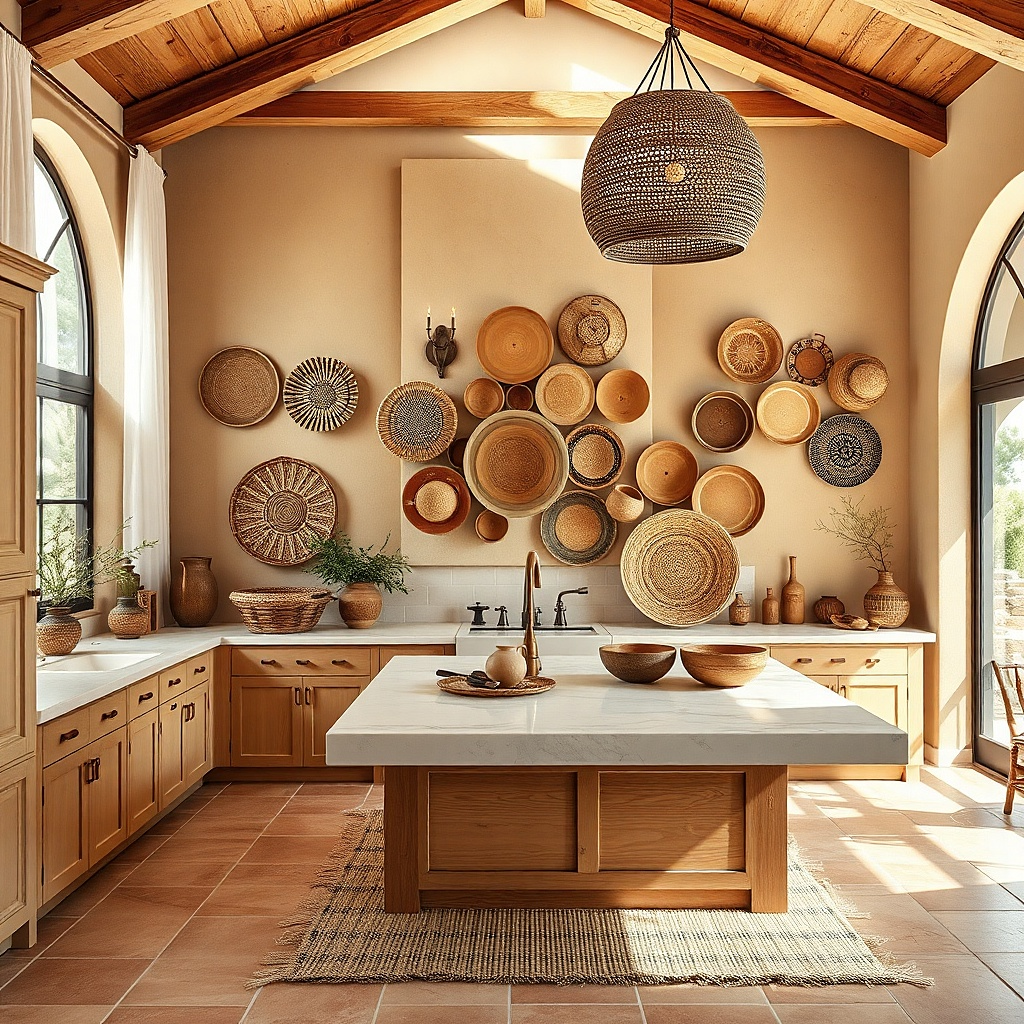
Woven baskets make a kitchen wall look cozy because they add softness and natural texture. Choose baskets in honey, tan, or light brown with tight, even weaving so they look tidy rather than boho-random. This idea works well when your kitchen has hard surfaces tile, laminate, or glossy cabinets because woven texture breaks up reflections. It also photographs well because the weave creates shadows that make the wall look dimensional.
Select 3 baskets with one larger center basket and two smaller companions. Mount using picture hooks or wall screws with basket hangers, depending on whether the baskets have handles or loops. Plan for spacing: keep 3-4 inches between basket edges so the weaving patterns don’t blur together. If you’re near steam, dust first and avoid baskets with untreated fibers that snag. Budget $35-120 depending on basket size and material.
Try thisUse a warm white or creamy wall behind the baskets; it keeps the weave looking golden instead of gray.
Common mistakeAvoid mixing very dark baskets with very pale baskets unless you keep the rest of the wall in the same dark-to-light range.
6. Antique-Style Brass Wall Sconces with Linen Shades
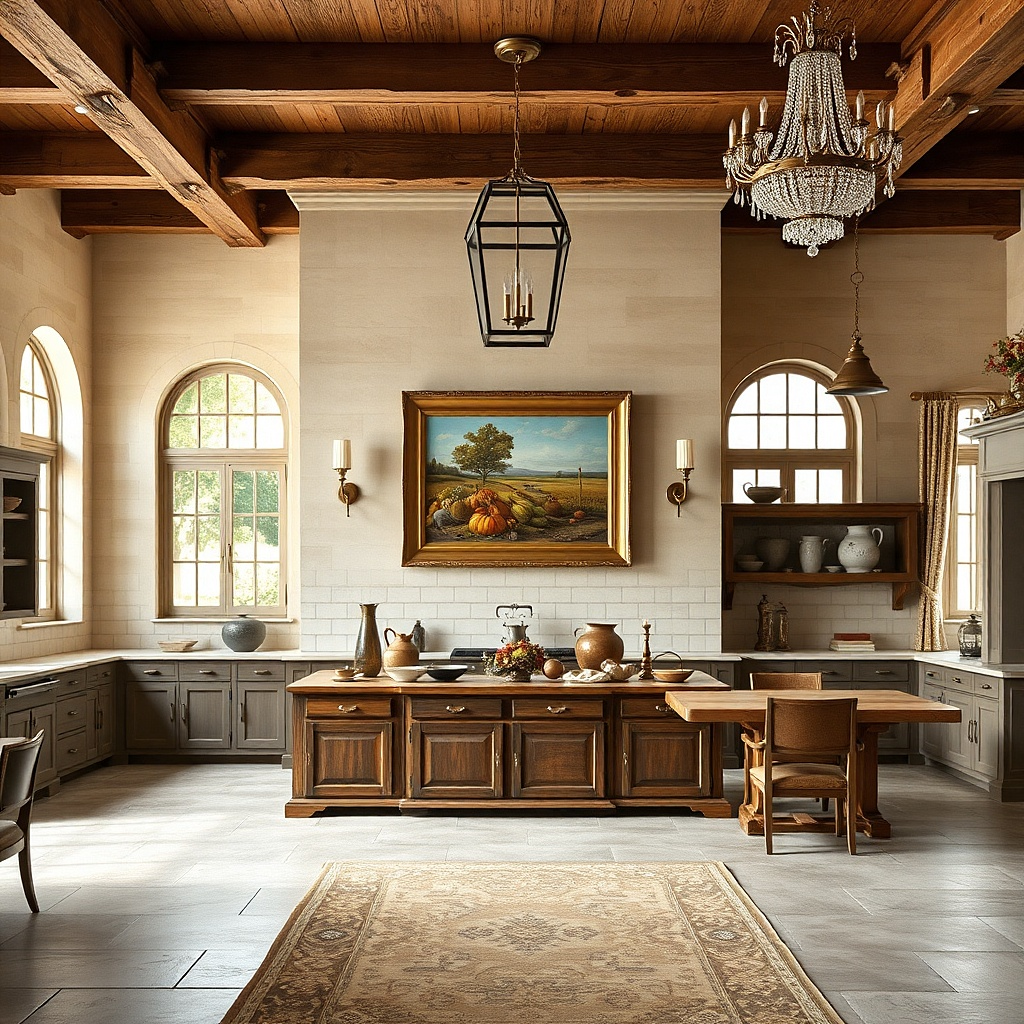
Lighting on a kitchen wall counts as decor because it changes how everything looks. Antique-style brass sconces with linen shades add old-world charm while giving you warm, flattering light over a dining nook or sideboard. The linen texture softens the glow so your wall decor and tableware look more inviting. This is a great move when your wall is blank and you want charm without adding more objects.
Pick sconces with a shade height around 8-12 inches so they don’t visually swallow the wall. Install them on studs at about 65-70 inches from the floor to the bottom of the shade, then center them relative to your table or artwork. If you’re not doing electrical work, choose plug-in sconces with a cord cover. Pair with a small framed print or a narrow mirror between the sconces. Costs commonly land in the $120-350 range for a pair, depending on wiring and finish.
Try thisUse warm bulbs around 2700K so the brass looks aged, not yellow-green.
Common mistakeAvoid oversized shades; wide shades can make a small kitchen wall feel heavy.
7. Vintage French Market Labels on a Wood Wall Panel
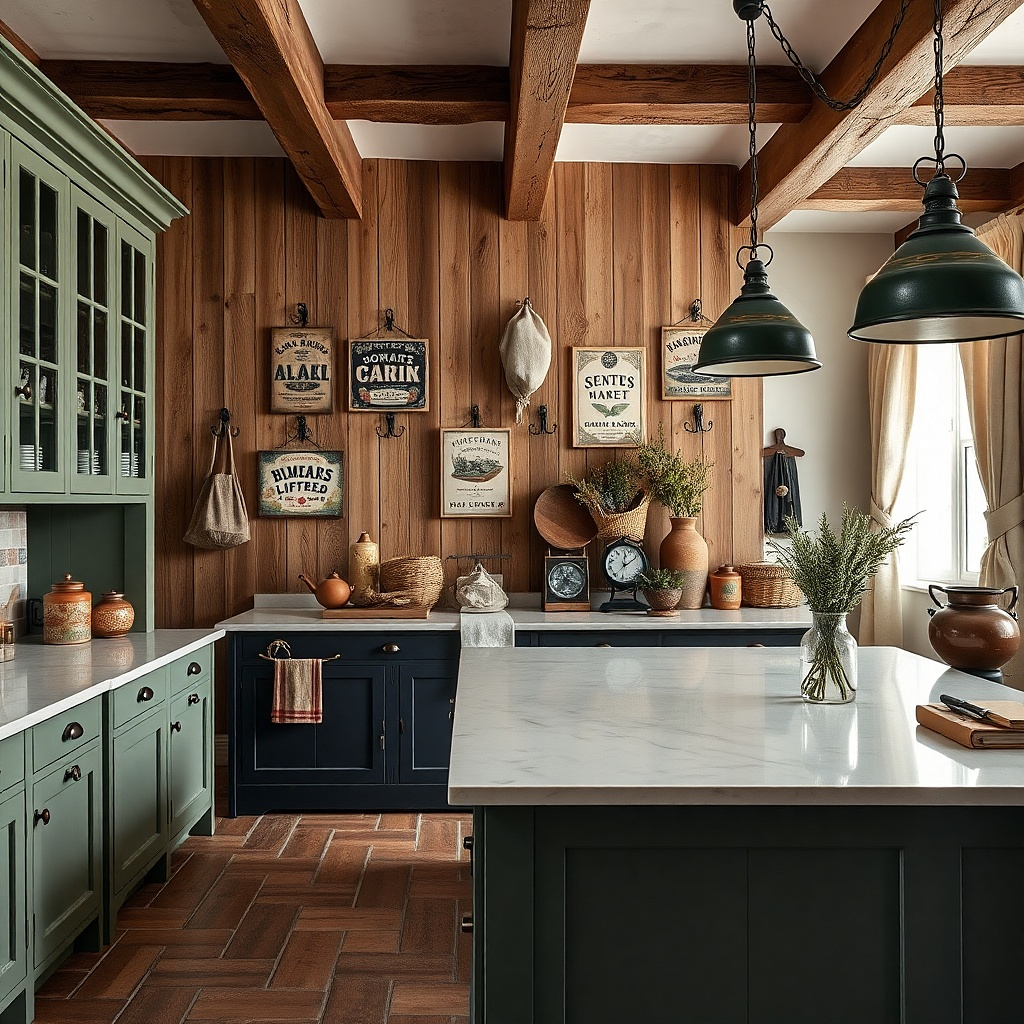
Label art gives you charm that looks specific to kitchens, not generic farmhouse. A wood panel with French market-style labels adds texture and story, and it pairs well with open shelves and utensil hooks. Keep the print colors muted cream, sage green, and faded red-brown so it looks old rather than loud. This works best on a plain wall where you want one anchored focal piece that still feels cozy and kitchen-appropriate.
Choose a wood panel about 18-24 inches wide, then apply label art printed on aged paper or use a label decal set designed for wall use. Mount the panel with a cleat or two picture-frame hooks so it sits flat. Add a thin frame trim if you want a more finished look; otherwise, keep the panel edges visible. Seal the surface with a clear matte varnish if your print is paper-based to protect from humidity. Expect $30-120 depending on panel size and whether you print yourself.
Match the label ink color to your cabinet hardware if your pulls are warm bronze, pick labels with warm brown accents.
Don’t choose high-contrast modern labels; they read like wall graphics, not vintage.
8. Framed Old Recipe Cards in a Shadowbox Frame
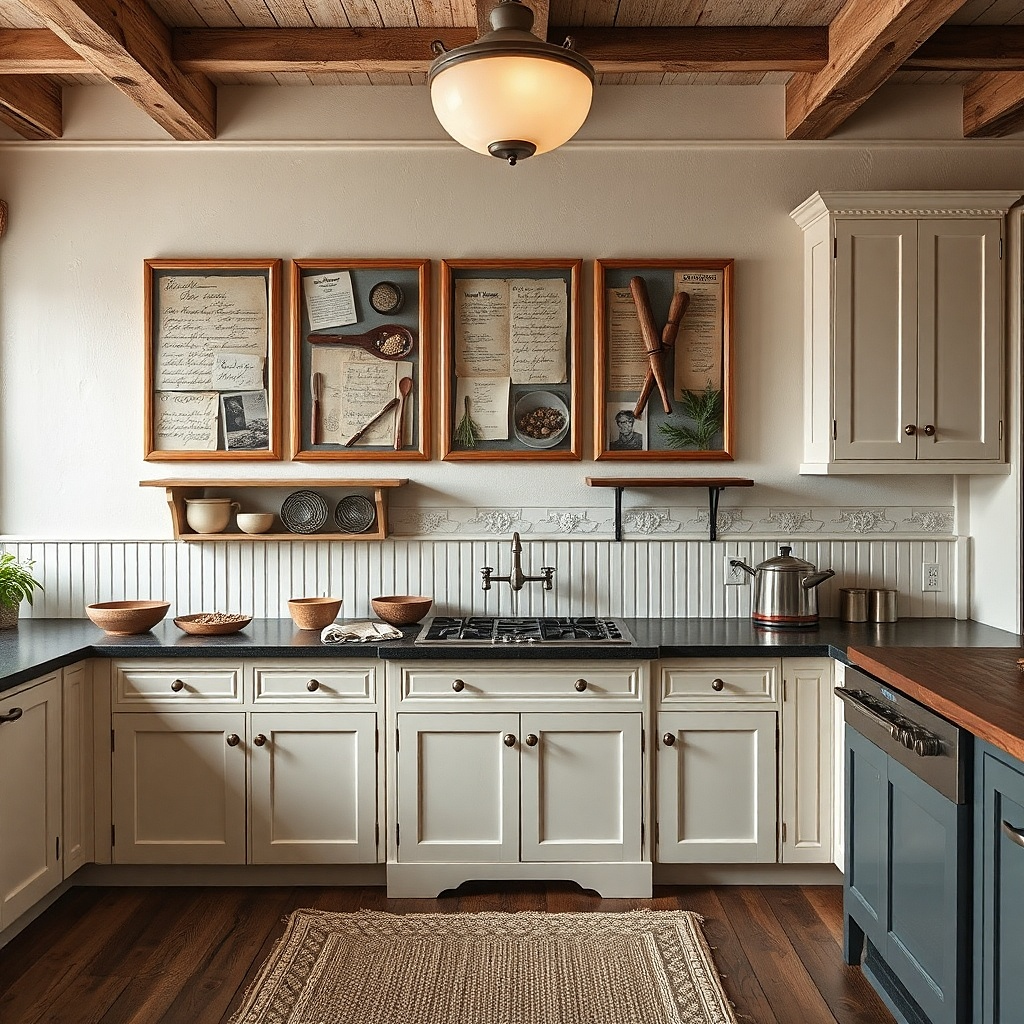
A shadowbox makes recipe cards feel like a collectible, not a print you taped to the wall. The depth of the frame creates a vintage museum look, and the layered paper edges catch light. For a cozy kitchen wall, pick cards with off-white paper and faded ink, then keep the mat color warm cream. This idea is perfect for kitchens where you want charm but you don’t want clutter across multiple small pieces.
Get a shadowbox frame with at least 1 inch depth and a warm cream mat if available. Select 3-5 recipe cards that share similar tone and font style, then layer them with thin spacers so they don’t touch. Mount the shadowbox centered on the wall, with the bottom about 60-65 inches from the floor for dining zones. Use acid-free tape or small adhesive corners so the cards don’t curl. Budget $70-250 depending on frame size and card sourcing.
Try thisLeave a small border of mat showing around the cards; it makes the whole thing look designed.
Common mistakeAvoid overcrowding the cards; too many layers makes the display look messy.
9. Vintage Wrought-Iron Utensil Holder Wall Art
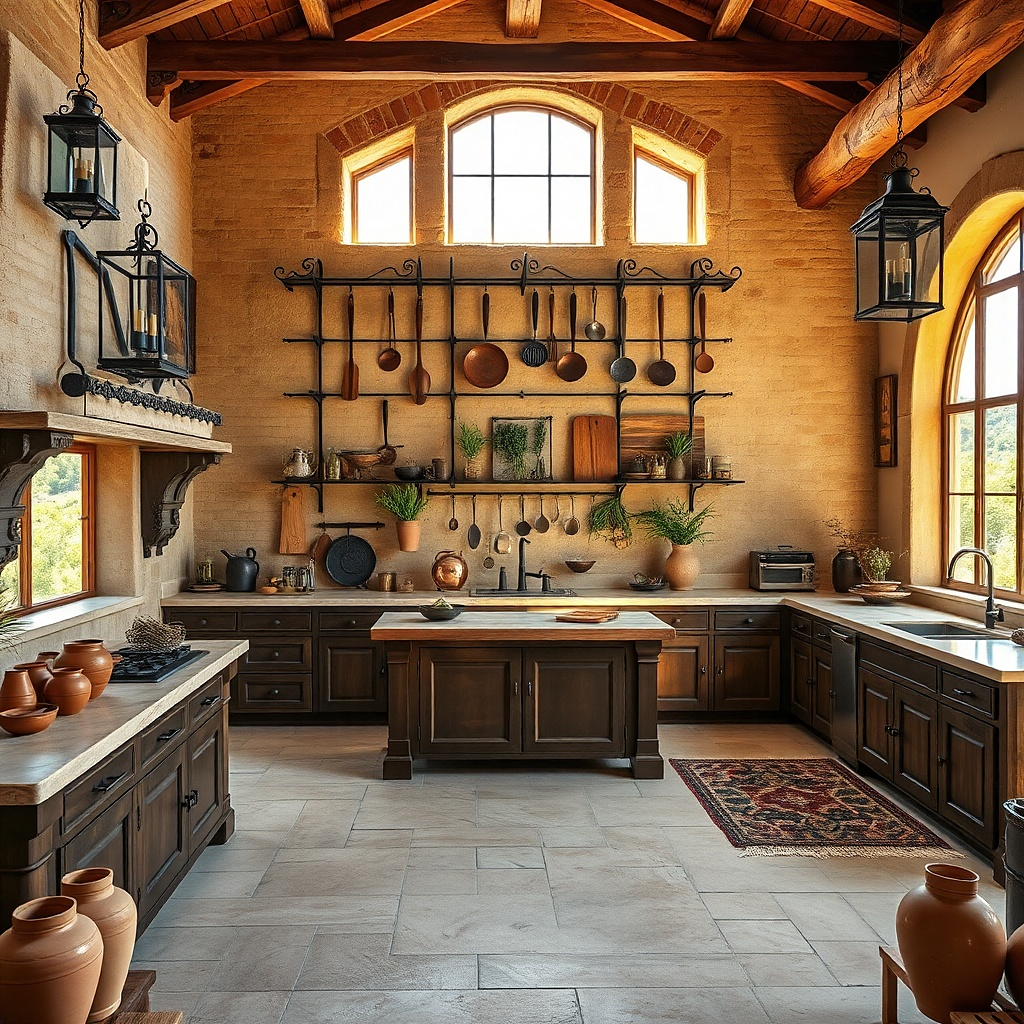
Wrought-iron utensil wall decor adds old-world texture and keeps the look distinctly kitchen. Choose a piece with a simple silhouette and a warm finish like black iron or lightly aged bronze. Hang it near a range wall, coffee station, or sideboard so it looks like it belongs to the cooking zone. This works when you want warmth from materials, not more prints, and it photographs well because metal bars create crisp shadows.
Pick a utensil holder piece about 14-22 inches wide so it doesn’t overwhelm the wall. Mount with two screws into studs or use heavy-duty wall anchors if studs aren’t accessible. Place it so the bottom sits around 58-62 inches from the floor. If the piece includes hooks, add 1-3 decorative utensils that match the finish, keeping them spaced. Cost usually ranges from $35-140 depending on size and finish.
Use one finish family across the room if you have black hardware, stick to black iron for consistency.
Avoid adding too many utensils; a crowded iron piece turns into visual clutter.
10. Carved Wood Wall Plaque with Farmhouse Script
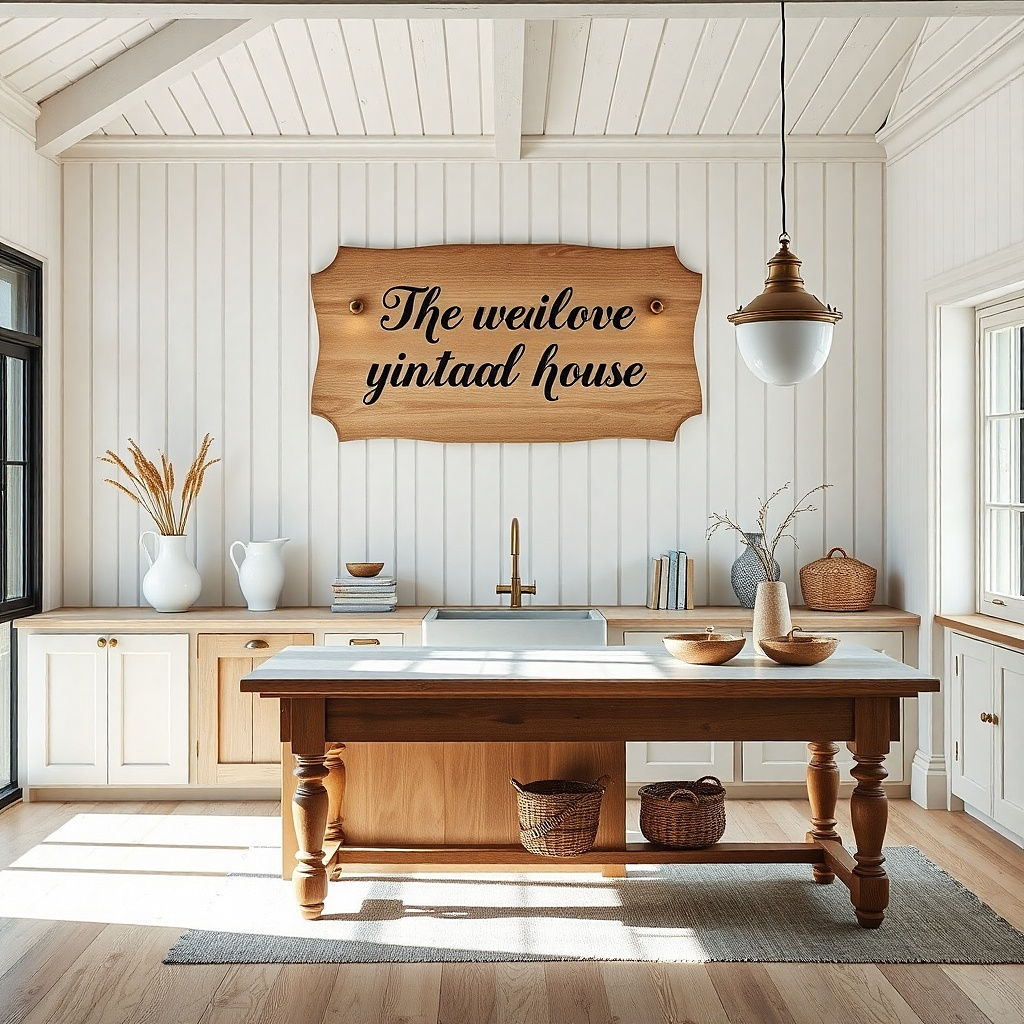
A carved wood plaque brings real relief to a kitchen wall, which is what makes it feel cozy instead of flat. Look for plaques with shallow carving or raised lettering so light creates gentle shadows. Choose a distressed oak or whitewashed finish, then keep the wording simple and vintage-style, not modern slogans. Hang it near a buffet, coffee corner, or above a small shelf to anchor the whole vignette.
Choose a plaque that’s about 12-18 inches wide, and check the back for pre-drilled holes. Mount it at about 60-66 inches from the floor with a level so the carving doesn’t look crooked. If the plaque is heavy, use two screws into studs. Pair it with a small frame or a single ceramic accent on the shelf below for a balanced look. Budget $45-160 depending on carving depth and size.
If the plaque has raised edges, dust it often; wood carving collects grease haze in kitchens.
Avoid glossy painted plaques; they look too new and kill the old-world effect.
11. Vintage Enamelware Wall Tray Display
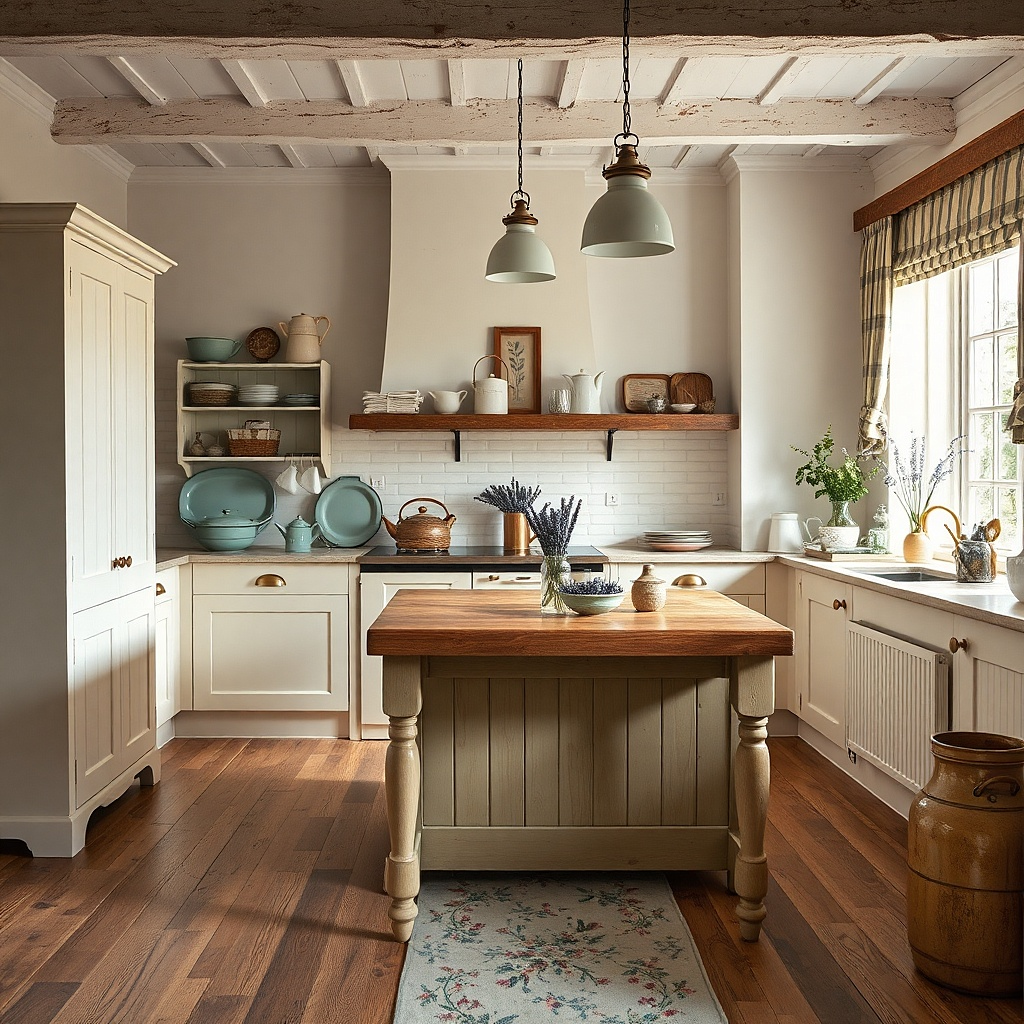
Enamelware trays give you that classic old-world kitchen vibe with color that still feels subdued. Go for muted tones like dusty blue, sage, or cream with speckled finishes. Mount trays using a dedicated tray hanger or small wall brackets so they sit slightly angled and catch light. This is a great choice when your kitchen has plain walls and you want a display that looks curated without being fragile or too delicate.
Choose 3 trays with similar shapes but different colors, ideally 10-14 inches wide. Install tray hangers on studs and aim for 2-4 inches between trays. Mount the largest tray at the center, then place the smaller trays above and to the side for a triangle layout. Keep the display height so the bottom tray edge lands around 60-65 inches from the floor. Enamelware pieces often cost $20-70 each depending on condition.
Try thisWipe trays with a barely damp cloth before mounting so the speckled finish looks clean under kitchen lighting.
Common mistakeAvoid bright neon enamel; it reads novelty, not vintage.
12. Antique-Style Wall Mirror with Worn Wood Frame
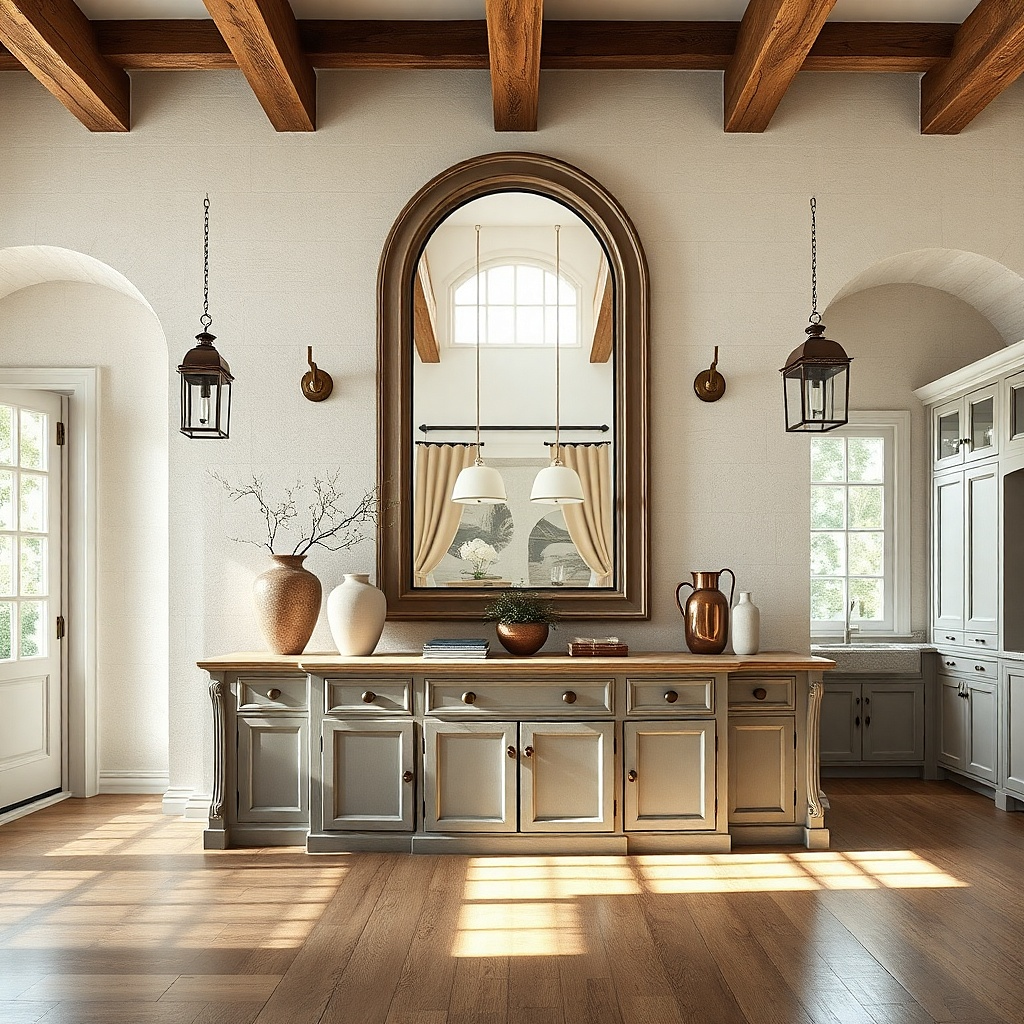
A mirror with a worn wood frame makes a kitchen wall feel bigger and warmer, which helps any vintage decor look more intentional. The mirror reflects light onto your dining area, so your plates and art look more inviting. Choose a frame with visible age distressed edges, rubbed corners, and warm undertones. This works best in kitchens where the wall is blank and you want charm plus brightness without adding more objects.
Pick a mirror that’s about 24-32 inches wide so it reads substantial over a sideboard or dining wall. Hang it centered so the bottom edge is around 60-65 inches from the floor. Use D-ring hooks or a cleat system for secure mounting. Style the surface below with one vintage item like a small ceramic jug or two stacked books — keep it minimal so the mirror stays the hero. Costs commonly run $80-300 depending on frame age and size.
Try thisPlace the mirror so it catches warm light from a nearby lamp or window, not harsh overhead glare.
Common mistakeAvoid thin, modern frames; they make vintage decor feel out of place.
13. Hexagon Shadowbox for Mini Kitchen Finds
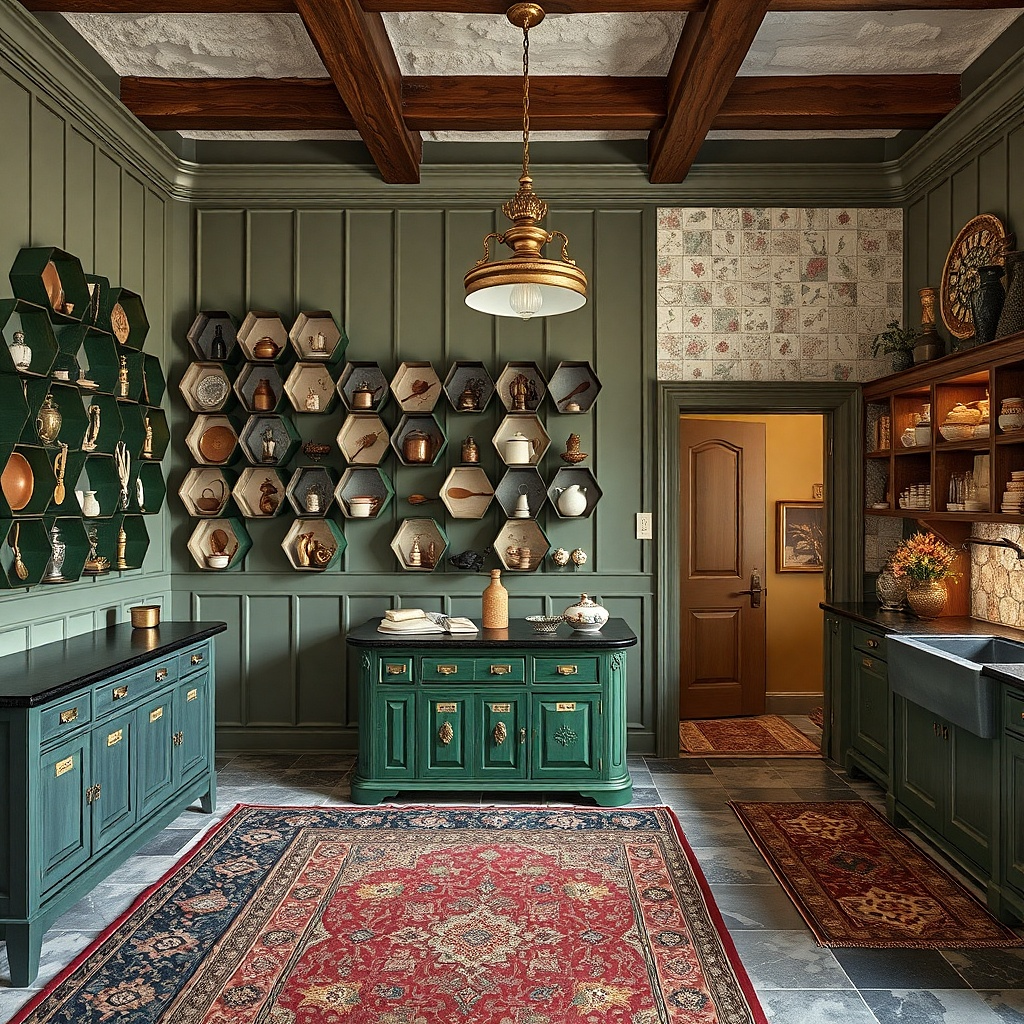
A hexagon shadowbox lets you build a vintage kitchen moment without cluttering the counter. Inside, place mini items with old-world cues: small wooden dough stamps, a dried herb bundle, or a tiny copper ladle (or a replica if you want it clean). The glass protects pieces from grease haze, while the shadowbox depth keeps everything crisp. This works when you want personality on a wall but your kitchen already has plenty of open shelving.
Buy a hexagon shadowbox frame with glass and at least 1 inch depth. Arrange 3-6 items inside on a neutral backing board so the colors read cohesive — warm wood, muted green, and copper tones work well. Mount the shadowbox at about 62-68 inches from the floor, centered over a shelf edge or between wall decor clusters. Secure items with museum putty or small adhesive corners so nothing shifts. Budget $50-180 depending on frame and whether items are sourced new or vintage.
Keep one element vertical (like a herb stem) so the arrangement has a clear direction.
Avoid mixing glossy plastics with aged wood; it breaks the vintage illusion.
14. Vintage Butcher Paper Roll Holder with Labels
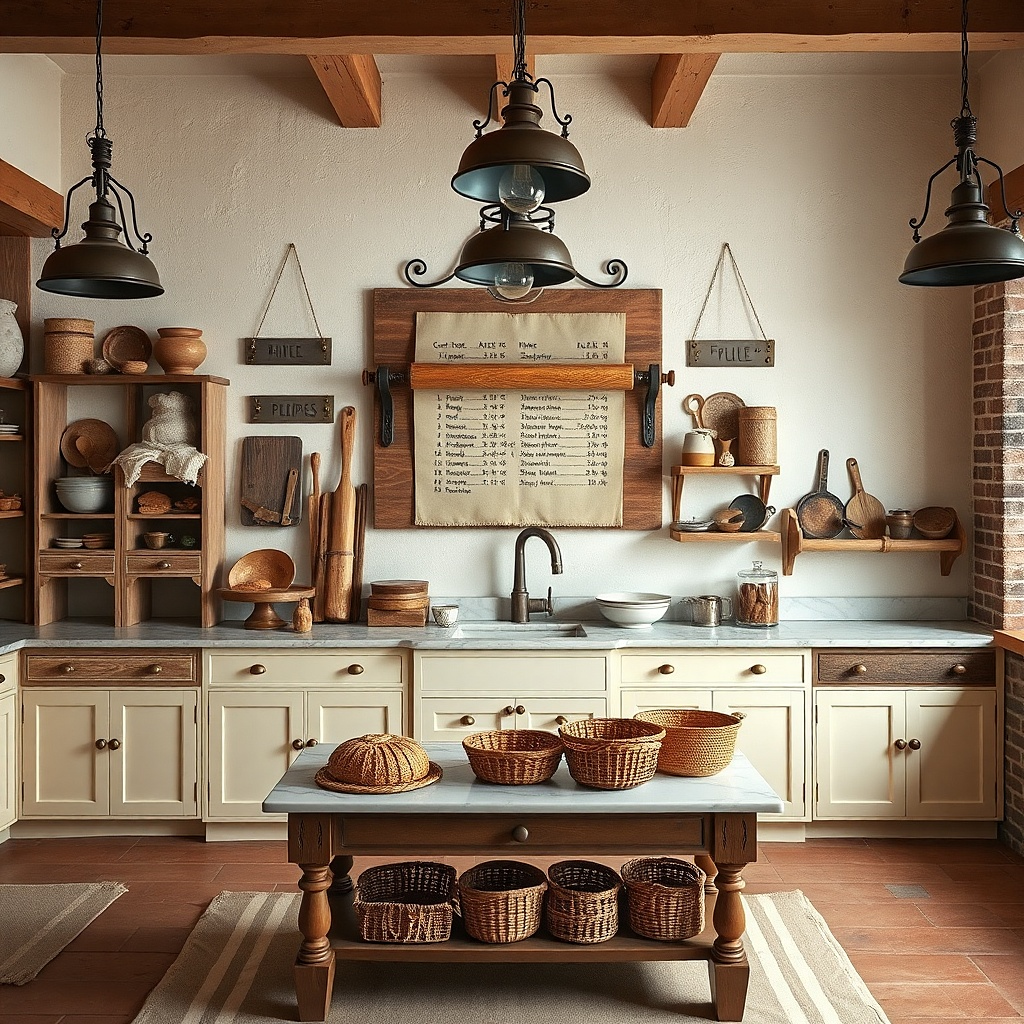
A butcher paper roll holder is both useful and decorative, which is why it reads cozy instead of staged. The old label look makes it feel like a real market setup, and the warm brown kraft paper adds color softness to a kitchen wall. Choose holders in black iron or warm bronze so they match typical kitchen hardware. This idea works best on a wall near a workspace it solves storage clutter while making the area look styled.
Select a wall-mounted roll holder that holds an 18-24 inch wide roll or smaller, depending on your needs. Mount it on studs at about 52-58 inches from the floor so you can pull paper easily. Add a small vintage label plate or decal near the holder, keeping the design in one color family. Use real kraft paper rolls so the paper texture shows. Cost usually lands around $25-90 for the holder plus $10-25 for a roll.
Try thisUse paper with a visible speckle texture; smooth kraft looks too modern for a vintage wall.
Common mistakeAvoid mounting it too high; if it’s out of reach, you’ll stop using it and the wall loses its charm.
15. Vintage Plate and Linen Shelf Styling with a Single Wall Frame
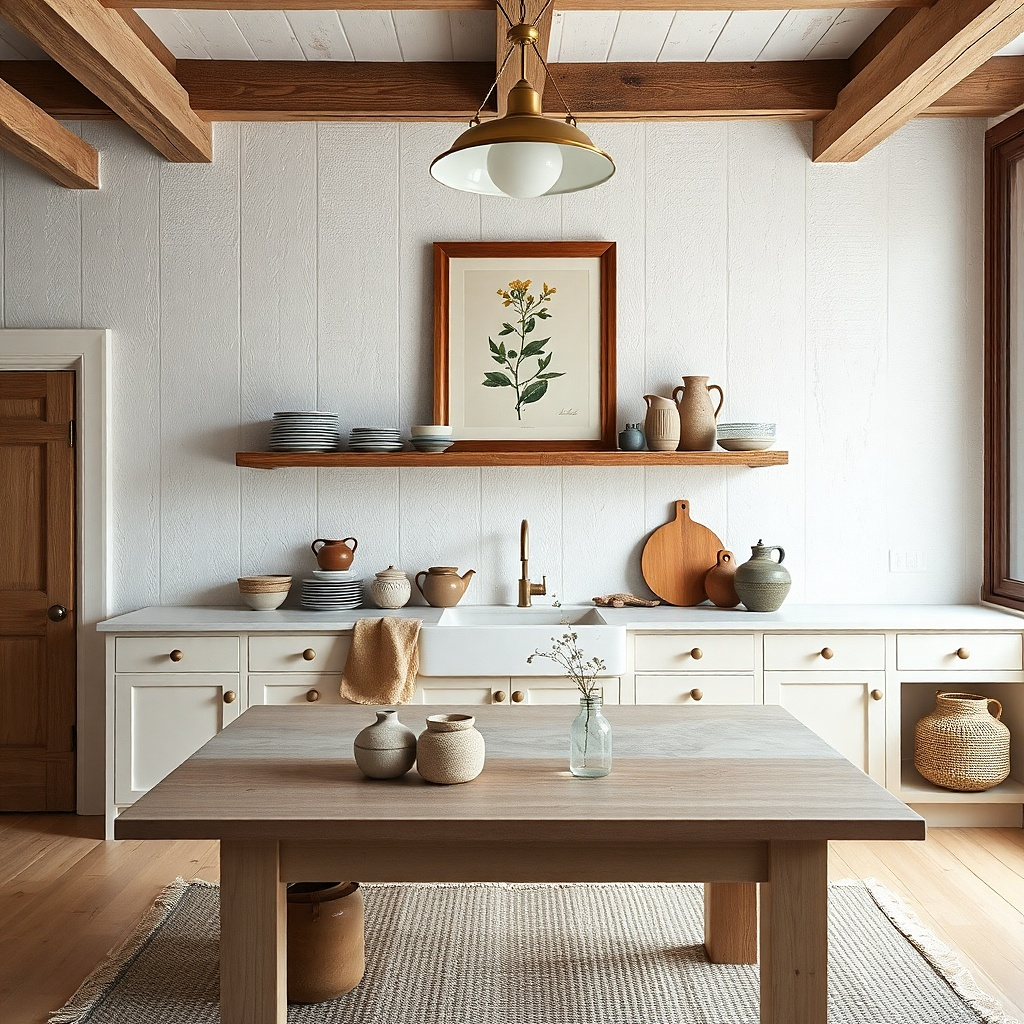
Sometimes the best vintage kitchen wall decor is a shelf vignette that looks like a still life. A small shelf with folded linen, one stacked set of vintage plates, and a single framed print above creates rhythm without visual overload. Choose linen in cream or oatmeal and plate patterns with the same muted colors as your kitchen accents. This setup gives you cozy texture from fabric and ceramic while keeping the wall clean and easy to maintain.
Install a narrow shelf 10-12 inches deep and mount it so the bottom of the shelf sits about 54-58 inches from the floor. Place a folded linen runner or tea towels in one color, then stack 2-4 plates with staggered edges. Add a single framed print above the shelf, sized around 12x16 or 14x18 inches. Use shelf brackets rated for the shelf load, and anchor into studs. Budget varies widely, but expect $60-220 for shelf hardware plus decor pieces.
Keep plate edges aligned on the shelf a neat stack makes the whole vignette read vintage instead of random.
Avoid adding too many small items; if you use plates and linen, you don’t need extra knickknacks.
16. Vintage Wall Clock with Roman Numerals and Warm Finish
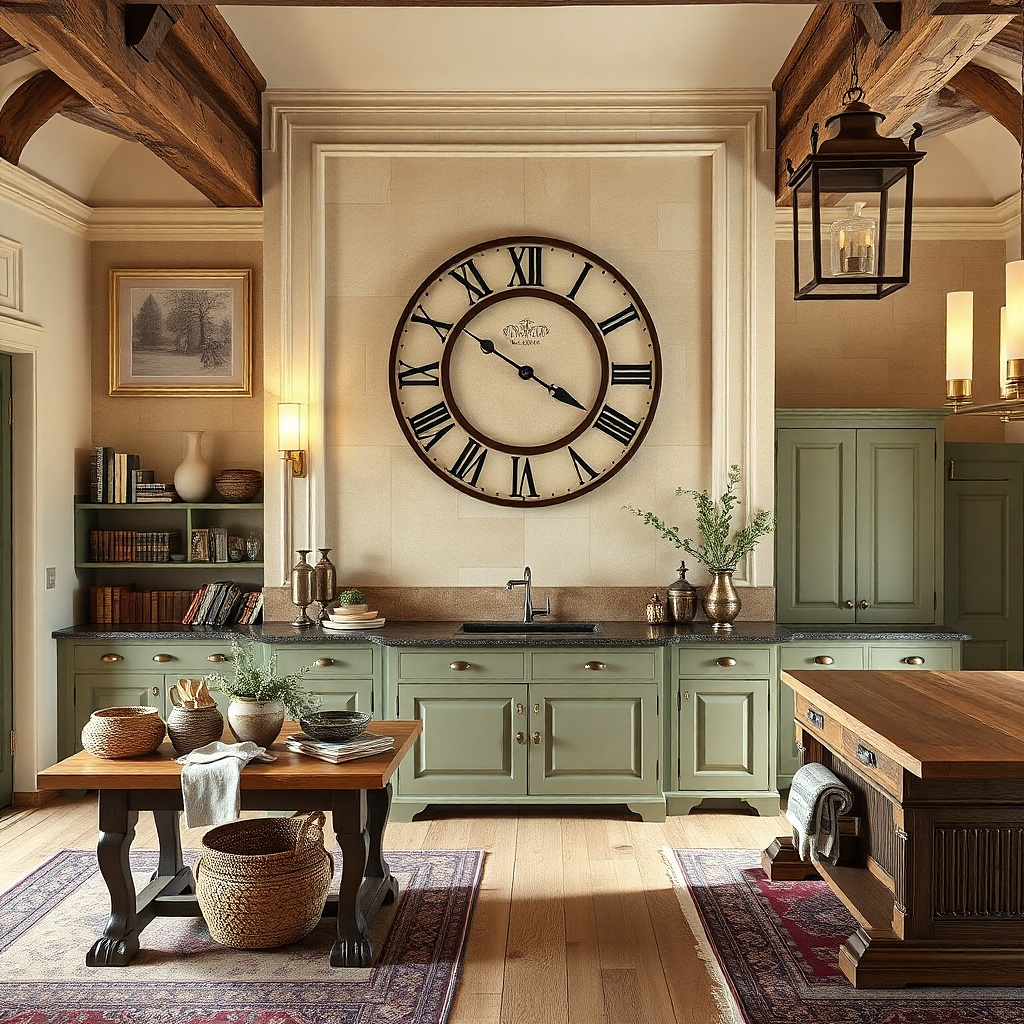
A wall clock is decor that also fixes the “nothing anchors this wall” feeling. Vintage-style clocks with roman numerals and warm wood frames look old-world, especially in kitchens where timekeeping is part of the routine. Choose a clock with a clear, readable face and muted hands, then match the wood tone to your cabinets or flooring. Place it near a dining area or coffee corner so it feels practical and cozy rather than purely decorative.
Choose a clock diameter around 12-16 inches so it’s visible but not bulky. Hang it centered on the wall at about 60-66 inches from the floor. Use a stud finder and mount through the back plate if possible. If the clock face is glossy, wipe it clean so it doesn’t show glare from overhead lights. Expect $40-180 depending on brand and finish.
Match the clock frame finish to a second item on the wall even a small wood plaque or cutting board makes it look intentional.
Avoid super-thin metal clocks; they look modern and can feel too cold for a cozy vintage kitchen.
17. Antique Map Print in a Warm Wood Frame
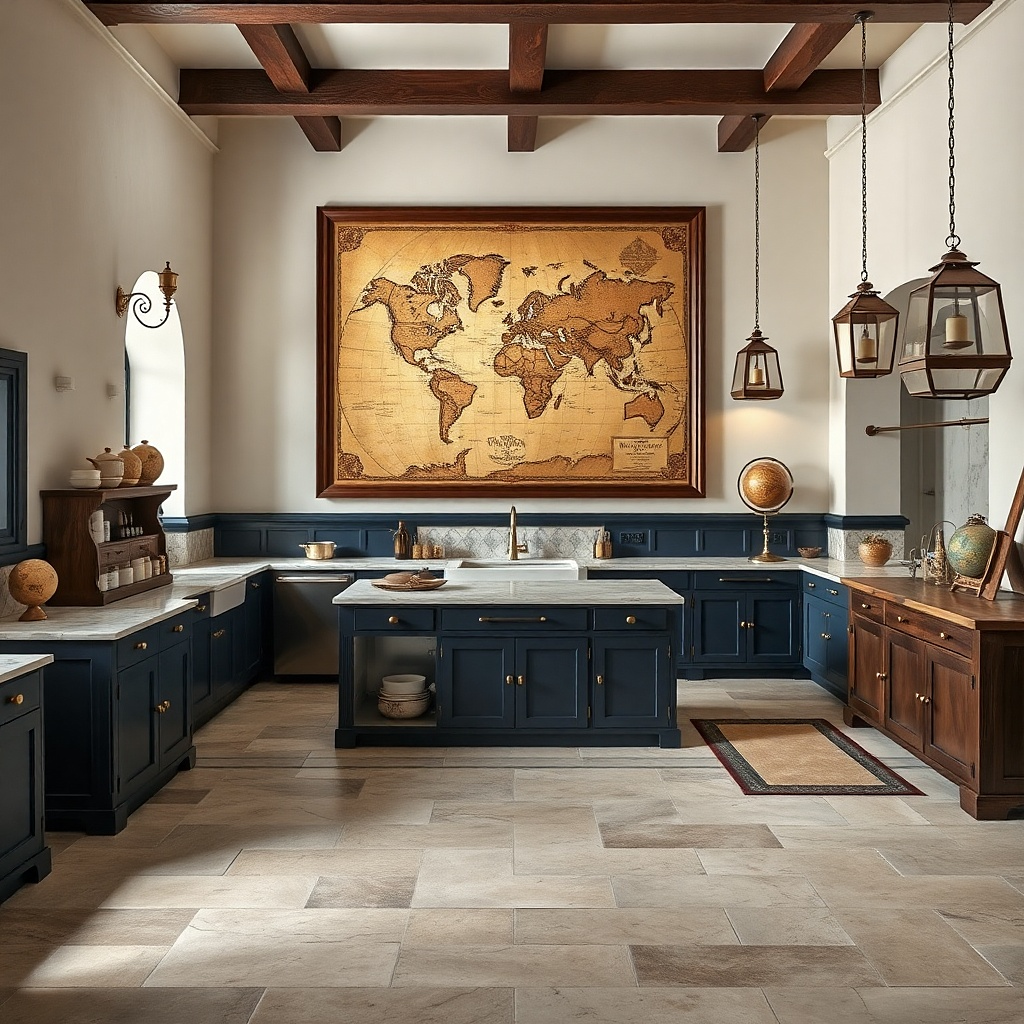
An antique map print adds old-world charm with a subtle storytelling vibe that feels more interesting than generic kitchen quotes. Keep the map muted — sepia, faded blue, or worn green — so it doesn’t fight with your backsplash. A warm wood frame with a slight distress gives it that aged paper look. This is ideal for kitchens with farmhouse or classic styling, especially when your wall needs something larger and more graphic.
Pick a map print sized around 16x20 or 18x24 inches. Use a warm wood frame with a mat so the paper doesn’t look flat. Hang centered at about 62-66 inches from the floor for dining zones, adjusting height based on your table or shelf lines. If you’re near a sink, use glass with UV protection to keep the print from fading. Budget $60-220 depending on print quality and frame.
Try thisChoose a map that includes a muted compass or border — the frame details look richer and more vintage.
Common mistakeDon’t pick a bright modern map; high-contrast colors look like decor, not history.
18. Oversized Wooden Spice Box Wall Panel with Brass Labels
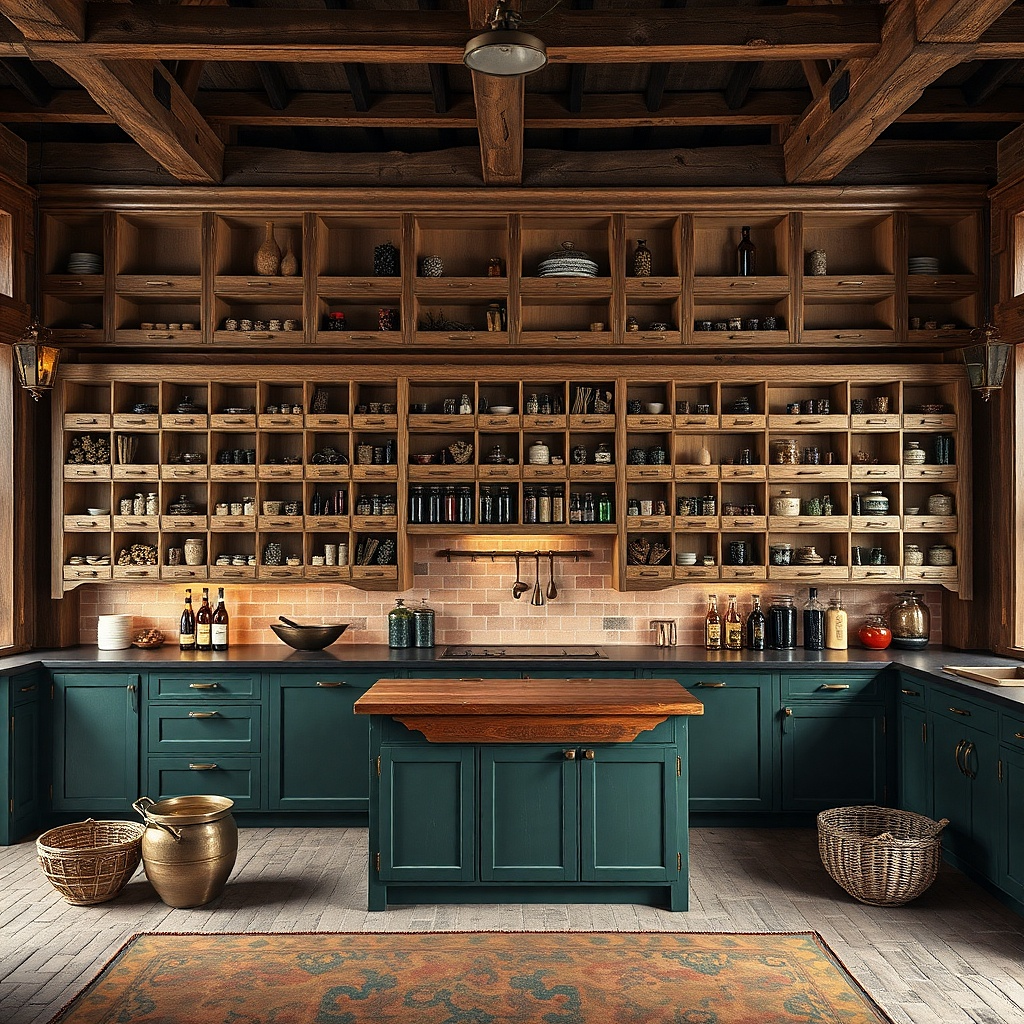
This is old-world kitchen wall decor that reads like storage, not clutter. A staggered panel of reclaimed wooden spice boxes gives you texture, warm grain, and that lived-in apothecary feel vintage kitchens love. Use a mix of small drawers and shallow compartments so the wall looks busy up close but still clean from across the room. Brass label tags in a muted antique finish tie it to other vintage metals like your sconces and ironwork, so everything looks intentional instead of random. It works best over a breakfast nook, on the wall beside a stove, or in a galley kitchen where you want one strong focal point without adding more “frames.”
Measure the wall space first and plan for a panel that spans about 60-72 inches wide, depending on your counter or table width. Buy or source 6-10 vintage-style spice boxes (mix sizes) and lay them out on a floor in the exact arrangement you want, then mark the back edges with pencil so you don’t drift during mounting. Attach a simple plywood backing (about 1/2-inch thick) to the wall studs with a French cleat or heavy-duty wall rail, then screw each spice box into the backing so the whole thing hangs flat. Add brass label tags using small screws or strong industrial adhesive if the boxes already have label slots; keep label text consistent in style and size (even if the words differ). Expect a weekend of work and roughly $150-$400 depending on how authentic the boxes are and whether you need a backing and hardware.
Try thisChoose one label font look in brass and keep all labels the same width so the wall reads curated even when the boxes are mismatched.
Common mistakeDon’t mount boxes directly to drywall with just picture hooks — the weight adds up fast and the panel will sag.
19. Vintage Copper Strainer and Ladle Wall Grid with Aged Wood Backer
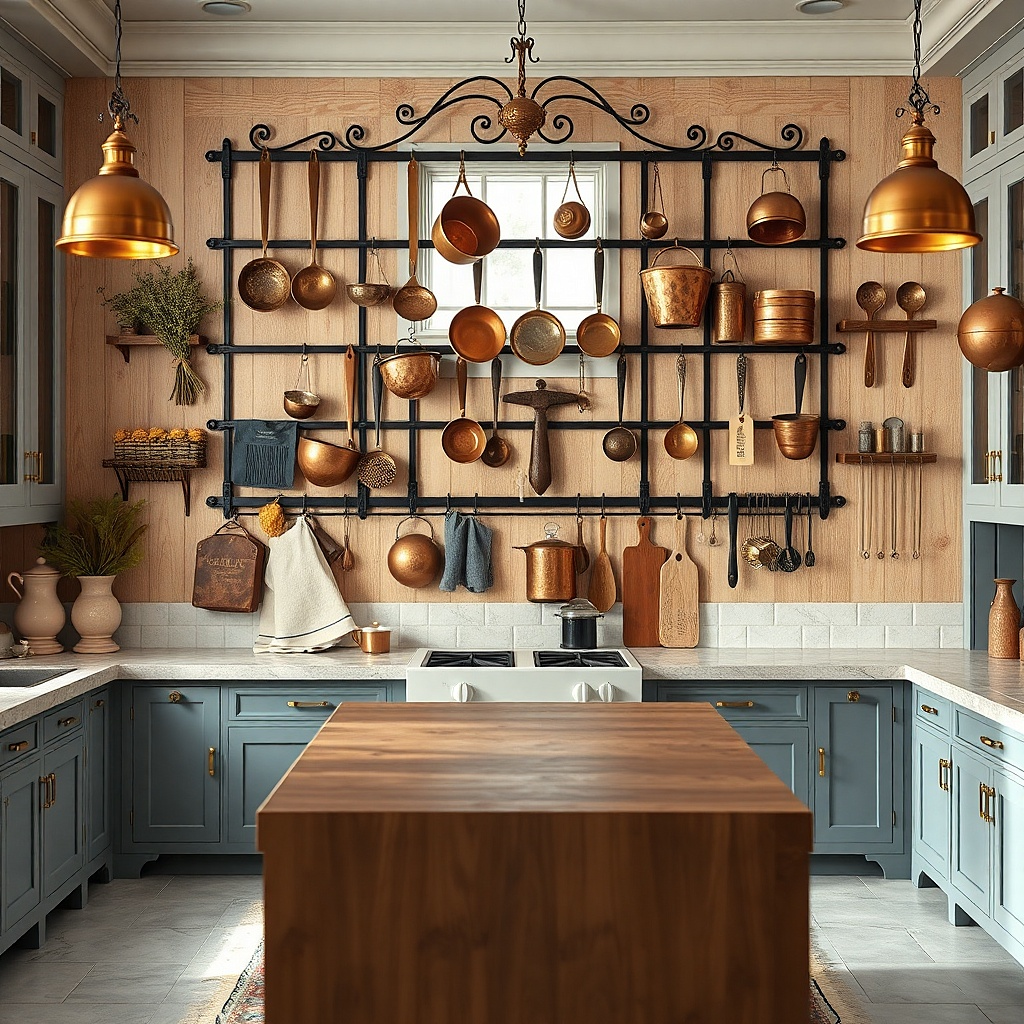
A copper utensil wall grid gives you the kind of old-world kitchen charm you can see from the doorway. Copper has that warm glow under overhead lighting, and the dents, mesh patterns, and handle wear look authentic without needing extra decor. The key is the backer: an aged wood board keeps the copper from feeling like a random collection and gives you a clear, graphic layout. This solves the common problem of empty wall space near a sink or prep area where you want something functional-looking but still decorative. Place it in a spot where you have light hitting the copper near a window, under a warm pendant, or opposite the stove for maximum shine.
Use a single backer board about 24-30 inches tall and 36-48 inches wide, in weathered pine or reclaimed wood, with a matte finish (not glossy). Mark a grid on the backer with pencil — for example, 4 columns by 3 rows — then pre-drill pilot holes for mounting points so the wood doesn’t split. Mount sturdy metal hooks or small cleats at each grid intersection, then attach copper strainers, ladles, and a slotted spoon so the handles line up vertically and the bowls overlap slightly. If you want it to look “collected” instead of perfectly symmetrical, vary heights by 1-3 inches across rows but keep spacing consistent between columns. Plan on $120-$300 for copper pieces and hardware, plus 2-4 hours for layout and mounting.
Wipe the copper with a dry microfiber cloth and skip polish — leave light patina so the wall looks aged, not freshly buffed.
Don’t hang copper pieces too close together — you need 1-2 inches of breathing room so each utensil’s shape reads clearly.