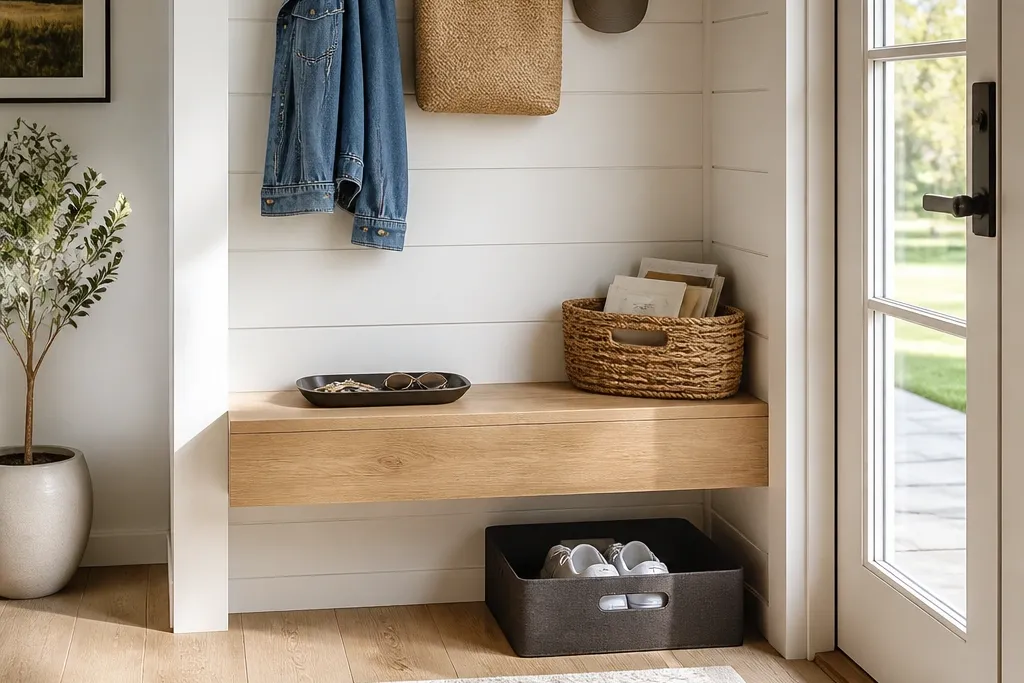
1. Shiplap wall + black grid hooks with a floating shoe bench
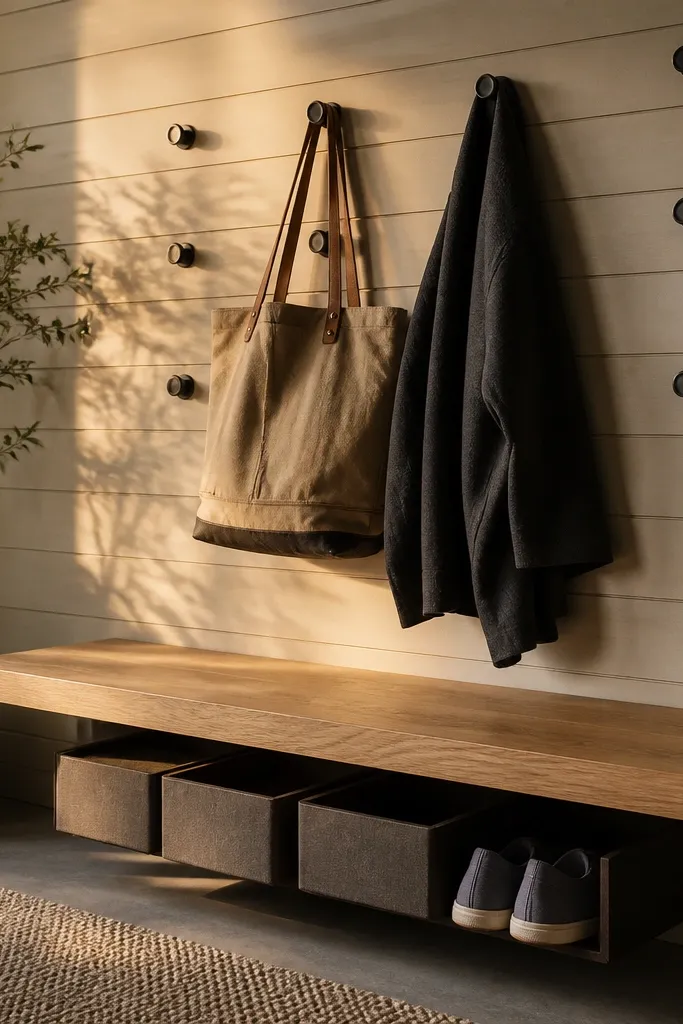
This setup stops clutter because it gives coats and bags a vertical home the moment someone walks in. Shiplap adds texture that photographs well and makes the hooks look intentional, not like hardware stuck on a wall. The floating bench keeps the shoe area visually light, and you can tuck slip-ons into bins so they don’t become a floor pile. The black grid hooks also create a clean rhythm for leashes, tote straps, and jackets, so the entryway looks styled even on busy days.
Try thisPaint the hook wall a soft warm white (not bright blue-white) so black hardware looks crisp without feeling harsh.
Start by marking a hook rail height so the top hook sits about 68-72 inches from the floor for adult coats. Install a floating bench 16-18 inches high with a depth of about 10-12 inches so shoes can slide in without crowding the walkway. Use 2-3 medium bins under or beside the bench for daily footwear and keep one larger bin for “rotation” shoes. Finish with a shallow catch tray on the bench top for keys and mail so small stuff never lands on the floor.
Common mistakeDon’t place hooks too low — coats will drape onto the bench and create the same mess you’re trying to stop.
2. Narrow console with a pull-out mail drawer and a drop tray top
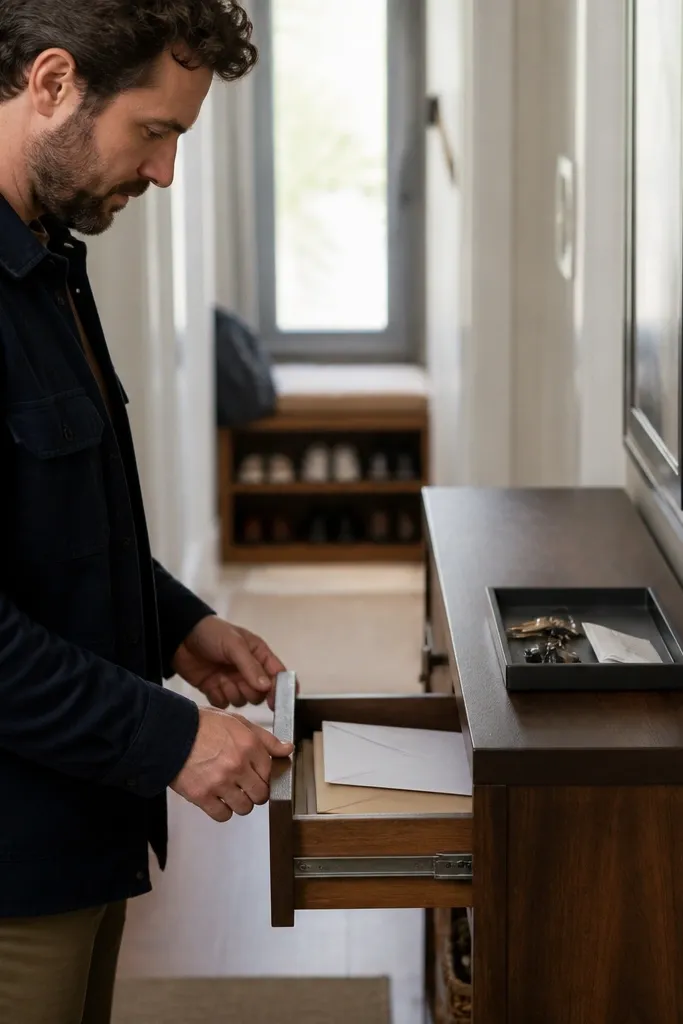
A console works best in entryways that are tight but still need a “home base.” The pull-out mail drawer is the difference between mail stacking on the floor and mail being handled. Put a shallow tray on the top for keys, sunglasses, and small receipts — it’s the landing pad that prevents random items from migrating. Choose a console with a thin profile (about 10-12 inches deep) so it doesn’t block movement, and pair it with warm wood or stone-look finishes for a polished look.
Try thisLabel the inside bin with a simple sticker or paper tab so sorting takes seconds, not minutes.
Pick a console width that leaves at least 30-36 inches of clear walkway in front of it. Install the drawer so the opening reaches comfortably without leaning over the tray; aim for a drawer height around 4-6 inches for envelopes and small papers. Use a tray with raised edges (1 inch) to stop items from sliding off when someone sets them down fast. Add one small bin inside the drawer for “to do later” mail to prevent a drawer full of loose paper.
Common mistakeDon’t rely on an open top for mail — it turns into a vertical spill within a week.
3. Bench with hidden shoe doors and a wall hook rail above
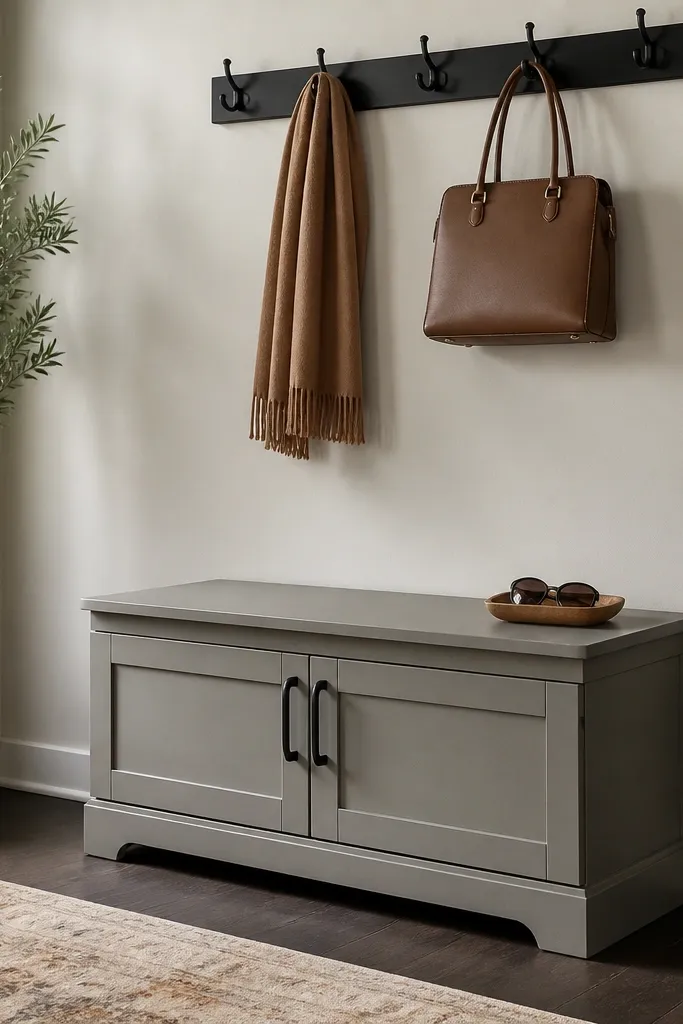
This is the cleanest visual trick for clutter control: hide shoes behind doors and keep coats on hooks. A bench with doors makes the floor look done even when you’re coming and going, which is what your guests and your own brain notice. The hook rail above handles bags and jackets so they don’t slump onto the bench cushion. Choose a bench in walnut-stained wood or painted matte off-white, and use a fabric cushion in a durable weave like cotton-linen blend.
Measure the shoe storage height you need: aim for 8-10 inches between shelves or use adjustable shelving inserts if you have boots. Place the bench so there’s room to open doors without hitting the wall — leave 2-3 inches clearance behind if possible. Install a hook rail above the bench at 62-66 inches for adult coats, then add 1-2 lower hooks around 40-44 inches for leashes or kids' outerwear. Finish by adding a small tray on the bench top for keys and a slim basket on one side for gloves.
Add magnetic door catches or soft-close hinges for a quieter, smoother daily routine.
Skip tall open cubbies for shoes if your goal is a calm look — open cubbies show every stray pair.
4. Corner entry shelf with three bins and a key ledge
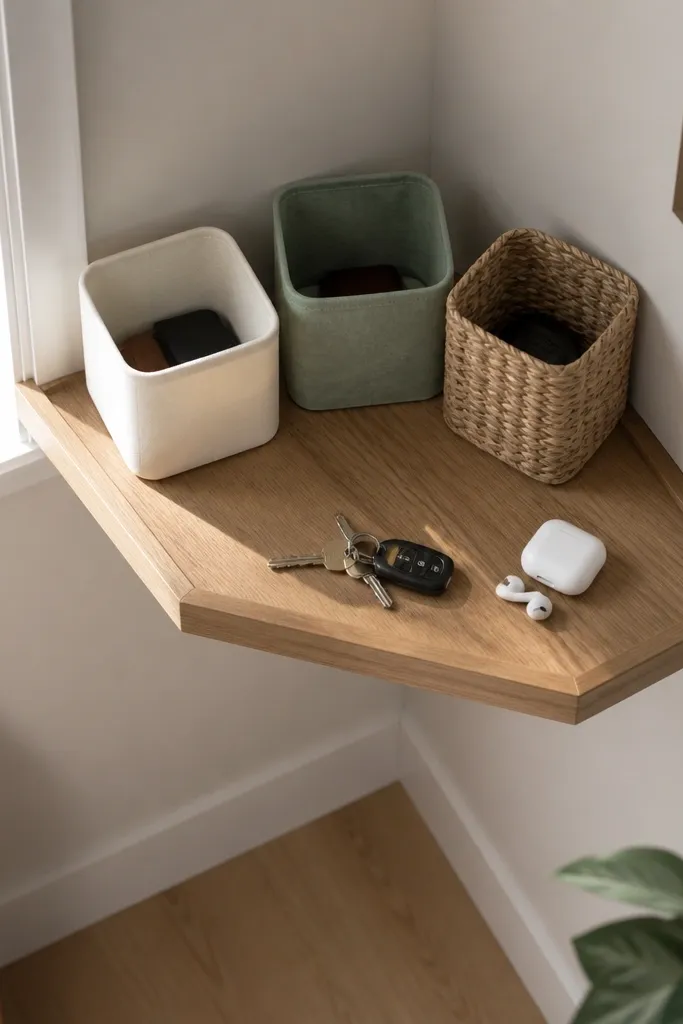
Corners are where clutter hides and grows. A corner shelf with bins gives you a dedicated “drop lane” without taking up hallway width. The key ledge is the key detail — a small lip that catches keys, earbuds, and sunglasses so they don’t join the floor pile. Use three bins in the same finish so the area reads as one system. Go for light oak shelves with woven or fabric bins in neutral tones for a warm, photo-friendly look.
Try thisUse bin lids or fabric flaps if the hallway gets bright — they stop glare from making clutter look worse in photos.
Install the shelf so the top edge sits about 54-58 inches high; this keeps it reachable for most adults without bending. Use bins that fit the shelf openings snugly — leave no more than 1 inch of extra space so items don’t slide behind. Add a key ledge by placing a thin tray (about 10-12 inches long) on the shelf top at the front edge. Put one bin for “small carry” (keys, earbuds), one for mail, and one for “grab later” items like hats.
Common mistakeDon’t mix too many bin styles — it looks like storage for random stuff instead of a drop zone.
5. Wall-mounted shoe cubbies with a slim top ledge for bags
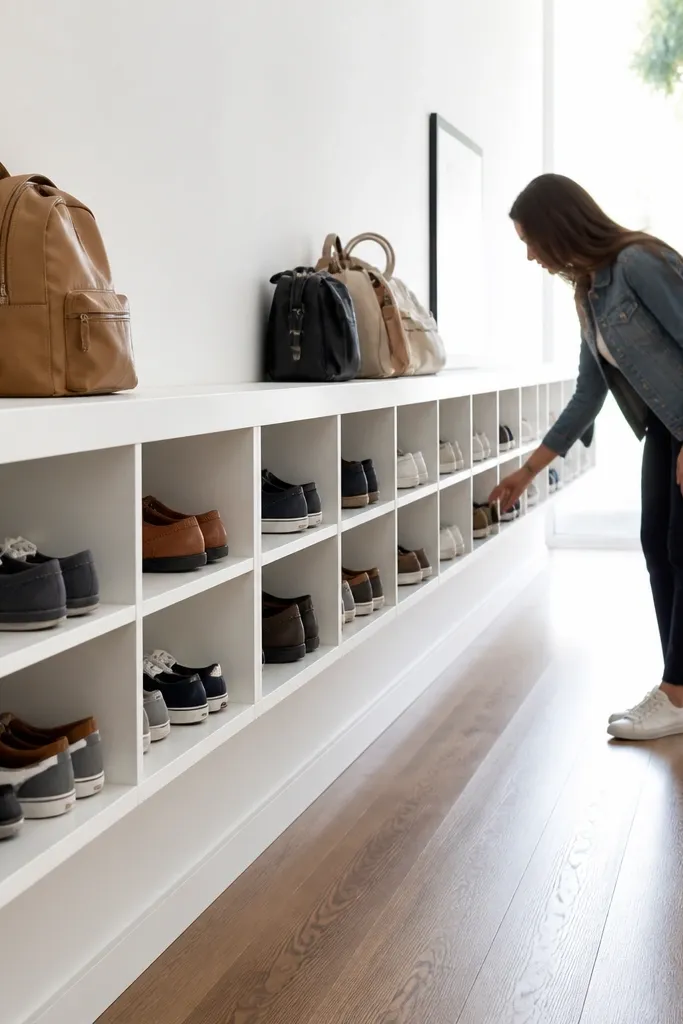
Wall-mounted cubbies keep the floor clear, which is the fastest way to stop clutter from spreading across the hallway. The slim top ledge is for bags and backpacks — the items that usually land on the floor because there’s nowhere to put them. Use uniform cubby sizes so shoes stack neatly and the look stays consistent. A light color finish makes the area feel bigger, and it photographs cleanly behind coats and bags.
Choose cubby depth around 10-12 inches so shoes don’t protrude into the walkway. Mount the unit so the bottom cubby is about 8-10 inches above the floor for easier access. Add a ledge shelf on top that’s 3-4 inches deep for bags; keep it shallow so bags don’t become a second pile. Place a small basket on the ledge’s front edge for gloves or scarves, then add a narrow tray at the side for keys.
Paint the back panel of cubbies a slightly darker neutral (like greige) to hide scuffs and shoe marks.
Avoid oversized cubbies — they invite extra clutter because there’s too much room to “temporarily” set things.
6. Leather catch tray on a marble-look console with brass knobs
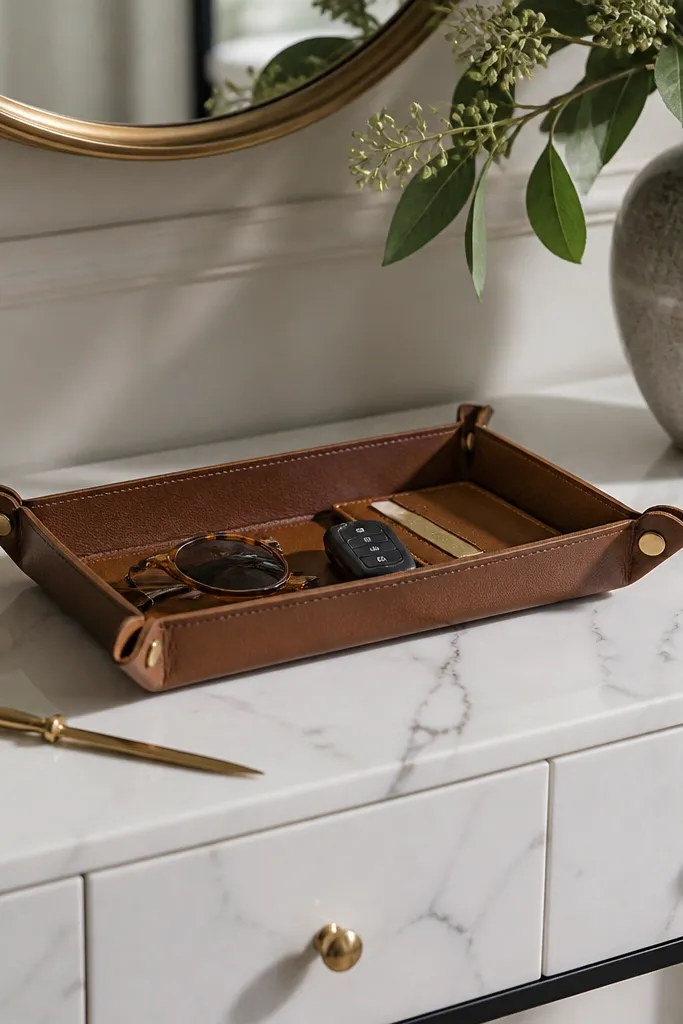
If your entryway clutter is mostly small items, this is a stylish fix that looks intentional. A marble-look console gives you a clean, bright surface, while a leather catch tray creates a distinct landing zone for keys, cards, and sunglasses. Brass knobs on drawers add a warm accent that makes the space feel designed rather than utilitarian. The leather tray also hides scratches and looks better as it ages, which matters in a high-touch area.
Pick a console depth of 12-14 inches so you have room for a tray without blocking walking lines. Place the tray centered 2-3 inches from the front edge so items don’t slide off. Use one drawer for “mail you keep” and one for “small essentials” like charging cables and lint rollers. Wipe the marble-look surface with a damp cloth and dry — it keeps the glossy look that makes the entryway feel high-end.
Choose a tray with a slight lip — 1/2 inch makes keys stop bouncing every time you set them down.
Don’t put the tray in the middle of the console — it should be the first thing your hand reaches, not an afterthought.
7. Rattan baskets under a floating shelf with a coat rack rail
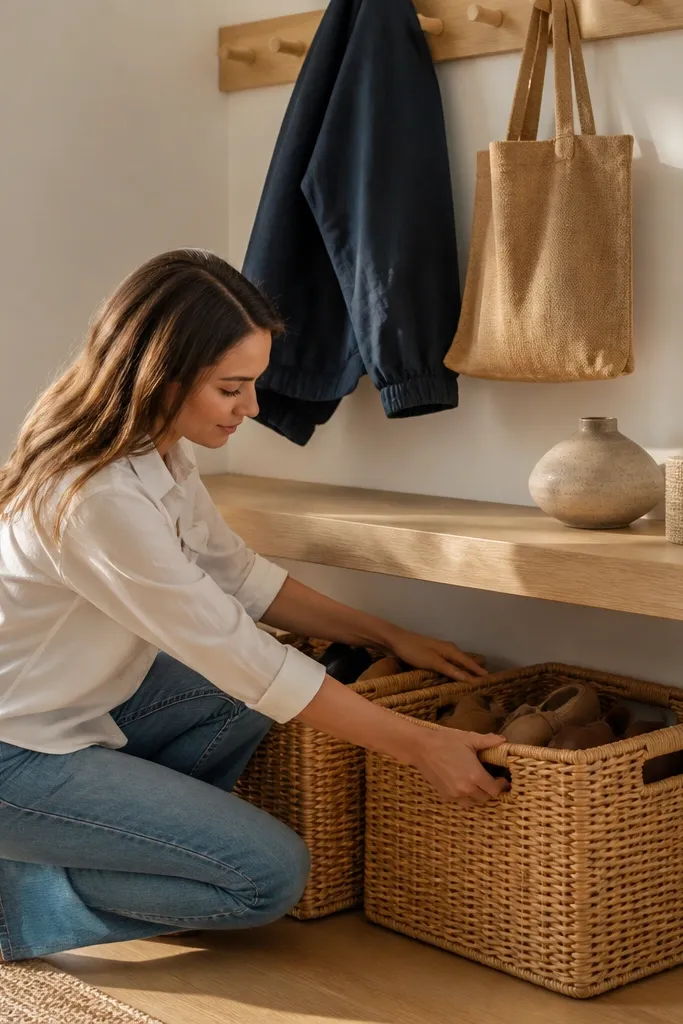
This is a soft, photogenic drop zone that still handles daily mess. Rattan baskets hide shoes and “stuff” fast, and the texture looks great in natural light. The floating shelf above keeps the visual line clean and gives you space for a catch tray and a small vase or candle. Pair it with a coat rack rail so coats and bags don’t end up on the floor. The result looks airy, not cluttered, even when baskets are full.
Mount the floating shelf 60-66 inches from the floor so a person can reach it without stretching. Install a coat rack rail directly above the baskets with hooks spaced about 4-5 inches apart for bags and jackets. Use baskets with flat bottoms and widths that match the opening spacing; aim for 2-3 basket sizes rather than a random mix. Add a tray on the shelf for keys and mail and keep the shelf styling to one small item max.
Line baskets with a thin cotton liner if you have light-colored floors — it prevents scuffs and keeps the look crisp.
Skip open shelving without baskets — it turns shoes and bags into a visual mess.
8. Tall cabinet with glass doors for "week display" plus a hidden key station
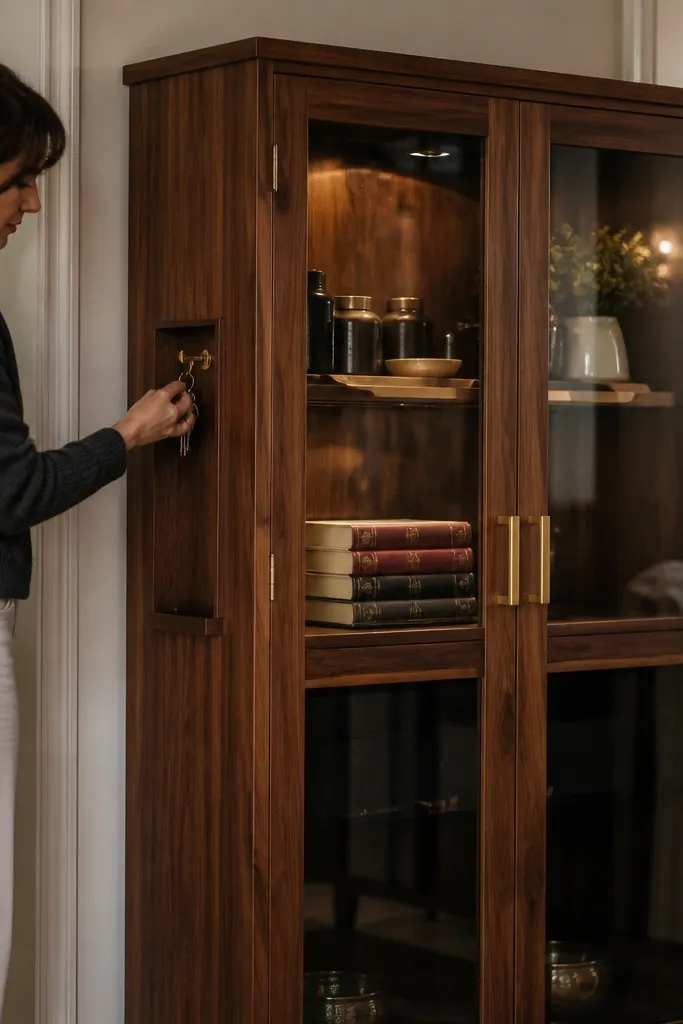
If your clutter is half practical and half decorative, this setup makes both behave. Glass doors let you show a controlled “week display” like a stack of small books and a tray, while everything else stays behind the cabinet. The hidden key station is the part that stops the daily pile — keys go inside a small compartment so they don’t sit on the nearest surface. This works in entryways where you want a furniture look, not a DIY wall grid.
Try thisUse frosted or lightly textured glass if you hate dust visibility — it keeps the cabinet looking clean on camera.
Choose a cabinet height that reaches around 70-80 inches so it looks intentional in vertical space. Install a small interior pull-out or flip-down key tray near the cabinet’s lower third. Keep glass shelves spaced so you can place items flat; use two decorative items and one functional tray max. Position the cabinet so it doesn’t block the door swing, then add a small hook on the exterior side for a daily bag.
Common mistakeDon’t store shoes behind glass — it turns a drop zone into a display of mess.
9. Pegboard entry wall with labeled bins and a mail sorter shelf
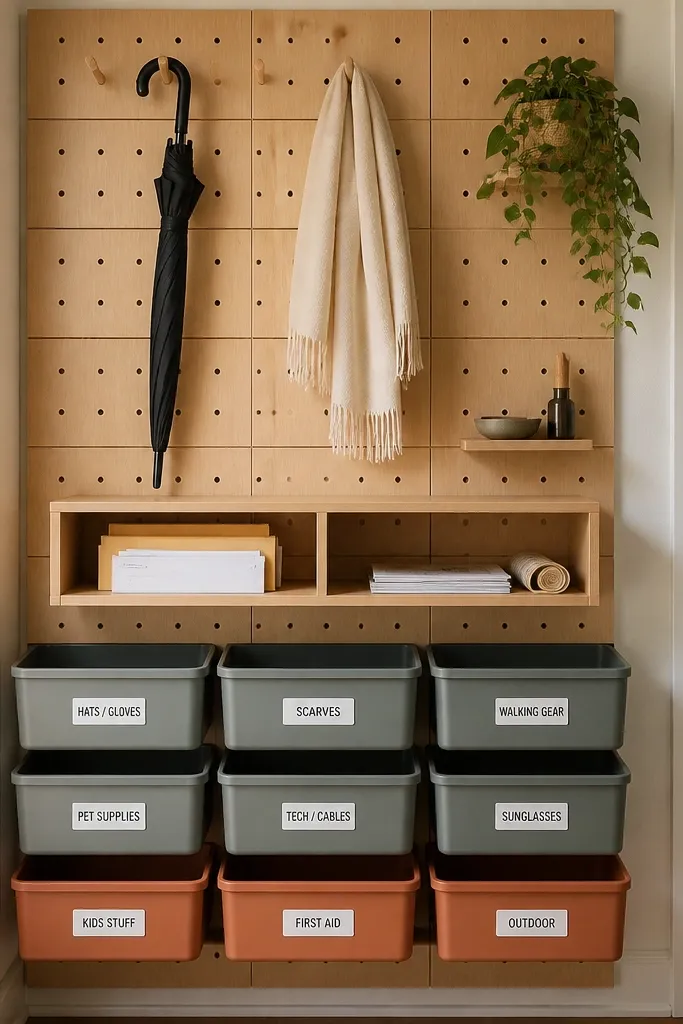
Pegboard looks good because it’s already a grid, so your storage lines up naturally. Label bins make sorting fast, which stops the common “mail everywhere” problem. Add a mail sorter shelf with two sections: one for action items and one for recycling. This system is also easy to adjust — hooks move when your household changes. Use a powder-coated pegboard in black or warm gray for a modern look that stays photogenic.
Try thisUse one label style (same font and color) so the wall reads like one design, not a crafting project.
Cover the wall area with pegboard panels, then paint or powder-coat to match your palette. Place bins at chest height so items land where the label is, not on the floor. Install the mail sorter shelf 52-56 inches high with a front lip so envelopes don’t slide. Add 6-10 hooks around the bins for bags, leashes, and coats, keeping the hook layout consistent.
Common mistakeDon’t leave the pegboard blank — empty grids look like you’re waiting to organize.
10. Industrial pipe coat rack with a reclaimed wood drop shelf
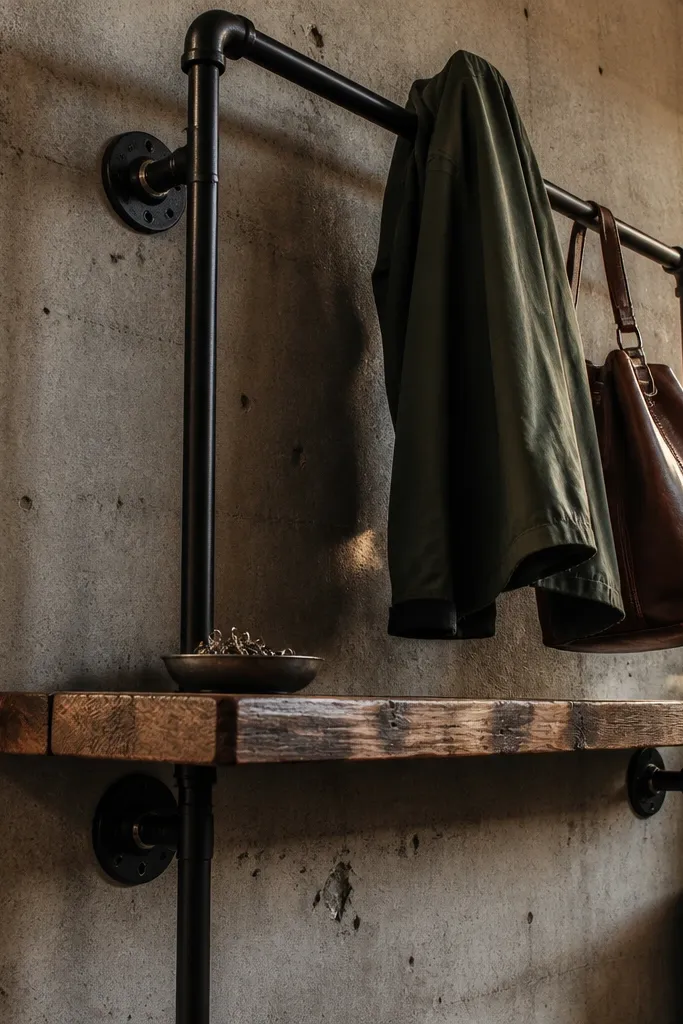
This is a strong option for entryways that need personality without looking messy. The pipe coat rack creates a bold vertical structure, and a reclaimed wood drop shelf gives you a landing surface with character. The shelf’s slightly uneven texture hides fingerprints better than smooth laminate. Pair it with a lower shoe bench or two stacked shoe trunks, and you get a clear path: coats hang up, shoes store below, and keys land on the shelf.
Try thisKeep the shelf overhang tight (about 1 inch) so it looks engineered, not accidental.
Mount the pipe rack so the highest hooks sit around 72 inches and the lowest are about 48 inches. Use a drop shelf depth of 8-10 inches so it catches small items but doesn’t protrude into traffic. Seal the reclaimed wood with a matte clear coat so it resists scuffs and looks consistent. Add a shallow tray on the shelf front edge and place a small door basket at the bottom for gloves.
Common mistakeAvoid glossy wood sealers — they show smudges and make the entry look dirty fast.
11. Built-in style entry nook with a bench seat and vertical cubby for bags
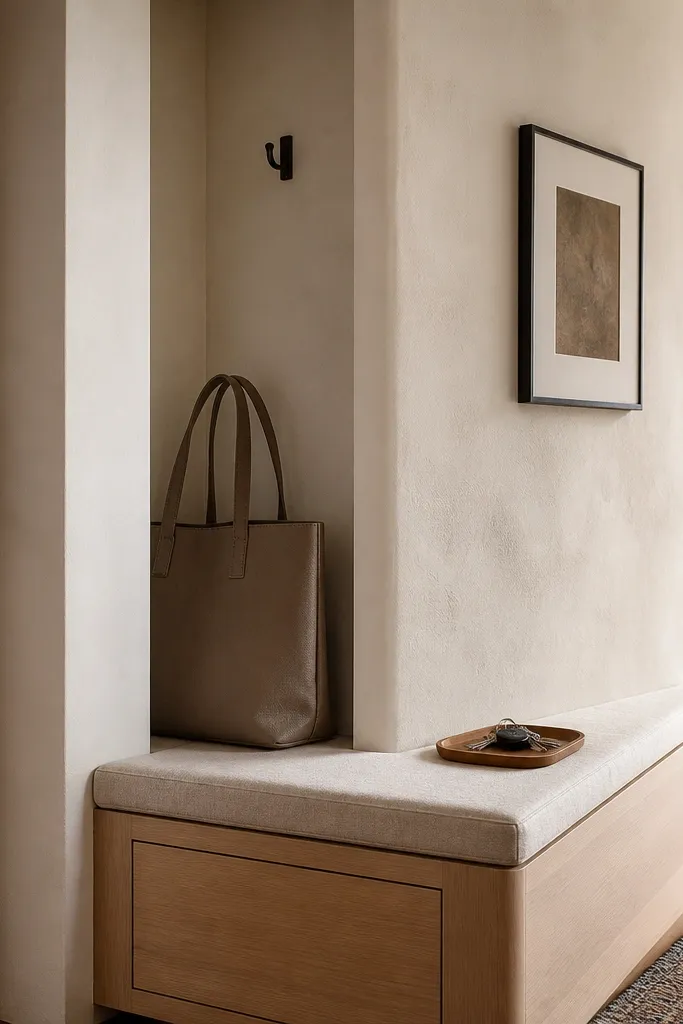
When your entryway has a dead-end wall or small alcove, use it as a drop-zone nook. A bench seat is comfortable and gives you a place to sit while you put on shoes, but the real win is the vertical cubby for bags. Bags get hung or stood upright in one spot, so they don’t become a second pile on the floor. Pick a fabric bench cushion in a pattern like small herringbone to hide wear and keep the look crisp.
Try thisUse a removable cushion cover so stains don’t ruin the look after rainy-season use.
Frame the nook if you can: aim for a seat height of 18 inches and a bench depth of 14-16 inches. Add a vertical cubby next to the bench that’s about 12-14 inches wide so backpacks and tote bags can stand without tipping. Install hooks inside the cubby at two heights for hanging straps. Finish the cubby with a closed panel or a door if your entry is visible from the living room.
Common mistakeDon’t make the cubby too wide — oversized cubbies turn into “place everything” storage.
12. Low shoe cabinet with a top ledge and a separate key hook rail
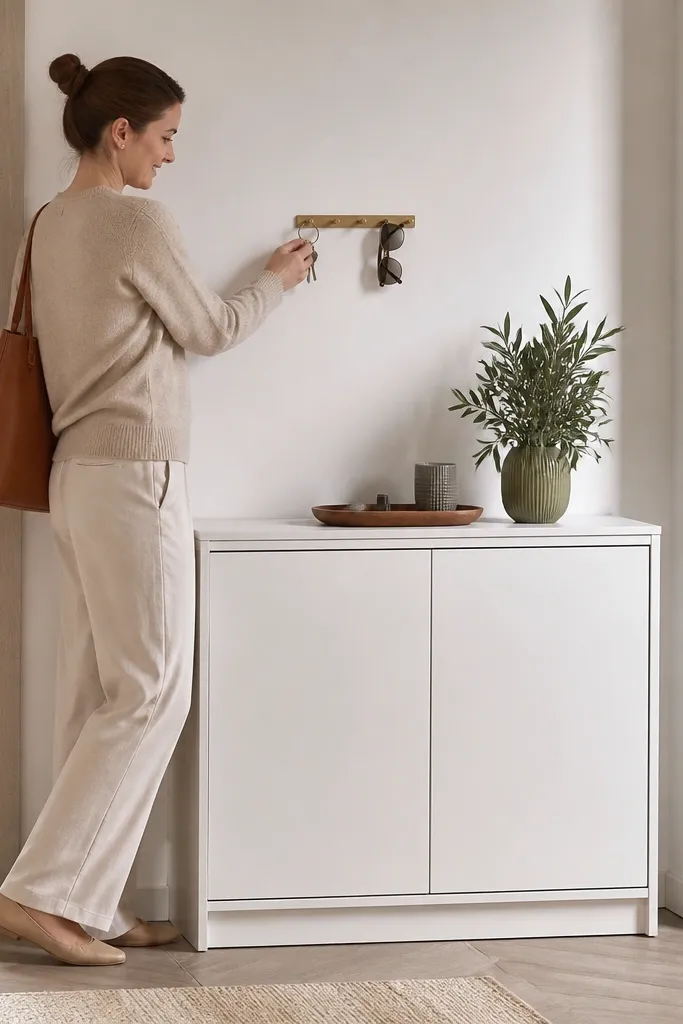
This works when you want a calm entry that looks like furniture. A low shoe cabinet hides the footwear, and a top ledge gives you a landing surface that’s wider than a tray. Keep keys separate with a small hook rail placed at hand height — the hook rail trains the habit. Choose a cabinet finish like matte white or warm greige and pair it with a contrasting hook rail in black for clear visual direction.
Buy or build a shoe cabinet with a top height around 20-24 inches for easy setting. Add a top ledge area using a flat board or built-in shelf so you can place a catch tray without clutter. Install the key hook rail about 50-54 inches high so keys land where your hand naturally goes. Use one slim basket on the ledge for sunglasses and one shallow dish for coins.
Place the keys hooks directly above the key tray so the eye and hand match up.
Avoid mixing key hooks with coat hooks at the same level — it makes people drop items in the wrong place.
13. Floating shelf ladder with two rows of bins for seasonal rotation
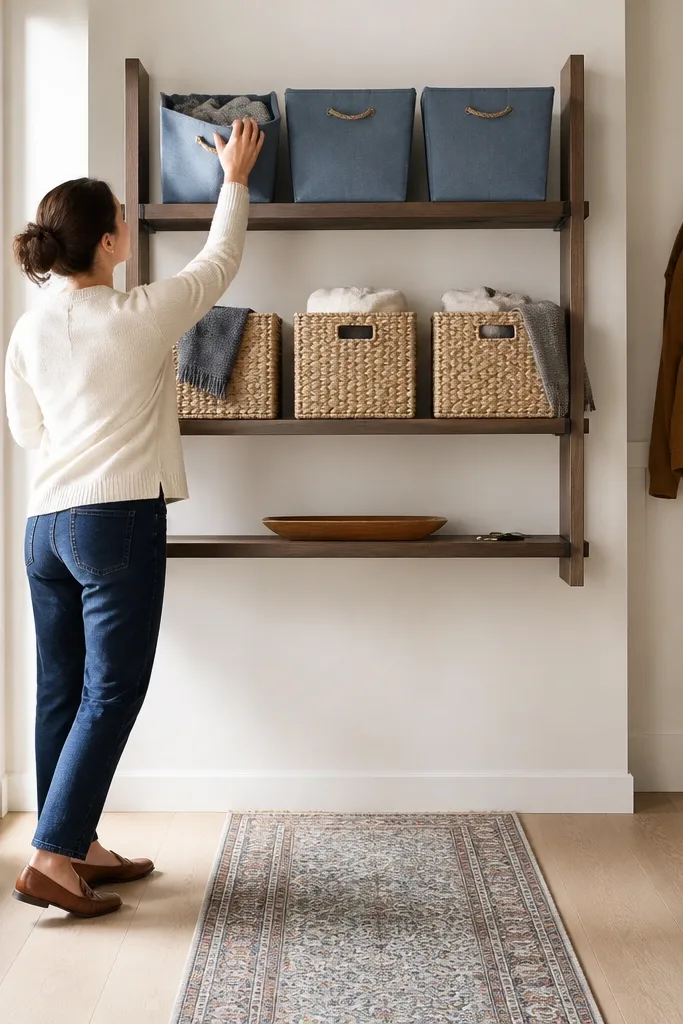
Seasonal clutter is the sneaky spreader. A floating shelf ladder with two rows of bins creates a clear system for rotation: daily items stay accessible, seasonal items stay contained. The ladder shape reads as design, not storage, and it’s easy to photograph because the lines are straight. Use bins in two coordinated tones so the wall looks purposeful. This is ideal for entryways with limited floor space where you still need organization.
Try thisUse matte bin colors (sand, charcoal) — glossy bins reflect light and make clutter look louder.
Mount the ladder shelves at heights that make the top row reachable around 66 inches. Use bin sizes that match the shelf bays and keep bin openings aligned so people don’t shove items sideways. Place the bottom row for daily shoes and the top row for seasonal gear like winter gloves and extra scarves. Add a small shelf lip at the side for mail and a tiny tray at the bottom for keys.
Common mistakeDon’t stack bins deeper than the shelf depth — deep bins create a “digging” habit and mess grows.
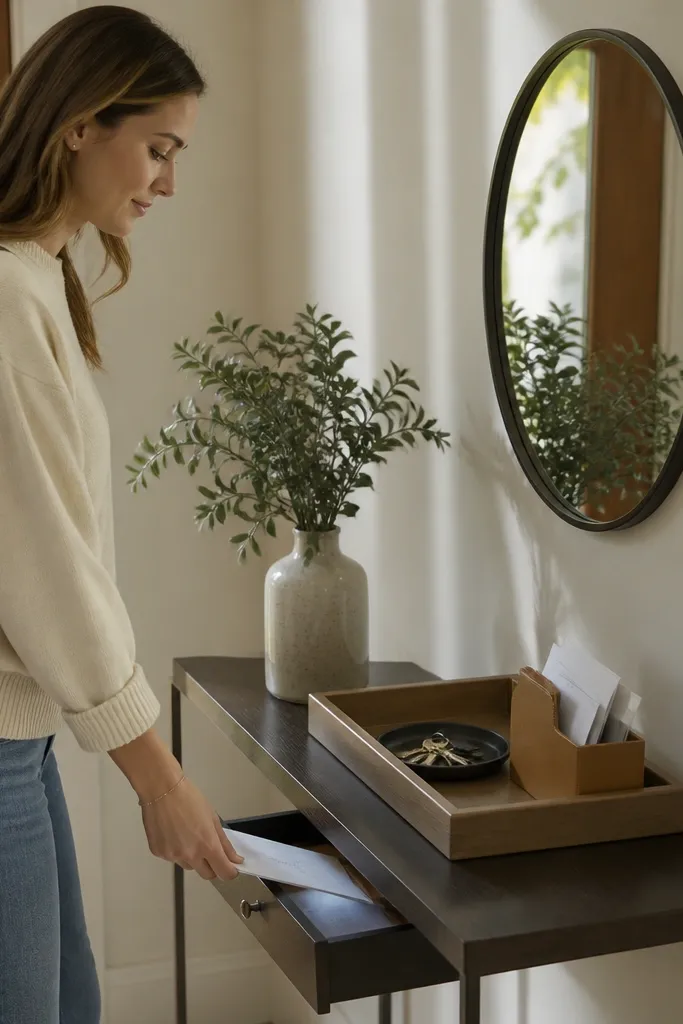
14. Oversized wall mirror with a slim console below and a hidden drawer for keys
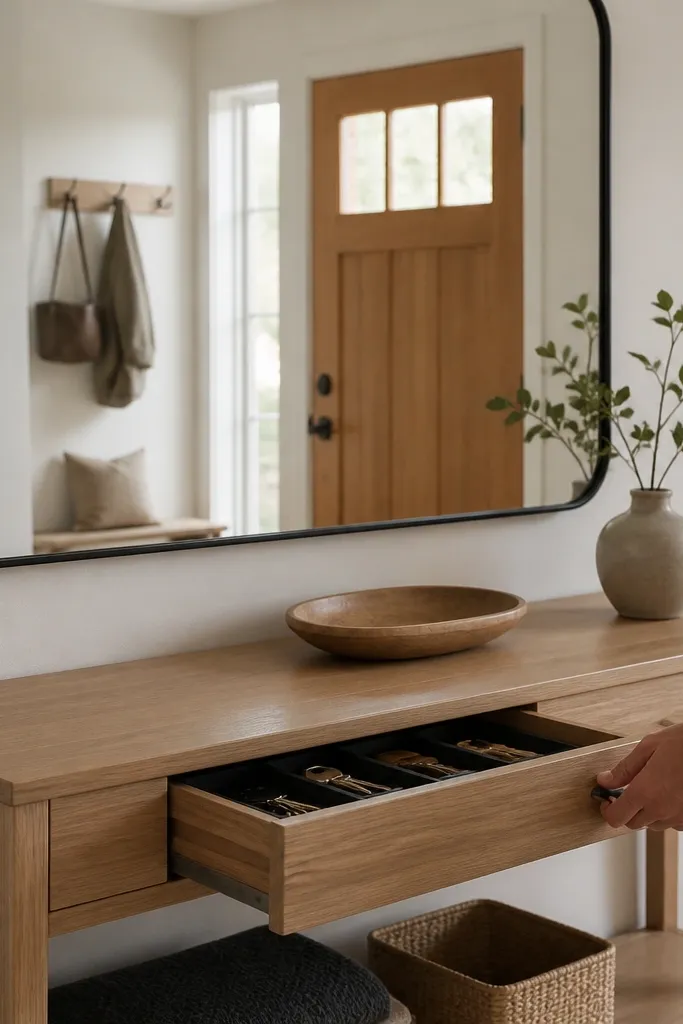
A mirror makes the entry feel bigger, but the clutter-stopping move is what’s under it. Use a slim console beneath the mirror and add a drawer specifically for keys and small daily items. The mirror gives a visual checkpoint so people check themselves and then set items down — the drawer gives them the place to go. Choose a frame that looks intentional, like black metal or thick wood, then keep the console surface clear except for one catch tray.
Try thisUse a tray color that matches the drawer divider material so everything looks coordinated.
Hang the mirror so its bottom edge sits about 60 inches high for most doorways and add a console beneath with a depth around 10-12 inches. Install a drawer with a small dividers insert for keys, fobs, and a couple cards. Keep the console top to one tray and one small object like a folded scarf basket. Anchor the console to studs so it doesn’t wobble when you set bags down.
Common mistakeDon’t let the console become a catch-all surface — one tray only.
15. Door-side hanging organizer with a decorative top shelf for mail
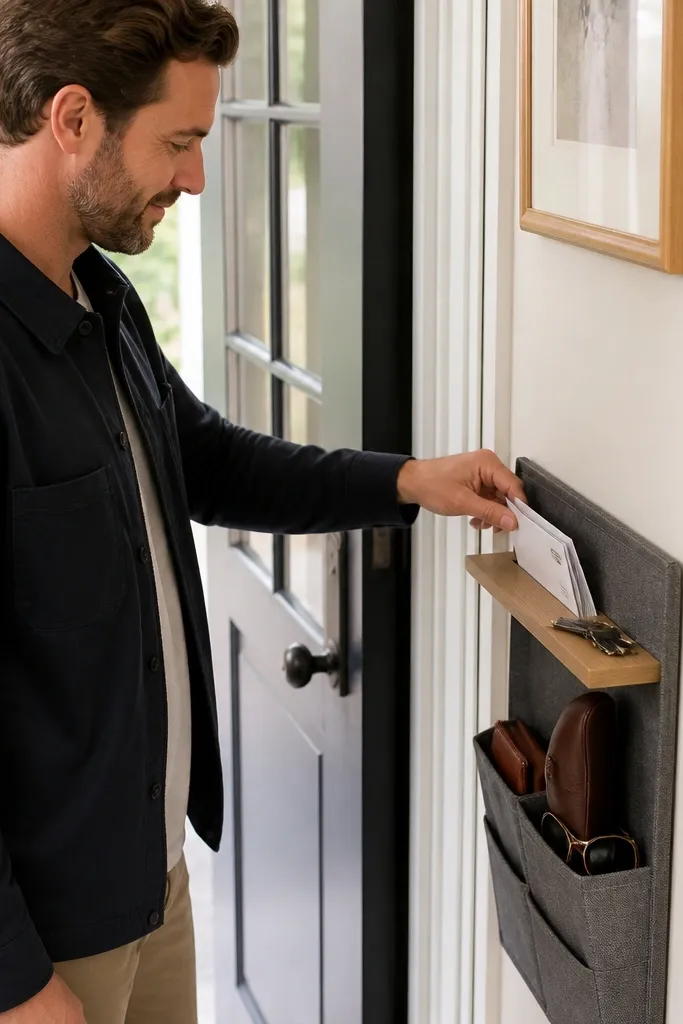
If your entryway is too narrow for furniture, a hanging organizer is the fastest, cleanest drop zone. Put it on the door side where people naturally face it when they enter. The top shelf is the secret: it catches keys and mail, so the pockets below don’t become a dumping ground. Choose an organizer with rigid pockets or reinforced fabric so it looks structured, not saggy. This is also great for renters because it’s easy to remove.
Mount the organizer so the top shelf sits around 48-52 inches high. Use reinforced pockets for shoes, umbrellas, and small accessories, and reserve one pocket for “always” items like gloves. Add a shallow tray on the top shelf for keys and thin mail so papers don’t fall into pockets. Keep one pocket for “incoming only” mail and empty it daily so it doesn’t overflow.
Pick a neutral organizer color like charcoal or oatmeal — it looks better than bright patterns in a hallway.
Don’t hang it too low — it forces people to bend, and they’ll start dropping items on the floor instead.
16. Textured wall panel behind a bench with a matching shoe bin set
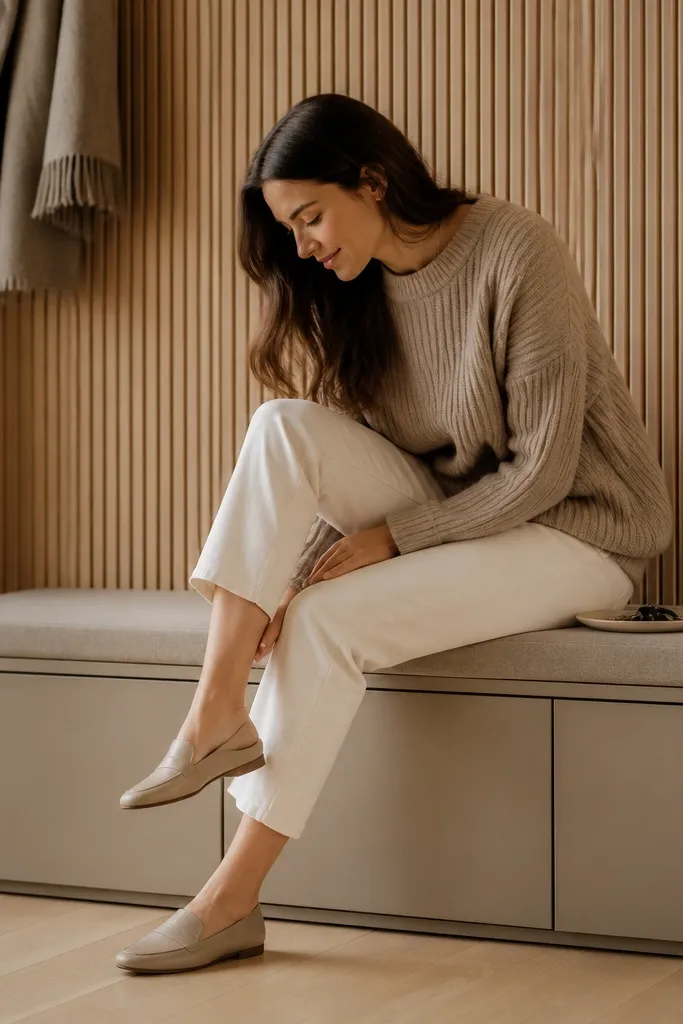
Texture is how you make a drop zone look styled even when it’s doing its job. Put a bench in front of a textured wall panel or acoustic-style slats, then use matching shoe bins in the same color family. The texture hides smudges from coats and hands, and it gives the whole area a focal point so clutter looks less chaotic. This is best when your entryway has a blank wall and you want the storage to look like part of the architecture, not furniture.
Try thisChoose bins with the same fabric color and texture so the under-bench area looks like one design block.
Select a bench height around 18 inches and place it 2-4 inches away from the textured wall so you can clean behind it. Install textured paneling only on the area behind the bench so the rest of the hallway stays calm. Use two bins under the bench or beside it, sized for your most common shoes. Add one catch tray on the bench top and keep it to small items only.
Common mistakeSkip random shoe sizes in random bins — the visual mess shows immediately.
17. Roll-top mail box with a narrow bench and umbrella stand
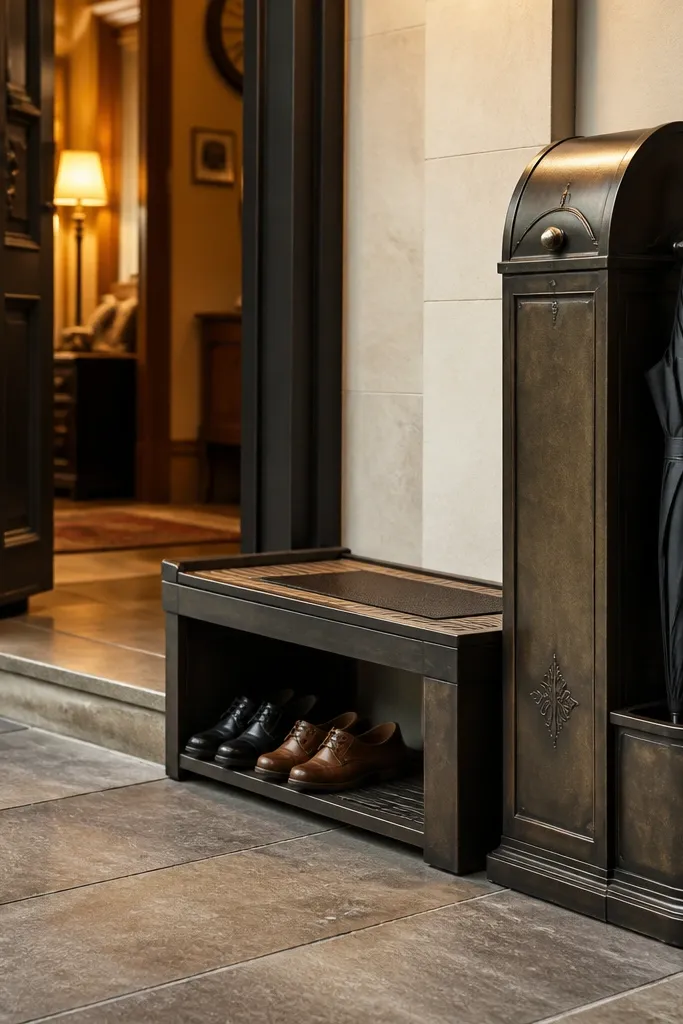
This setup is made for households that get a lot of paper and need a clean incoming system. A roll-top mail box blocks visual clutter and stops the “mail stack” from taking over the entry. Pair it with a narrow bench for shoe changes and an umbrella stand so wet items don’t drip onto the floor. The look is old-world but clean, especially when you choose a matte finish and keep the bench surface minimal.
Place the mail box near the door at about 44-48 inches high so it’s easy to drop envelopes in. Use a narrow bench around 12-14 inches deep so it doesn’t steal walkway space. Install an umbrella stand with a removable tray so water doesn’t pool — keep it 6-10 inches away from the bench. Add a small tray on the bench for keys and a separate basket for scarves.
Use a water-resistant liner under the umbrella tray and wipe it weekly for a consistently clean look.
Don’t place the mail box too far from the door — it stops being used and the clutter returns.
18. Built-in style shoe drawer bench with a rotating tray for keys
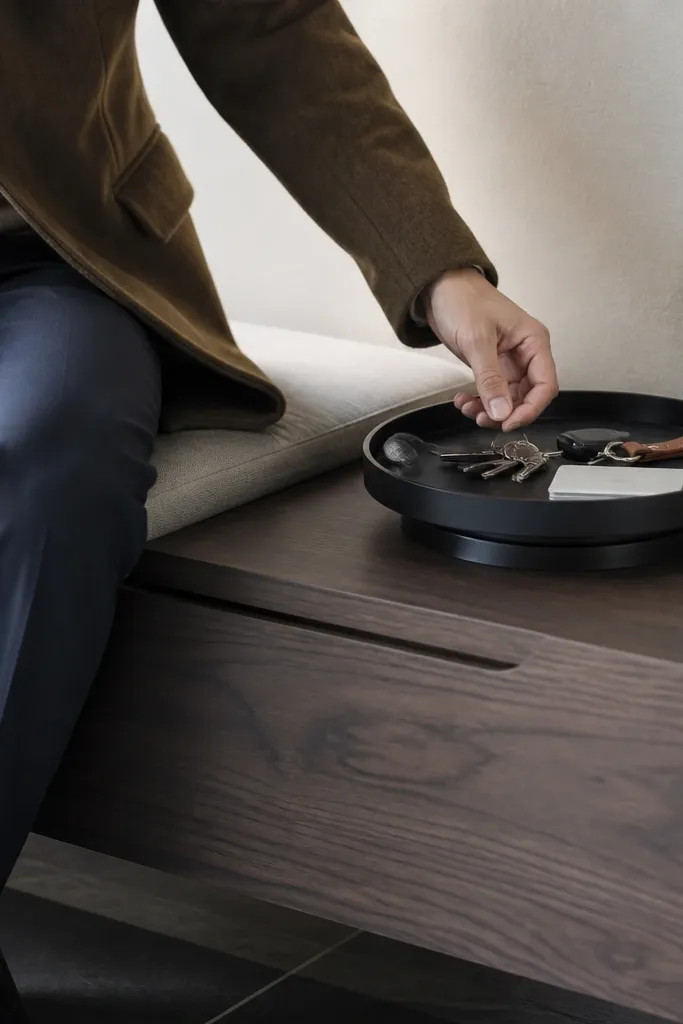
A drawer bench is one of the most effective ways to hide shoes while keeping the entry usable every day. The rotating tray on top is a small detail that makes the key drop feel like a deliberate action, not a random toss. It also helps prevent the “keys on the bench edge” problem where they fall or get lost. Choose a bench finish like walnut or matte black and keep the tray in a contrasting material like light wood or brushed metal for a sharp, photogenic look.
Try thisUse a felt liner inside the drawer to reduce scuffing and keep the bench looking new.
Build or buy a bench with a front drawer opening sized for shoes, with a drawer height around 8-10 inches. Set the bench top height to about 18 inches for easy shoe changes. Add a rotating tray with a diameter around 10-12 inches and mount it centered on the bench top. Keep one small catch bowl for coins next to the tray so loose items don’t spread.
Common mistakeAvoid open shoe baskets beside the bench if your goal is a clutter-free look.
19. Matte black floor-to-ceiling cabinet with side key hooks and bench
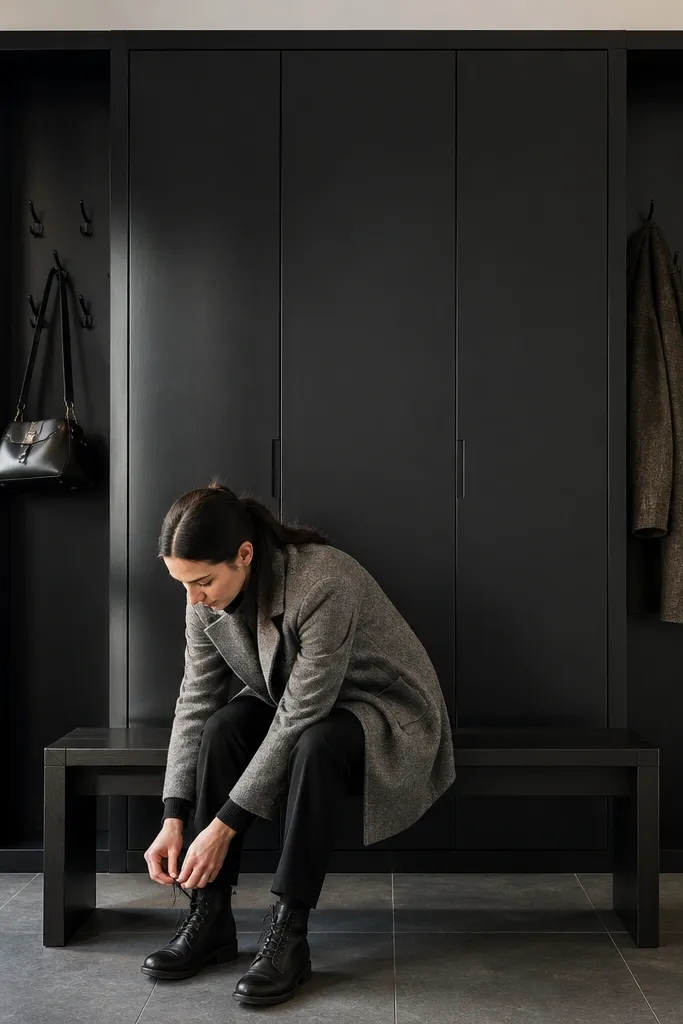
High-contrast entry storage makes clutter look controlled because the surfaces visually frame the mess. A matte black floor-to-ceiling cabinet hides shoes, bags, and bulky items behind doors, and it gives your hallway a strong design anchor. Side key hooks train the daily habit, and a bench in front provides a practical seat for shoes. This works especially well in modern homes or entryways with light walls where black cabinetry looks sharp.
Choose a cabinet width that leaves a clear 30-36 inches of walkway in the hallway. Mount key hooks at 50-54 inches high on the cabinet side panel, then add a small key tray on the bench top. Use bench height around 18 inches and ensure there’s at least 12 inches clearance from the cabinet face to the bench so bags can hang without rubbing. Install soft-close doors so daily use stays smooth and quiet.
Keep hardware consistent — brushed brass or matte black only — so the entry reads as one system.
Don’t mix shiny hardware finishes — it makes the entry look busy even when it’s organized.
20. Gallery wall style entry with a narrow shelf ledge and framed bin labels
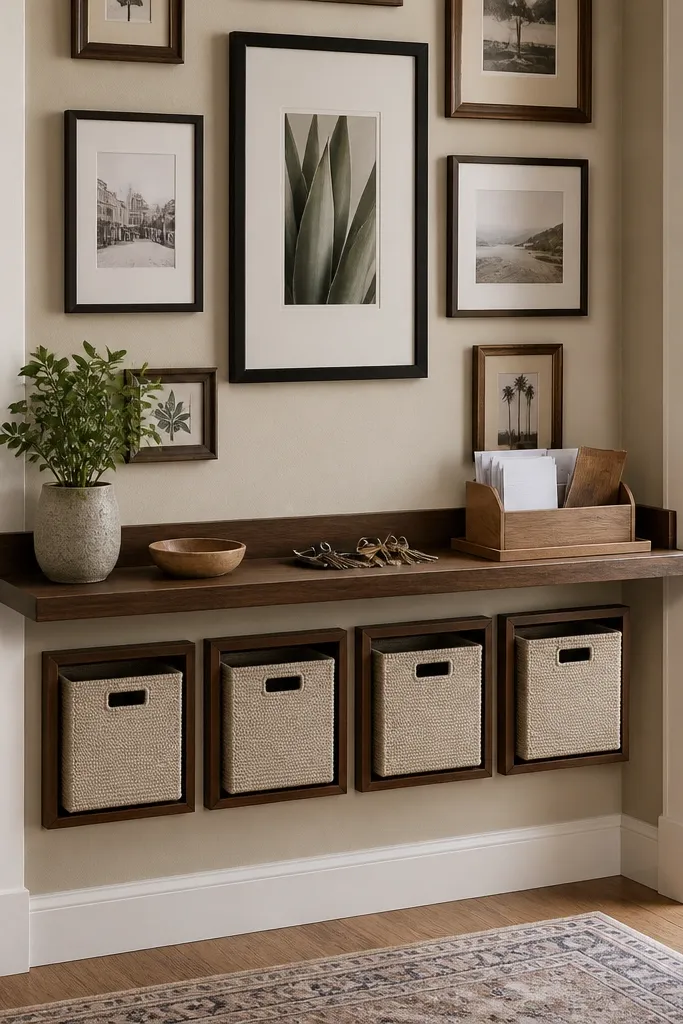
This is for entryways where you want the drop zone to blend into wall decor. A narrow shelf ledge creates the landing surface for keys and mail, while framed bin labels make sorting feel like part of the design. The gallery wall gives the area visual interest, so when bins are open, they still look curated. Pick frames in the same finish as the shelf brackets — black metal or warm wood — and keep the ledge depth around 4-6 inches so it looks tidy.
Mount the shelf ledge at 52-56 inches high, using brackets spaced so the shelf doesn’t sag. Place 2-3 labeled bins under or beside the shelf, with one bin for mail, one for small carry items, and one for “waiting” items. Use framed labels or small printed cards behind clear acrylic so they look clean even when hands are busy. Keep the gallery art consistent in size to avoid cluttered visuals.
Use a small tray under the shelf ledge for receipts — it keeps paper from slipping behind bins.
Skip oversized shelves — a deep ledge becomes a second surface for random piles.
21. Shoe bench with flip-up top and a built-in umbrella channel
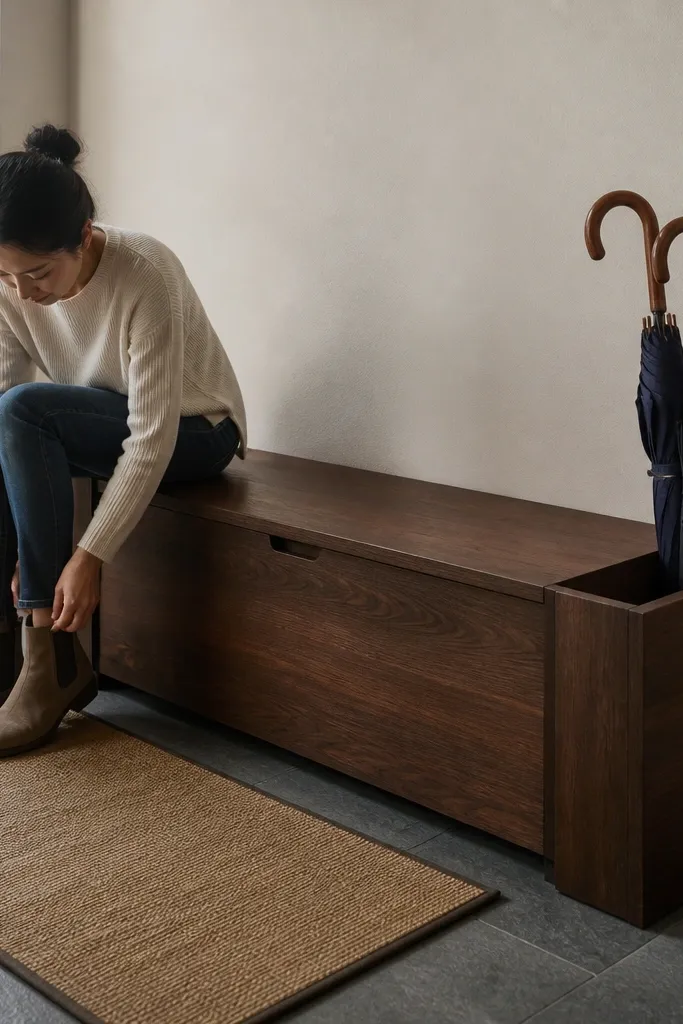
Wet-weather clutter spreads fast because umbrellas and shoes keep moving. A bench with a flip-up top hides shoes, and a built-in umbrella channel stops umbrellas from leaning on the wall and dripping onto the floor. This creates a clean, functional zone that looks intentional — especially with a bench finish like dark oak or textured microfiber. It’s a strong pick for entryways that get rain, snow, or lots of muddy shoes.
Choose a bench width that fits your door area without crowding the walkway, typically 48-60 inches. Install the umbrella channel along one side with a drain-safe bottom and a removable tray insert. Set the flip-up top to open smoothly and keep the interior compartment sized for your common footwear. Add a small catch tray on the exterior top edge for keys and a narrow basket for gloves.
Put a mat or tray insert at the umbrella exit so water stays contained and the bench top stays dry-looking.
Don’t store wet umbrellas in open bins without a drain tray — it creates odors and stains.
22. Light oak ladder rack with hanging baskets and a shoe mat landing zone
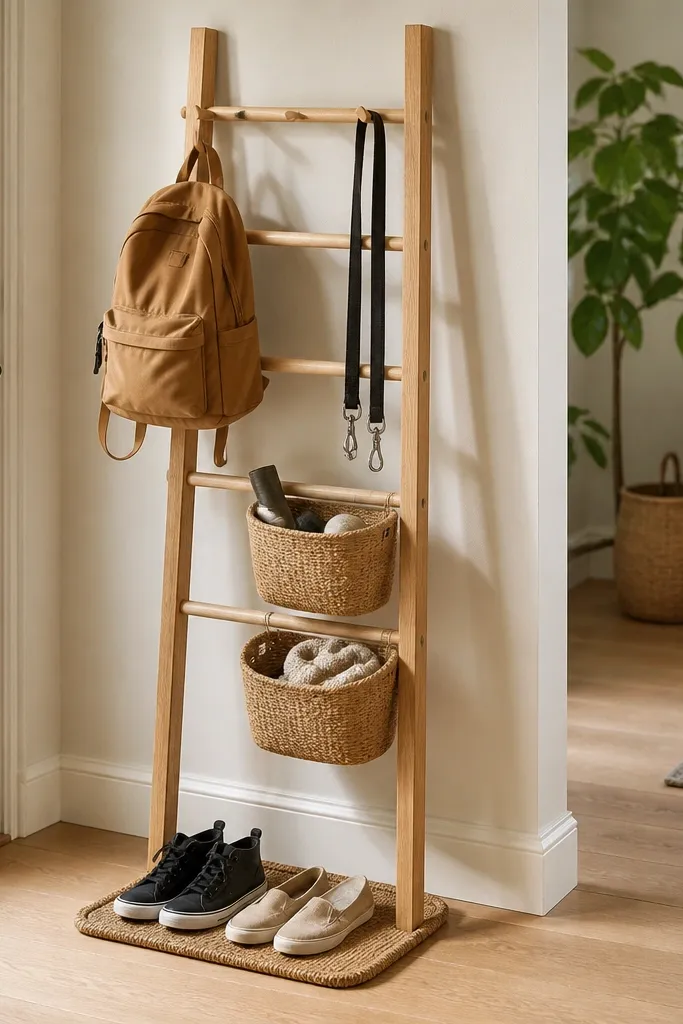
This idea is built for families who drop everything at speed. A ladder rack gives you multiple hook heights for coats, backpacks, and leashes, and hanging baskets keep smaller items from falling into the floor pile. The shoe mat landing zone is the practical anchor — it marks where shoes go and keeps dirt contained. Light oak and neutral baskets look warm and photogenic, even when the entry is busy.
Place a shoe mat centered in front of the door, sized about 24x36 inches for most entries. Position the ladder rack so the bottom hooks are around 42-46 inches high and the top hooks are around 72 inches. Use hanging baskets with reinforced rims so they keep their shape; keep baskets for gloves, hats, and “small grab” items. Add a small tray at the side of the mat for keys and mail so the landing action stays consistent.
Use one color basket set for all hanging baskets so the ladder rack looks like furniture, not supplies.
Avoid mixing hanging basket heights randomly — it looks chaotic and people stop using the system.
23. Stone-look wall shelf with two tiers and covered bins for shoes
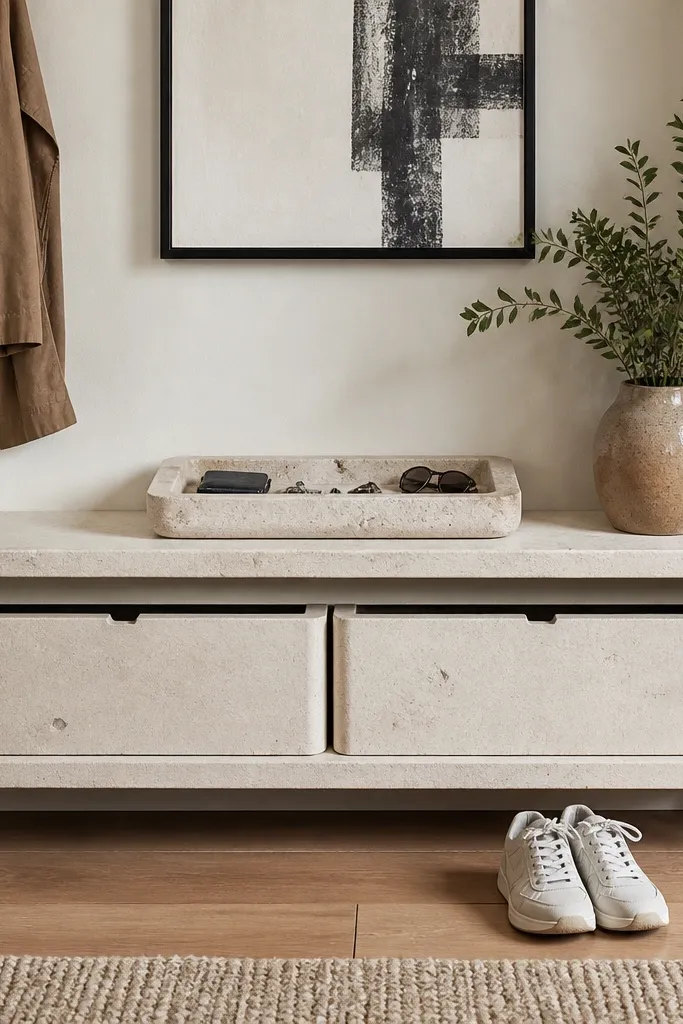
A stone-look shelf creates a built-in feel and makes the entry look expensive even when the storage is simple. Two tiers give you separation: the top tier holds the daily catch tray, and the lower tier holds covered bins for shoes. Covered bins are what stop the clutter spread because you don’t see the pile. Choose a shelf finish in light gray or warm beige and pair it with matte black hooks for strong contrast.
Try thisUse a tray liner in the same tone as the shelf so the landing zone looks flat and tidy.
Mount the shelf so the top tier sits around 56-60 inches high. Keep bin openings covered or lidded so the visual line stays clean when bins are full. Use covered bins that match the shelf width and place them on the lower tier or directly below with a matching frame. Install a small tray on the top tier for keys and mail and keep the tray centered on the shelf front.
Common mistakeDon’t use open bins for shoes if your real goal is stopping clutter before it spreads.
24. Pegboard cabinet hybrid with a front door for shoes and side key hooks
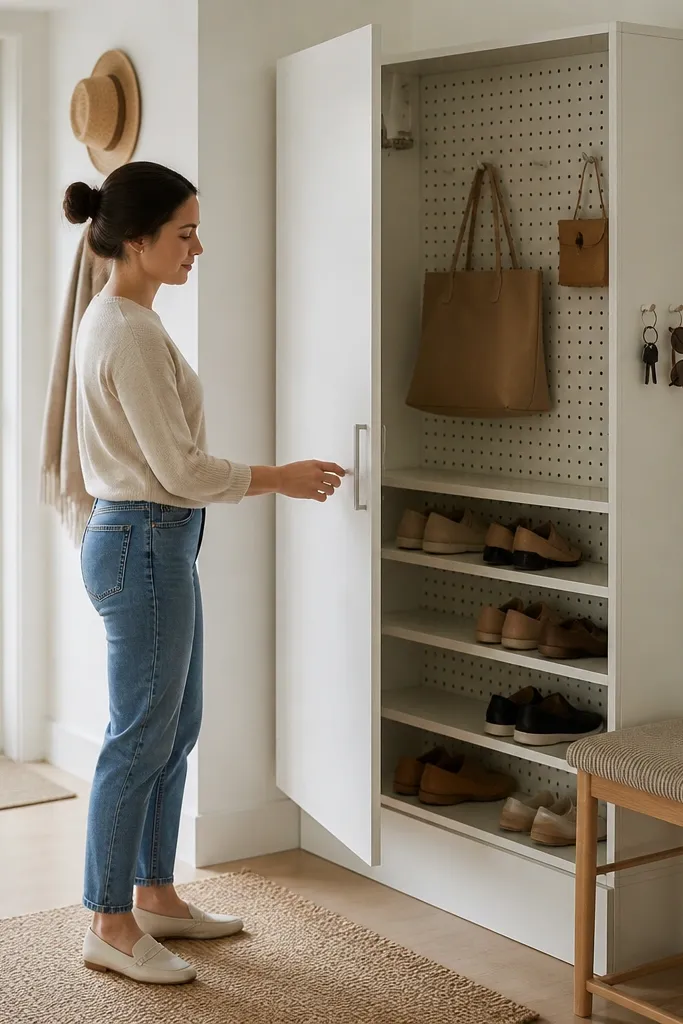
This hybrid gives you the organized look of pegboard with the clutter control of a cabinet. The front door hides shoes instantly, while the pegboard interior keeps hooks and small organizers in a neat grid. Side key hooks at hand height train daily behavior without requiring a separate console. It’s a great option for hallways where you want storage that looks like one piece of furniture, not a collection of parts.
Try thisPaint the pegboard interior in a slightly darker neutral than the cabinet so tools and bins don’t look washed out.
Pick a cabinet size around 24-30 inches wide and mount it so the top aligns visually with other wall elements. Install side key hooks on the cabinet exterior at about 50-54 inches high. Add pegboard inside the cabinet behind the door for small items like leashes, charging cables, and scarves. Use one covered bin inside for shoes and keep the cabinet door closed except when you’re placing items in the drop zone.
Common mistakeSkip too many hooks — if everything has a hook, people stop choosing and clutter returns.
25. White wall molding + slim black shelf with a mail slot and key dish
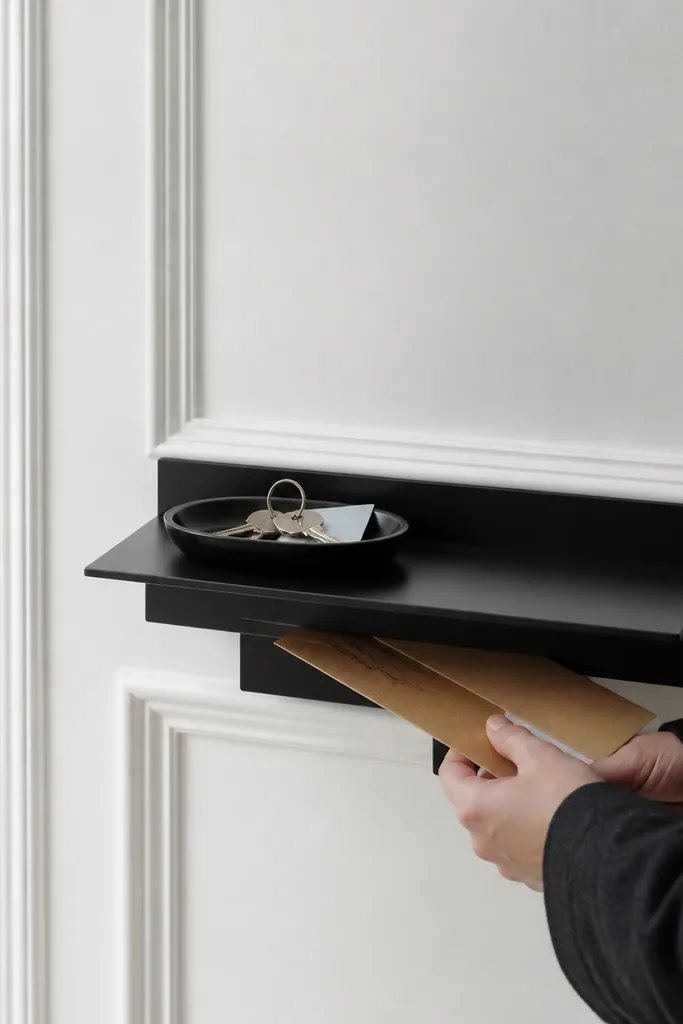
Classic wall molding makes a drop zone look architectural, and the slim shelf keeps it from feeling bulky. Add a mail slot so envelopes don’t land on surfaces at all. A key dish on the shelf creates a dedicated landing point with a defined edge that prevents keys from sliding. This works best in entries that already have traditional trim or where you want the clutter-control system to look like built-in millwork.
Try thisChoose a key dish in ceramic or matte metal — glossy dishes show fingerprints constantly.
Install wall molding or use existing trim as a guide, then mount a shelf bracket at 54-58 inches high. Add a mail slot opening sized for standard envelopes and place it directly under the shelf front edge. Set a key dish on the shelf near the mail slot so the action is one motion. Keep the shelf surface minimal: one dish and one small tray for sunglasses only.
Common mistakeDon’t add multiple dishes — you’re trying to reduce decisions, not create more places for items to land.